Small Air Dry Clay Projects That Are Quick to Make and Easy to Share
You can whip up small air dry clay projects that are cute, cheap, and easy to pass along—tiny mushrooms, keychain charms, name tiles, or mini vases! Start with simple shapes, a skewer, and damp fingers to smooth seams, then add stamps, freckles, or painted spots for personality. Let them dry, finish with acrylics, and suddenly you’ve got little gifts that look store-bought, not school-craft chaos. Stick around, because the best shareable ideas are still ahead.
Love cozy DIY projects? 💕
Get free printable guides, exclusive tutorials & surprise craft goodies straight to your inbox.
Disclosure: This post may contain Amazon affiliate links, at no extra cost to you. Content on DiyCraftNest is created with research support from AI tools and carefully reviewed, edited, and fact-checked by the lead author, Daniel Pat, to ensure accuracy and reliability. Learn more
Key Takeaways
- Shape quick mini mushrooms, faces, or abstract forms by hand using pinch, roll, and smooth techniques.
- Make shareable charms and keychains by adding holes before drying, then paint and seal them after curing.
- Create tiny gift tags or letter tiles with stamps, texture, and twine for personalized gifting.
- Build small shelf pieces like houses, patterned tiles, or mini vases for easy decorative displays.
- Use damp fingers or a sponge to smooth seams fast, then air-dry flat before finishing with acrylic paint.
Mini Clay Mushrooms for Decor
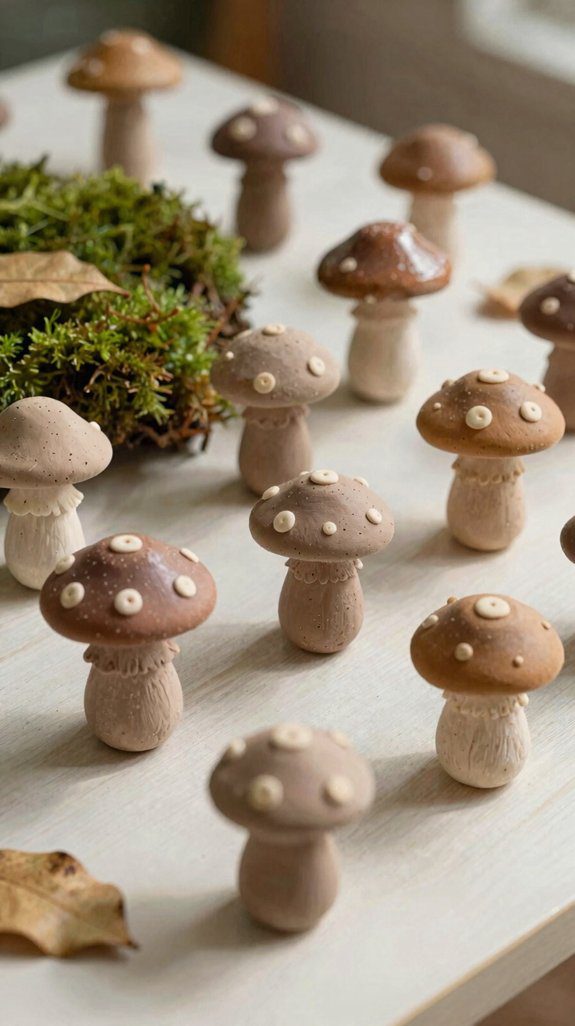
If you want a tiny DIY that looks adorable fast, mini air-dry clay mushrooms are a total win! You can shape them with your hands, no baking or decorative tools needed, so you’ll fit right in with the crafty crowd.
Roll tiny stems, pinch dome caps, and use a small foil core for steadier stems.
Try Colorful Clay Techniques by pressing soft texture into the cap, then smooth the join for a neat look.
Thanks to Fast Drying Times, they’ll set at room temp in hours.
Paint spots and earthy tones, then add magnets or string for cute sharing!
Tiny Clay Houses for Shelf Styling
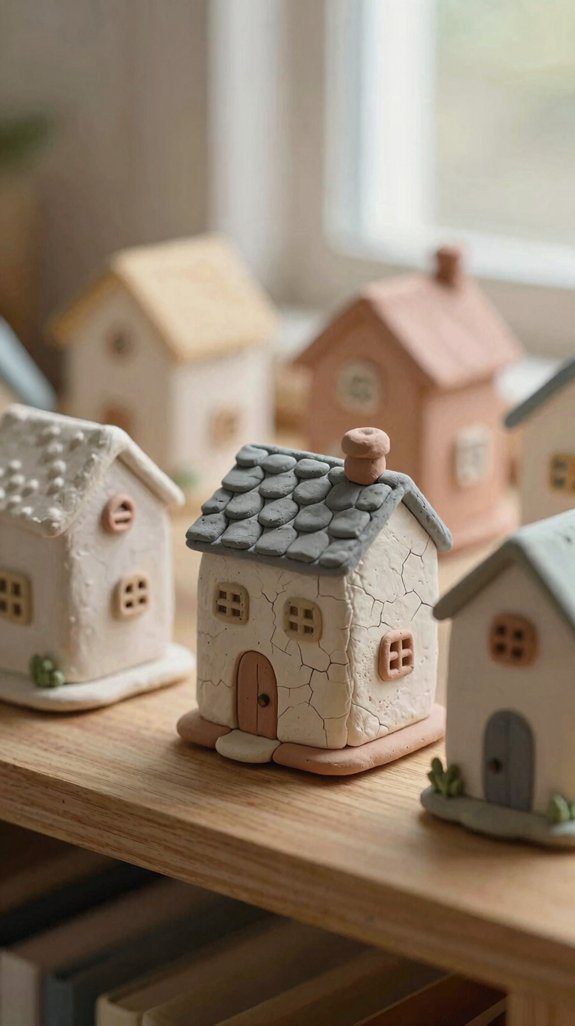
Building tiny clay houses is such a fun way to give your shelf a little storybook charm!
Roll flat slabs, cut simple walls and roofs, then join them with a little water and smooth the seams.
Add doors and windows with a toothpick, and if you want extra strength, tuck a tiny wire or foil frame inside the base.
After drying flat, paint them with acrylics or water-based colors, then try Clay drying tips like turning them once halfway.
For cozy street style, press leaves or make stone textures.
Finally, check acrylic sealants options, since a light varnish helps protect your cute indoor display!
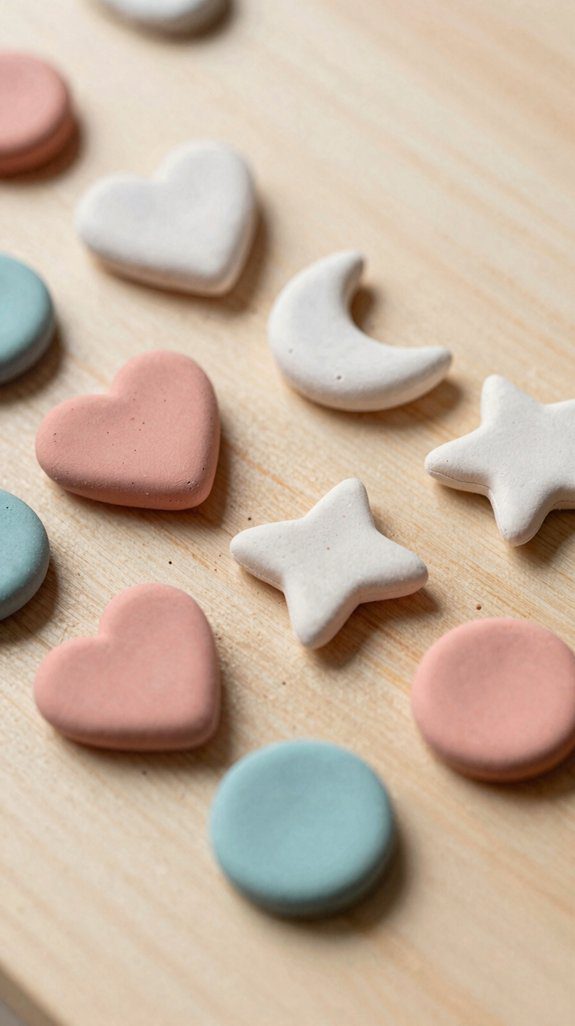
Clay Charms for Keychains

Clay charms for keychains are a tiny project with a big payoff, and they’re way easier than they look!
Roll a 1–2 inch heart, star, or circle, then poke a hole with a skewer before it hardens.
Keep the clay cozy by misting it or covering it with a barely damp paper towel and plastic wrap, because it dries fast.
Want that finished look? Press in a leaf vein or letter stamp before drying.
After it cures, sand rough spots, paint with acrylics, and let it set.
For Keychain charm tips, use Durable sealing methods, like clear varnish, to keep your charm bright and ready to show off!
Mini Face Sculptures with Expression
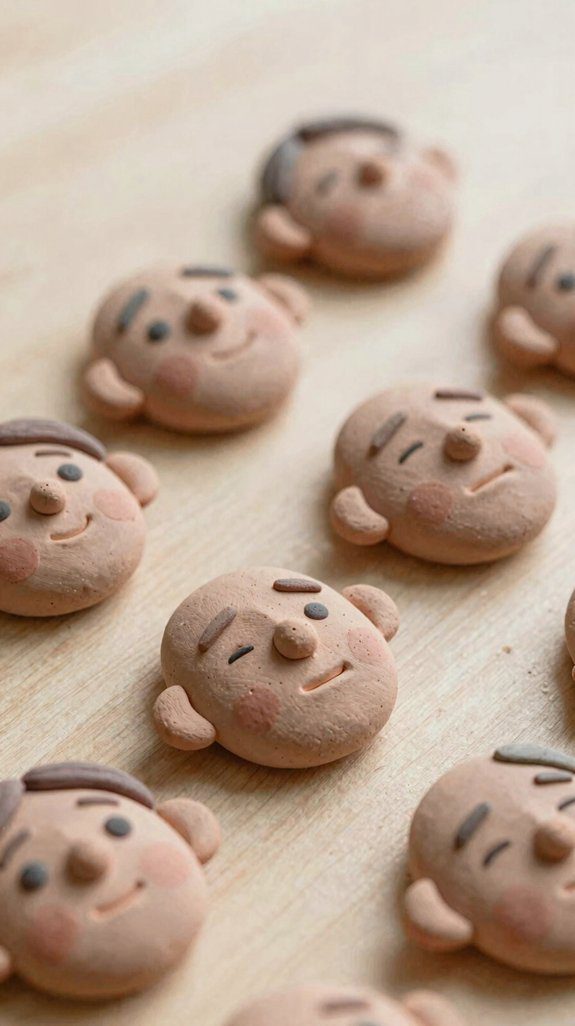
Tiny faces are surprisingly fun to make, and they can look full of personality with just a few careful moves! Start with a small ball of white air dry clay, flatten it, then use damp fingers and a sponge for faster smoothing methods.
You’ll fit right in with these clay tool tips:
- Pinch tiny brow ridges and a little nose bump.
- Roll two equal eye pieces, then blend the edges.
- Press a curved smile, or a V for a frown, and add shallow freckles with a pen.
Let them dry untouched, then paint expressive colors!
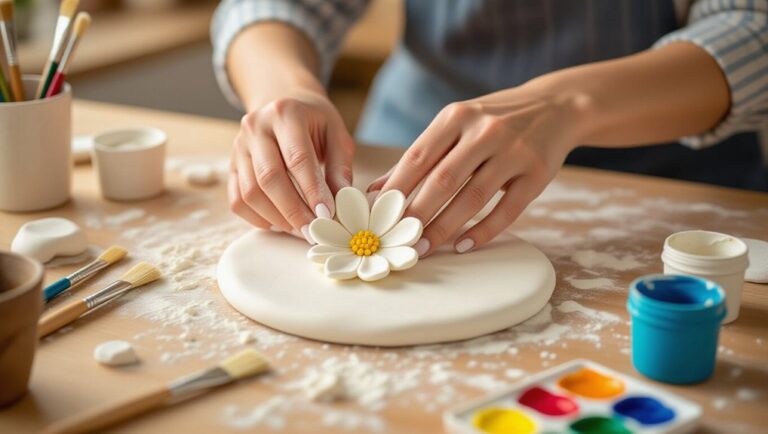
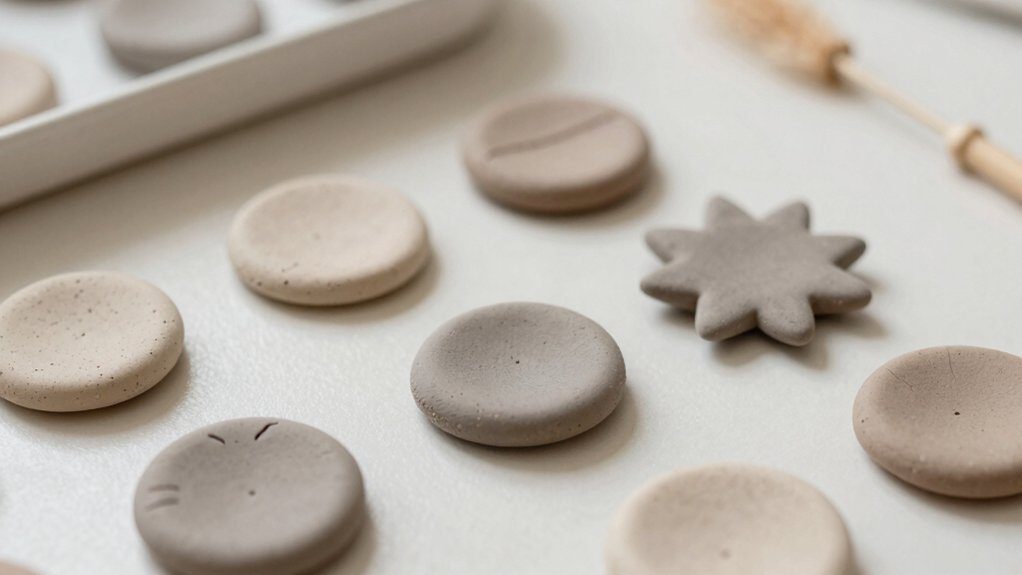
Clay Letter Tiles for Names
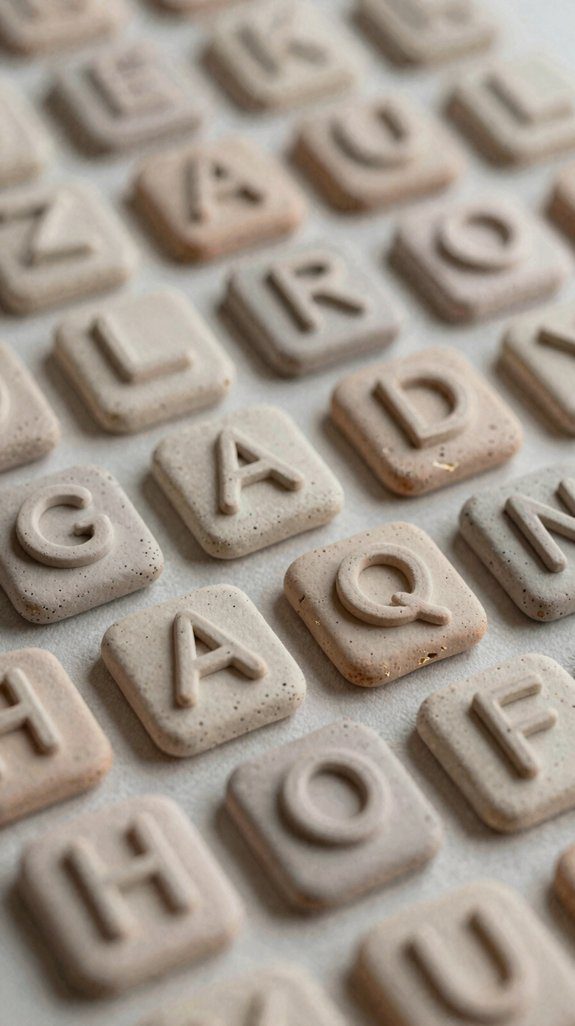
A simple way to make names pop is to press letters into an air-dry clay slab and turn it into cute little tiles! Roll your clay to about 1/4 inch thick, add letter stencils or stamps, and smooth the edges with a damp sponge so they look neat, not lumpy.
Let the tiles dry for 24–48 hours until hard, then paint them with acrylic or water-based paint. Color matching tiles makes each name feel personal, and you can add a tiny hole for hanging too.
Need a sweet surprise? Try Quick gift packaging for a set of tiles—easy, affordable, and so shareable!
Tiny Plant Markers for Pots
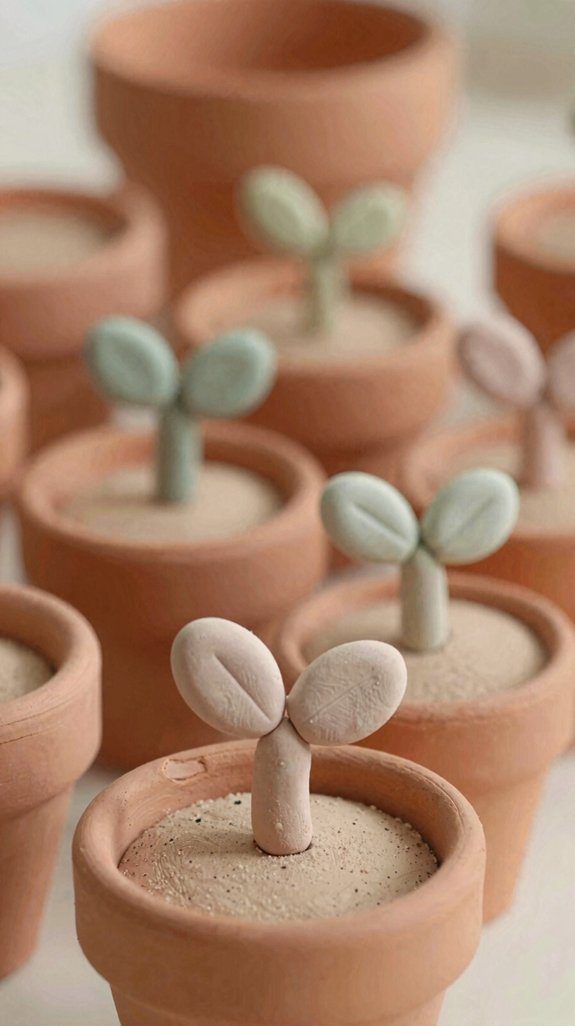
If your letter tiles made names feel extra sweet, here’s another easy win: turn leftover air-dry clay into plant markers that make every pot look charming and organized!
Roll thin clay rectangles or tiny tags, then press leaf veins, stamps, or letters before drying.
- Smooth edges with a little water.
- Add a short spike or loop on the back.
- Keep them coin-thin so they dry fast and stay sturdy.
After they’re dry, paint them, then try waterproof sealing tips for longer life.
Use reusable marker molds if you want matching sets.
Make a few extra, because these little garden buddies are perfect for sharing!
Mini Clay Frames for Photos
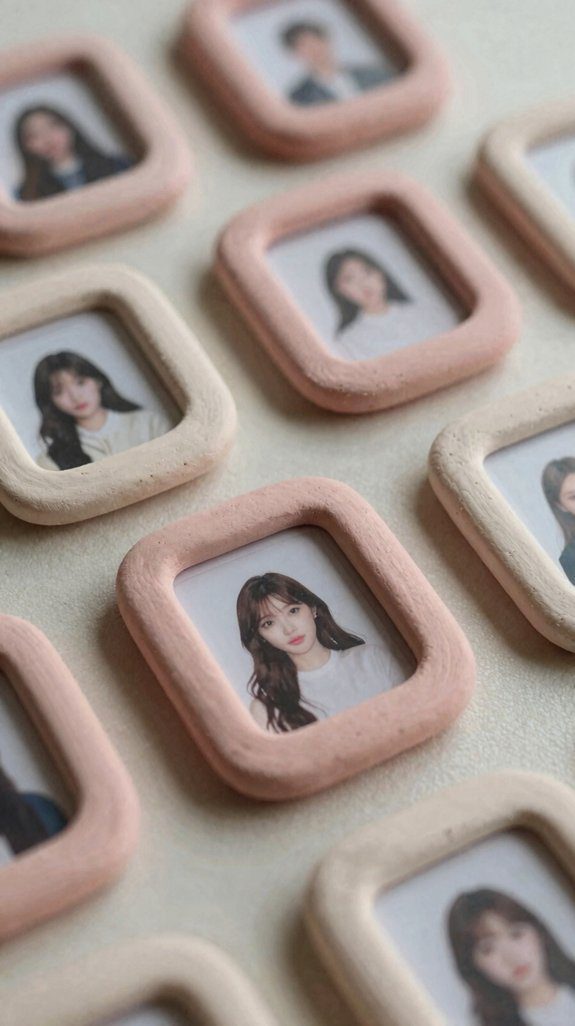
While your plant markers are drying, let’s jump into a super cute next project: mini clay frames for photos!
Roll white or terracotta air dry clay flat, then cut a tiny window with a craft knife or cookie-cutter-style guide.
Now comes the fun part: Texture Techniques. Press in leaves, lace, or a small stamp, then smooth the edges with a damp sponge.
Let it dry overnight to a couple of days, so it won’t warp or crumble.
After that, paint on cheerful colors and add Decorative Finishes, maybe a clear sealant.
Slip in a mini photo, and you’ve got a gift-ready frame!
Clay Magnets with Simple Designs
Clay magnets are a quick win when you want something cute, useful, and fridge-friendly! You can shape thin hearts, stars, flowers, or tiny houses on a silicone mat, and they won’t fight back—nice.
- Roll the clay thin for better clay drying tips.
- Smooth edges with a damp fingertip so they don’t snag.
- Press in a magnet before fully hardening, then paint after dry.
For a fun shareable set, make four matching designs, then glue on strong magnets for fridge ready finishing. They’re cheap, easy, and feel like a little handmade high-five every time you grab a snack!
Small Animal Figurines for Decor

Tiny animal figurines can turn a plain shelf, desk, or windowsill into something way more charming, and they’re easier to make than they look!
Start with clay cat poses or little birds, rolling a body, pinching ears or paws, and smoothing seams with damp fingers and a sponge.
For sturdier pets, tuck clay over crumpled foil or thin wire, then add texture with leaves, mesh, or cheap stamps—hello, fuzzy fox!
Let them dry fully, paint with acrylics, and seal if you want them to last.
Want easy sharing? Set each cutie on a small base, and you’ve got a tiny buddy that feels gift-ready.
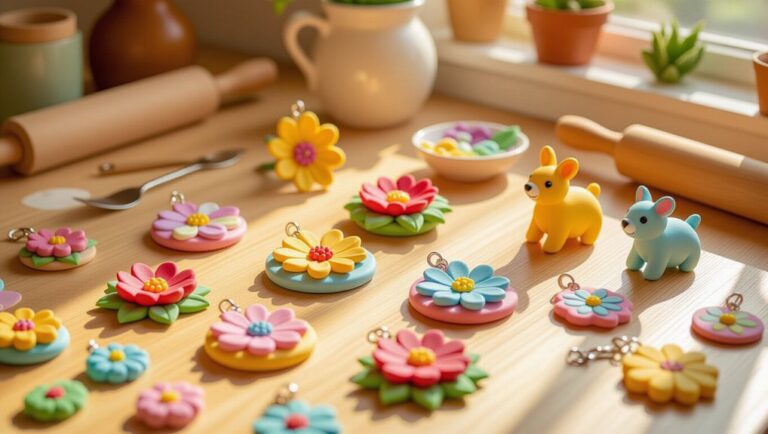
Clay Beads for Jewelry Making
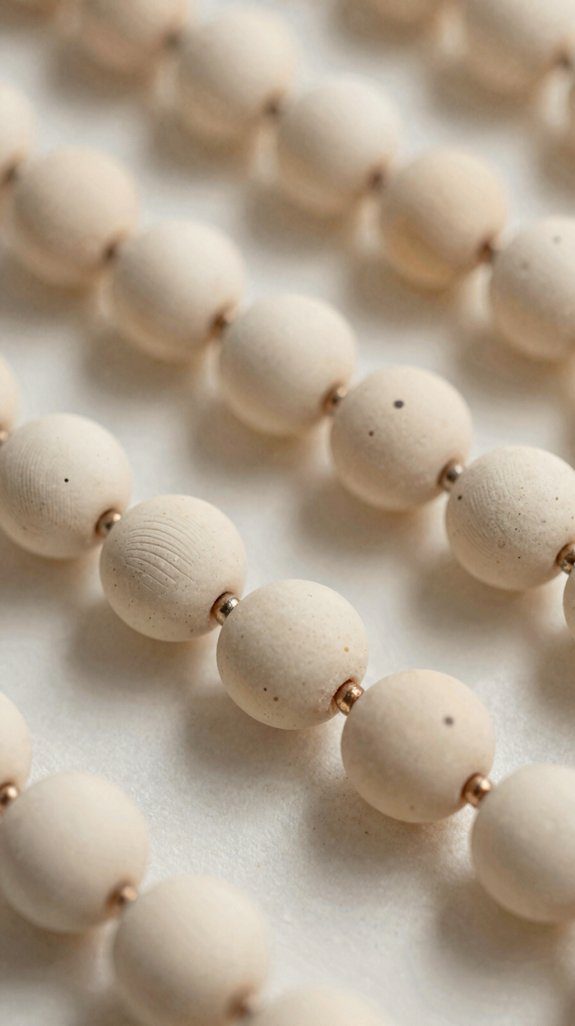
A handful of air-dry clay can turn into the cutest little beads for bracelets, necklaces, and charms—seriously, it’s almost suspiciously easy! Roll tiny pieces, poke a center hole with a toothpick, and keep them small, like pencil erasers.
- Dry them on silicone mat or wax paper
- Sand any rough spots after they’re hard
- Use glaze finish tips like acrylic paint and clear varnish
For bead stringing methods, try elastic cord or jewelry wire, then add a clasp or jump ring for a pro look.
You’ll get a sweet, custom piece that feels totally yours—yay, handmade squad!
Mini Clay Candle Platforms
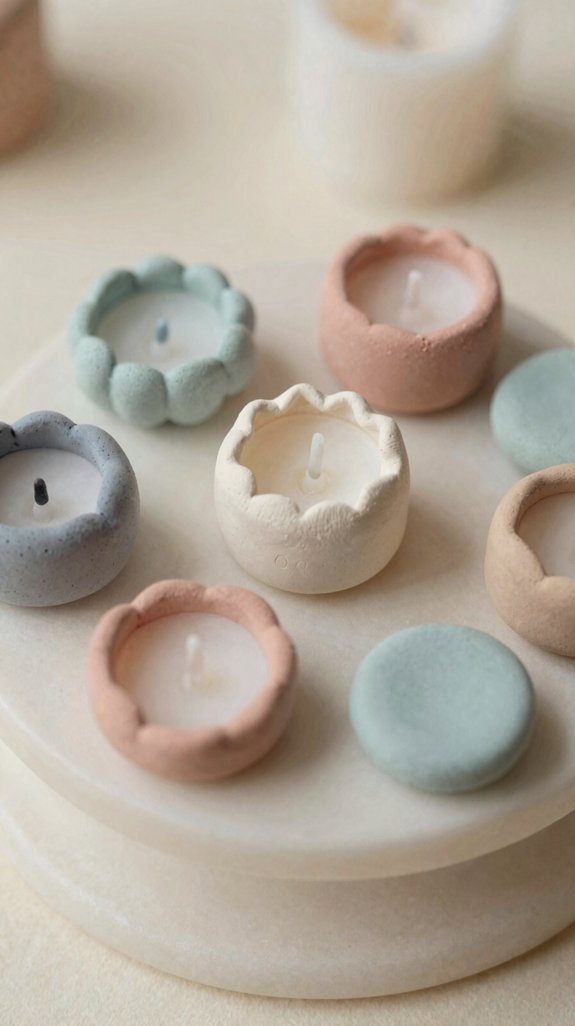
If those handmade clay beads got you in a crafty mood, you can keep the fun going with mini air-dry clay candle platforms—basically little decorative bases that help tea lights or small candles sit steady and look adorable.
Grab clay, a dab of foil or cardboard for support, and use Clay Tool Basics to press, texture, and smooth the top so it stays level.
Let it dry 24–48 hours, then paint with acrylics.
Follow Candle Safety Tips, and keep them indoors since air-dry clay isn’t water-resistant.
For gifting, make matching sets, then finish lightly for a polished wow!
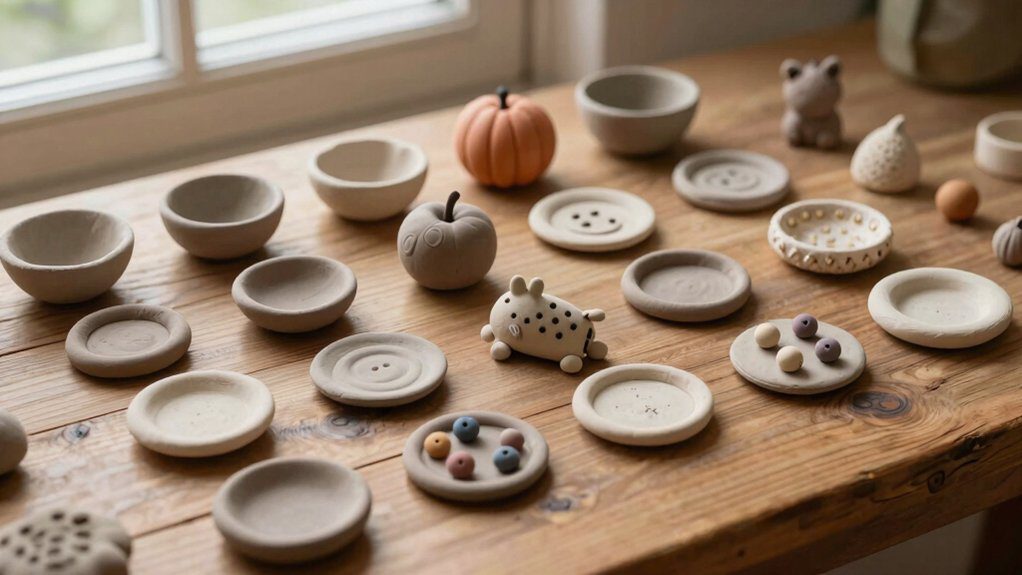
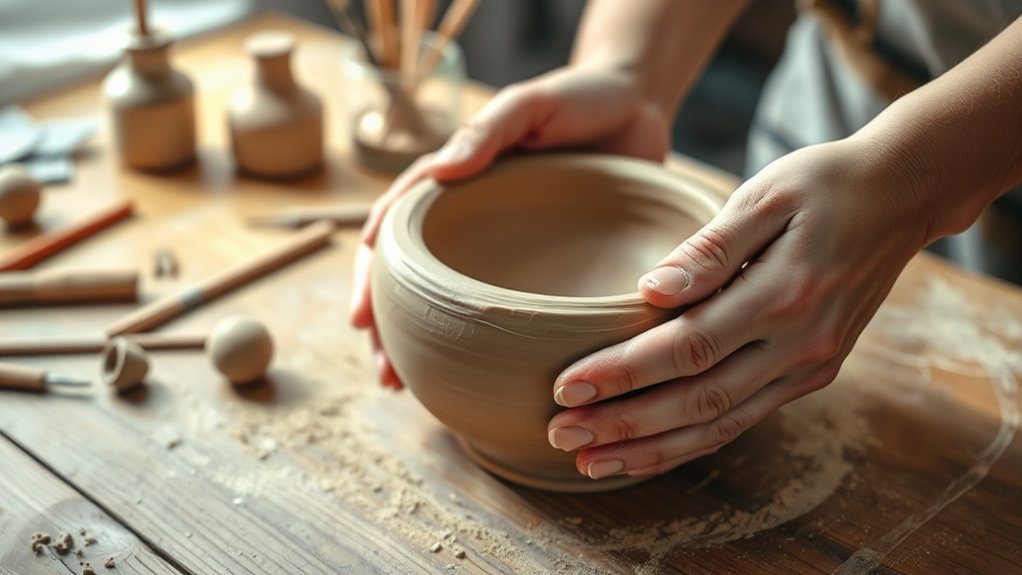
Tiny Decorative Bowls
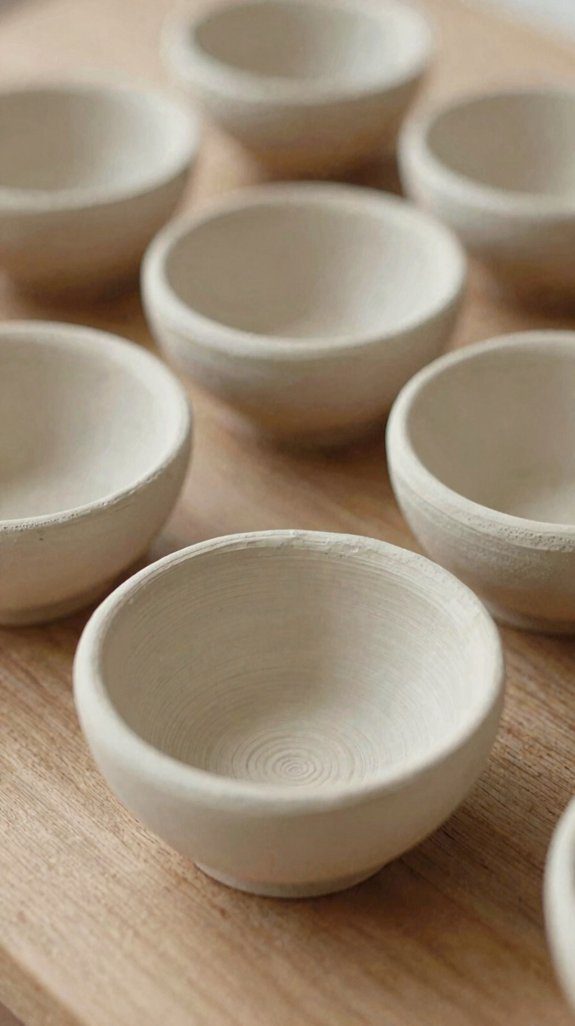
With just a few scraps of air-dry clay, you can make cute little decorative bowls that feel way fancier than the effort they take!
Roll a small ball, press it into an even base, then smooth the inside with a damp fingertip or sponge. Let it dry hard, and you’ve got a tiny dish for rings, earrings, or paper clips.
- Keep extra clay under plastic wrap.
- Add Texture Transfers with leaves or fabric.
- Try Glazing Techniques with acrylics, then seal if you want.
Make a whole set in different colors, and suddenly your shelf looks like a cozy little club!
Clay Initial Tags for Gifts

Tiny clay initial tags turn even a plain gift into something that feels personal and handmade! Roll a thin slab of air dry clay, press in a letter stencil or cookie-cutter initial, and punch a hole with a straw before it dries.
Let each tag dry, then sand the edges lightly and paint it with acrylics for crisp, gift-ready color. A quick seal keeps it looking nice for indoor use, and it’s cheap, easy, and super shareable.
For extra charm, try fork lines, toothpick dots, or leaf prints. Finish with twine attachment tricks, then tie them onto painted gift packaging, boxes, or jars!
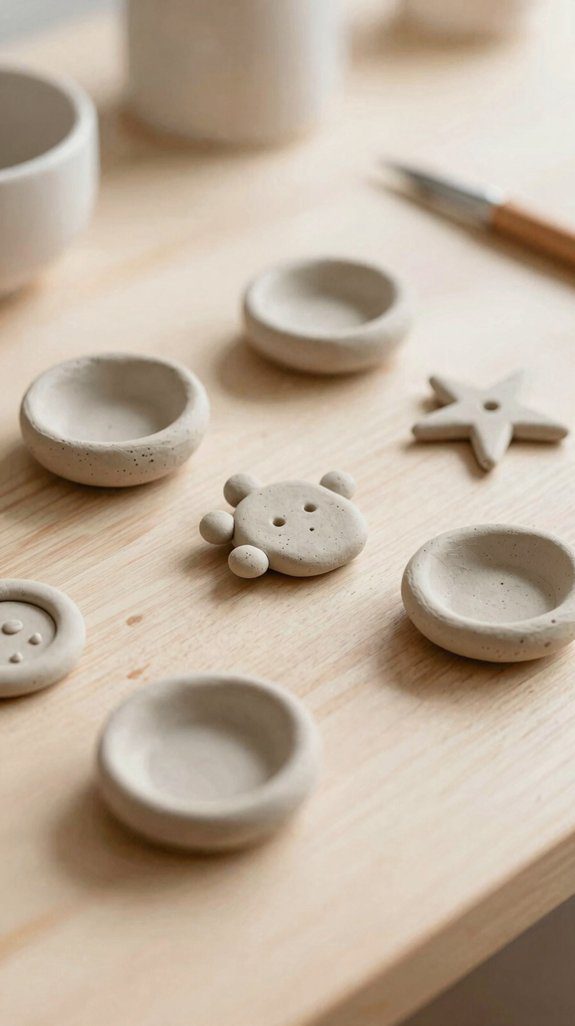
Mini Clay Sculptures with Abstract Shapes

After those sweet little gift tags, you can keep the fun going with mini clay sculptures that feel playful, modern, and just a little artsy! Roll air-dry clay into balls, coils, and tiny slabs, then pinch or twist them into shapes that look cool on any shelf.
- Add stamps, buttons, or fabric for Textured surface techniques.
- Use damp fingers to smooth seams, then let each piece dry hard.
- Paint with acrylic color blocking for bold, happy contrast.
Need more structure? Hide a tiny foil core inside first. These little pals cost almost nothing, and they’re beginner-friendly—cute, sturdy, and shareable!
Small Clay Tiles with Patterns
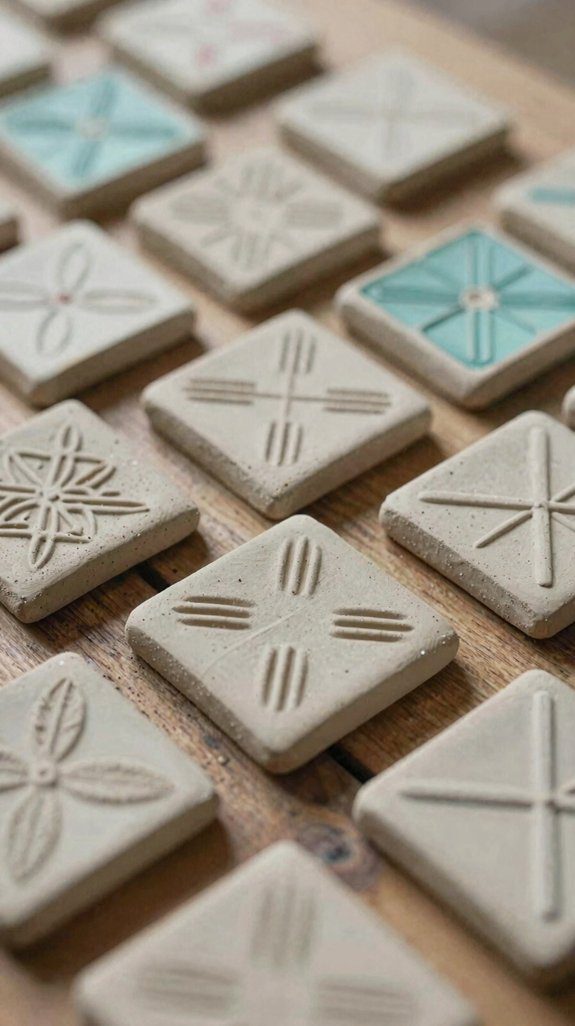
If you want a project that feels neat, fast, and a little stylish, small clay tiles with patterns are such a fun win! Roll out air dry clay about pencil-thick, cut squares or circles, then press in stamps, lace, leaves, or a craft comb. You’ll get clear texture and a design that feels like yours, not a copy from the craft aisle.
Smooth the edges with damp fingertips, let them dry, then paint for contrast. Think of Pattern Placement like arranging your own tiny crew, and try simple Glazing Techniques with a clear sealant for a polished finish.
Cute, cheap, and share-ready!
Tiny Clay Trinkets for Desk Styling
Those patterned clay tiles are a great warm-up, and now you can shrink the fun down into desk-friendly decor that actually makes your workspace look put together—wild, right?
You’re making tiny trinkets that feel like they belong on your desk, not hiding in a drawer.
- Press mini shapes on a silicone mat, then dry them flat at room temp.
- Try desk ring dishes or freehand charms with a foil base to help thicker pieces hold up.
- Stamp leaf prints, add drilled holes or magnets, then paint after dry and seal if you’ll handle them often.
Keep clay wrapped, moisten fingertips, and your little crew’s set!
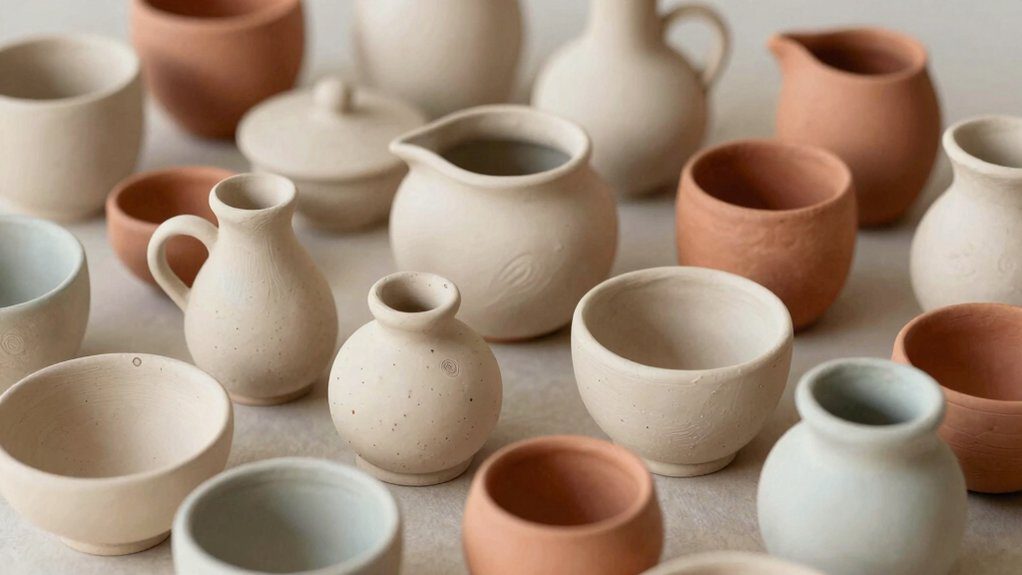
Clay Mini Vases for Single Stems
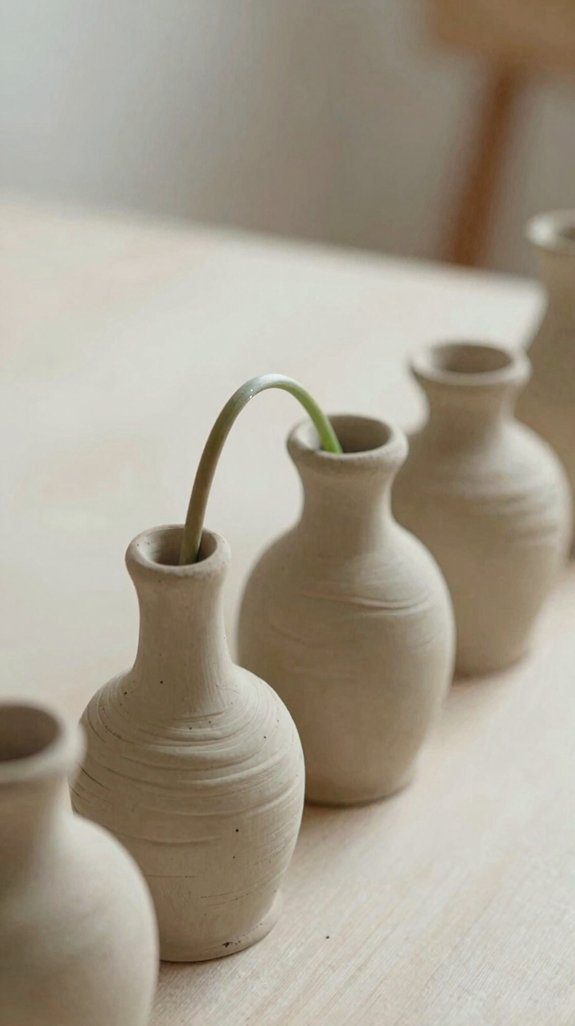
When you’re ready to level up from tiny trinkets, mini vases are a super charming next step, and they’re way easier than they look! Roll and pinch clay into a tiny vase, smooth seams with a damp finger, then hollow the center with a skewer for stem secure inserts.
| Step | Tip |
|---|---|
| Shape | Keep it small and cute |
| Dry | Air dry at room temp |
| Finish | Use glaze safe finishes or paint |
Make the opening a bit wider than one stem, and you’ll get a snug fit. Since it’s decor, add a tiny plastic cup for water, or swap in dry stems.