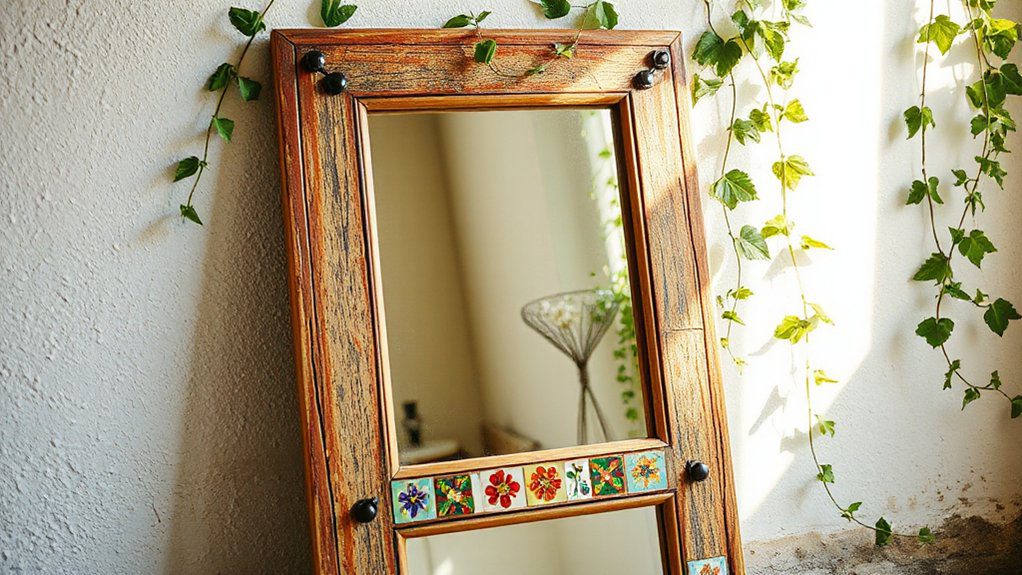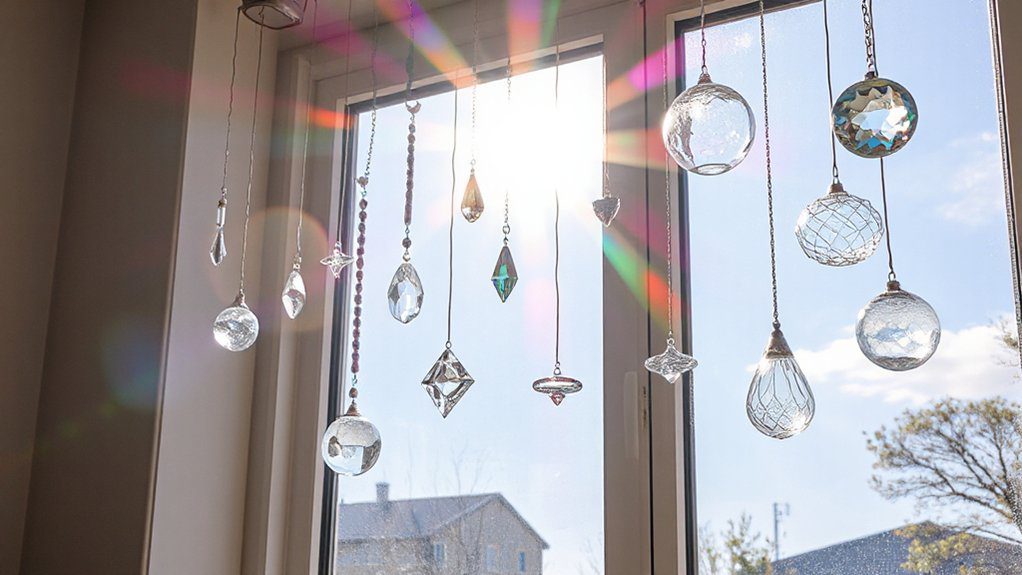
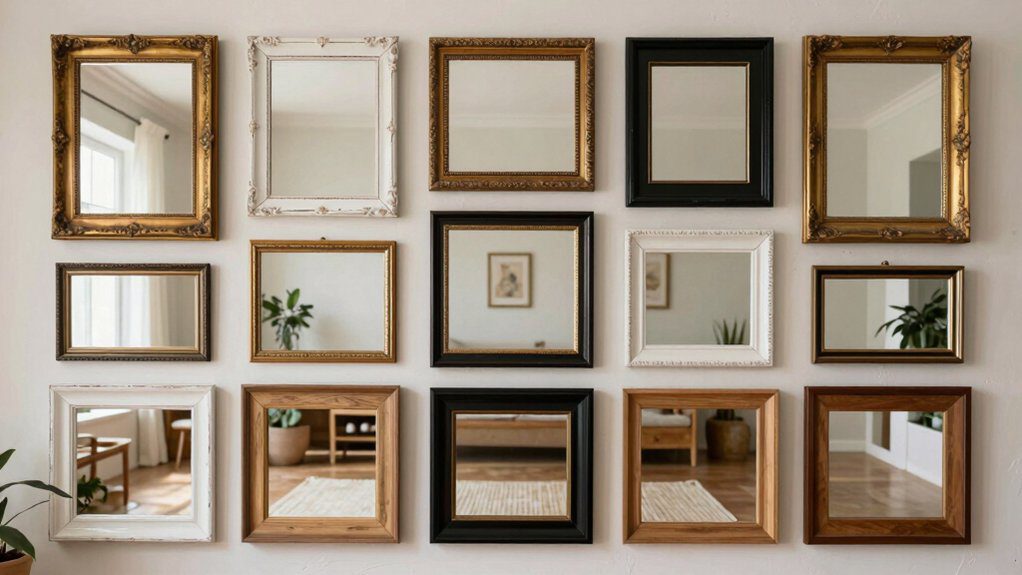
17 Mirror Makeover Ideas That Turn Old Frames Into Stunning Decor
I’ll show you 17 mirror makeover ideas, and they’re easier than they look! Start with neutral paint for a calm clean-up, then try luxe gold leaf, distressed chalk paint, black matte, whitewash, rope, patterned paint, layered depth, or added molding for a custom finish. I use simple supplies like primer, tape, glue, and sandpaper, and most projects stay budget-friendly. The best surprise might be the final frame trick, and it’s worth sticking around for!
Love cozy DIY projects? 💕
Get free printable guides, exclusive tutorials & surprise craft goodies straight to your inbox.
Disclosure: This post may contain Amazon affiliate links, at no extra cost to you. Content on DiyCraftNest is created with research support from AI tools and carefully reviewed, edited, and fact-checked by the lead author, Daniel Pat, to ensure accuracy and reliability. Learn more
Key Takeaways
- Paint old frames in neutral tones like white, ivory, cotton, oyster, or driftwood for a clean, calming update.
- Add luxury with gold leaf or metallic paint on carved details for a rich, reflective finish.
- Create distressed charm using chalk paint, sanding, dark wax, or glaze for an aged patina look.
- Use bold styles like matte black, whitewash, or ombre for modern high-contrast or farmhouse decor.
- Finish with custom touches like rope wrapping, dry brushing, or decorative transfers for extra texture and personality.
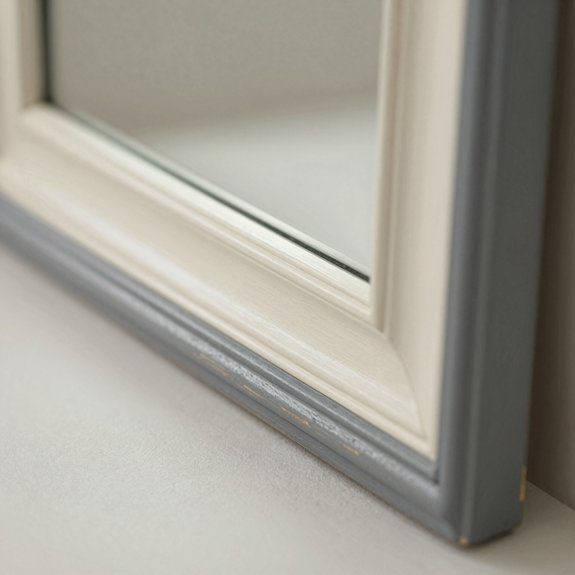
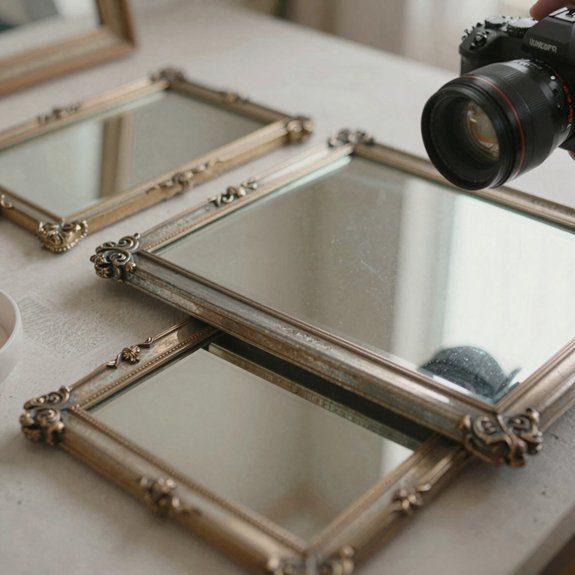
Painted Mirror Frame with Neutral Tones
A neutral-painted mirror frame is one of those easy upgrades that can make an old frame look calm, clean, and way more expensive than it really was! I like white, ivory, Cotton, Oyster, or Driftwood because they fit almost anywhere, so you won’t feel stuck with one style.
First, I do primer prep: wipe the frame with a damp cloth, clean the mirror with glass cleaner or vinegar, and sand off any stubborn finish. If the frame is stained or had a loud pink spray job, I prime it, then brush on two solid coats of chalk paint.
Want a little more personality? I dry brushing a lighter shade over a darker base for a soft driftwood look. Let it dry, then add tiny transfers or rosettes if you want extra charm!
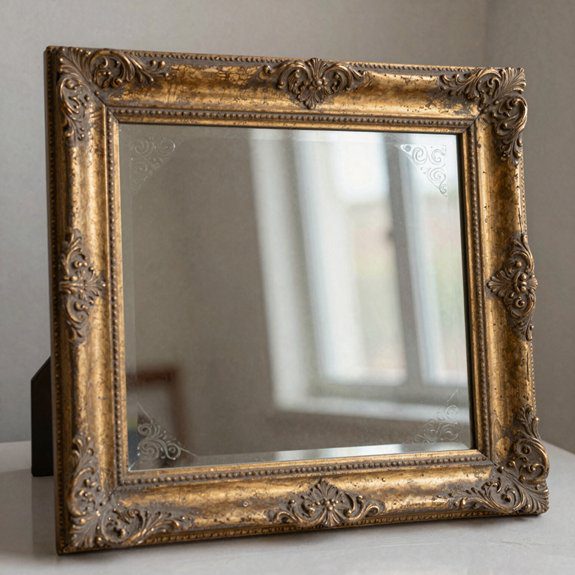
Gold Leaf Mirror Frame for a Luxury Look
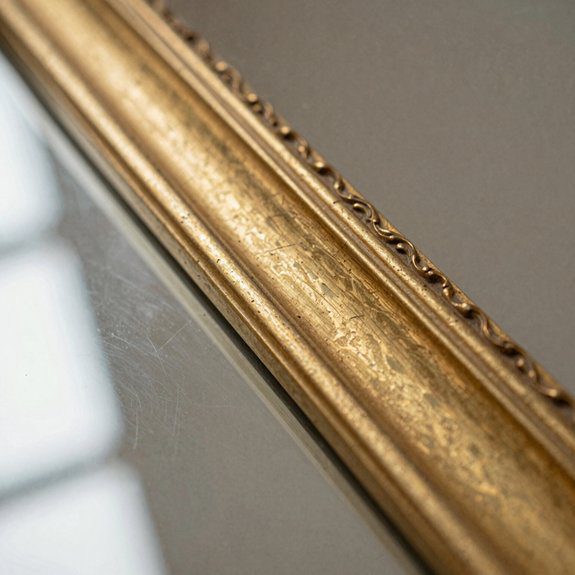
If the neutral frame idea felt calm and pretty, this one goes full glam, and I’m here for it! I start with a sturdy thrifted mirror, maybe carved or beveled, because it already has good bones.
- Prep: I do mirror cleaning, lightly sand, and prime the wood so the shine sticks.
- Gild: I brush on gold leaf tools’ adhesive, then press real gold leaf in small sections.
- Finish: I burnish the corners, seal with a clear topcoat, and, if I want extra drama, add a whisper of dark wax.
It’s not hard, and it’s cheaper than buying a luxury mirror. The result? A warm, bright frame that looks like it belongs in our favorite stylish room!
Distressed Vintage Frame Makeover
Before I go full “antique shop treasure,” I like to clean the thrifted mirror frame with glass cleaner, then lightly sand any chipped or worn spots so the finish grabs on evenly.
Next, I brush on two solid coats of chalk paint, and let each one dry, because rushed paint looks like it missed the memo!
Then I distress the edges with dry-brushing or a little sanding, just enough to tease out the carved details.
If the finish feels too shiny or wrong, I paint over it and test one tiny corner first.
For the best old-world charm, I rub dark wax into the grooves and buff it back.
A few frame hardware updates and nearby modern farmhouse accents make the whole piece feel welcoming, lived-in, and totally ours.
Black Matte Frame for Modern Style
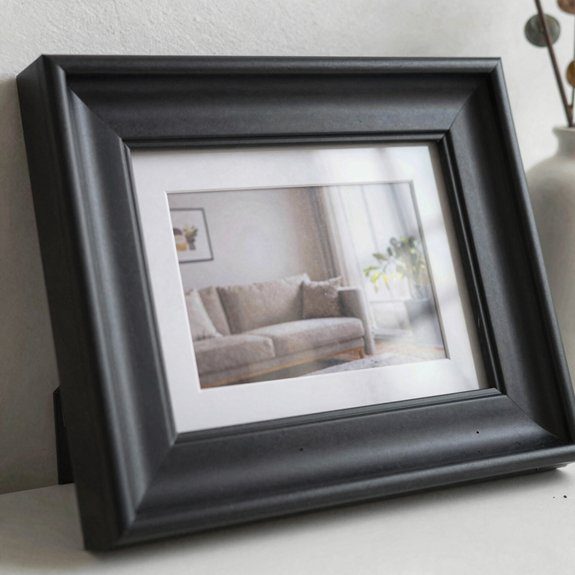
When I want an old mirror frame to look instantly fresh and modern, I reach for black matte paint, because that low-sheen finish turns thrifted wood or carved details into something sleek and clean.
I start with spackle repair on nicks, then wipe the frame, clean the glass, and tape the edge.
- Sand glossy spots, so paint grabs fast.
- Brush on two coats of black matte, keeping color matching simple and bold.
- Add a tiny dark-gray dry brush on raised carvings, then hang it where light hits.
It’s beginner-friendly, budget-smart, and honestly, it feels like joining the cool kids’ wall club!
If the frame looks a little flat, that last texture trick wakes it right up.
Whitewashed Frame for Farmhouse Decor
After that bold black-matte makeover, I love flipping the vibe completely and giving an old mirror a soft whitewashed finish, because it turns the frame from moody to warm and airy in no time!
First, I wipe it clean, tape the glass, and lightly sand any old finish so the paint grabs well.
Then I brush on thinned chalk paint, working in small sections and wiping some back right away, so the weathered wood grain still peeks through.
If the color’s super bright, I add a base coat first, then let everything dry fully.
For extra farmhouse charm, I softly distress the edges, or brush on patina with a touch of dark wax, and wow, the carved details pop!
Put it in a bright room with cozy neutrals, and it’ll feel like home.
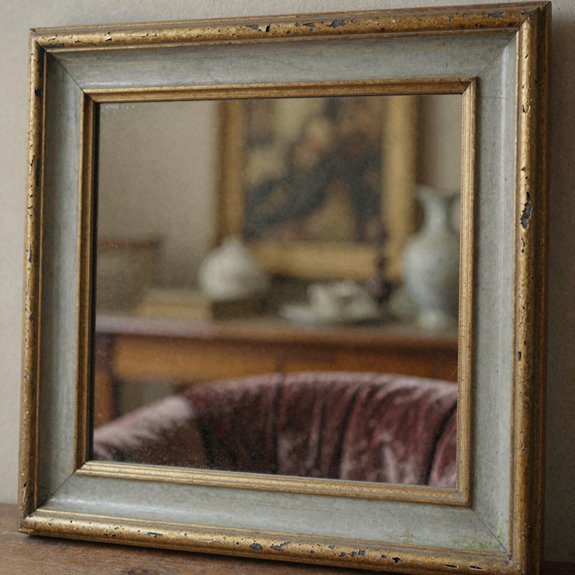
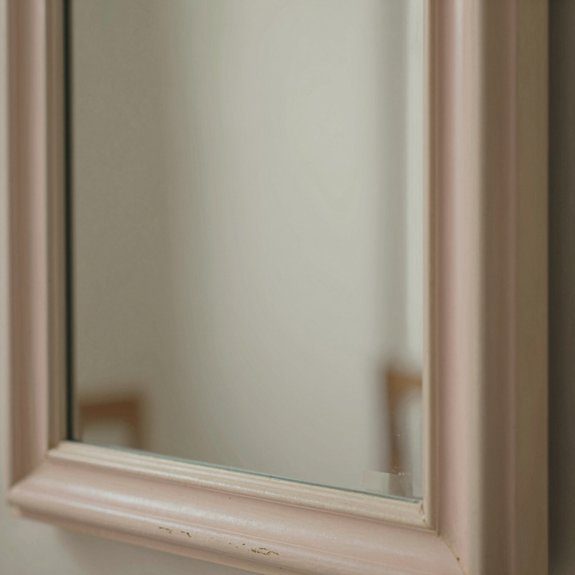
Two-Tone Painted Mirror Frame Design
I love a two-tone mirror frame because it can go from plain to polished with just a little paint and a fun color combo! I pick a frame I can keep, clean it well, and tape the glass, so I’m ready to make my own little wow piece.
- Set the base: Sand loose finish, then brush on two coats of dark grey or ivory for a smooth start.
- Add the second tone: Dry brush a lighter shade on raised edges for color block accents and a soft weathered texture.
- Seal and show off: Add a clear coat, then hang it in bright light, where the contrast really pops.
It’s cheap, beginner-friendly, and honestly, it feels like joining the cool decor club!
Ombre Frame Effect for Subtle Color Gradient
An ombre mirror frame can look soft and dreamy, and it’s way easier than it sounds, even if you’re working with a thrift-store rescue!
I start by sanding and wiping the frame clean, because a fresh surface helps the paint stick and keeps the finish neat.
Then I brush on a base coat, like warm white or light gray, and let it dry all the way. Next, I add the darker shade where I want the fade to begin, then use dry brush blending with light strokes to soften the line.
For paint sheen balancing, I finish with a clear topcoat.
Keep the colors close for a subtle glow, not a loud jump, and build thin layers. The result? A frame that feels calm, polished, and totally you!
Chalk Paint Frame Makeover for Soft Texture
When you want a frame that feels cozy instead of shiny, chalk paint is such a fun trick! I start with Mirror frame prep: I wipe dust away with a damp cloth, then clean any glass edges with vinegar or glass cleaner, because chalk paint adhesion needs a clean base.
- I brush on dark grey chalk paint, using two solid coats.
- If the old color still peeks through, I add primer first, no drama, just better coverage.
- After it dries, I seal it, so the soft texture won’t rub off.
The matte finish hugs carved spots and makes the frame look warm and lived-in. Want extra charm? I lightly distress raised areas and touch them with rose gold for a sweet little glow!
Frame with Carved Detail Highlighting
Carved frames are such a gift, because those little grooves and swirls do half the decorating work for you! I love hunting thrift mirrors with ornate details, since the recesses can become the star after a fresh finish. First, I clean the frame, tape off the glass, and sand only rough spots so I keep those crisp edges.
If you want a pretty glow, Add subtle gilding with gold paint or leaf, then brush a darker wax into the carvings for that soft, princessy depth. It’s low-cost, beginner-friendly, and honestly feels a little magical!
At the end, protect ornate edges with clear coat, so the detail stays sharp and the mirror can handle daily life. Suddenly, you’ve got a standout piece that feels like it belongs in your favorite room.
Mirror Frame with Metallic Accents
I love giving old mirror frames a little metallic glow, because it can make a tired piece look stylish fast without a huge budget! I start by checking for a sturdy wood frame, then I clean it, tape the glass, and get ready for a quick shine-up.
- Gold edge pop: Use metallic paint on raised details.
- Two-tone boost: Add chalk paint first, then highlight with gold leaf.
- Bright-room finish: Hang it where light hits, so the sparkle feels fresh.
When I do color contrast planning, I like white or ivory under metallics, because the shine stands out.
It also fits seasonal styling trends without feeling fussy.
Best part?
Small accents keep it classy, not flashy—like the frame got invited to the party, but didn’t wear a disco suit!
Antique Finish Frame with Patina Effect
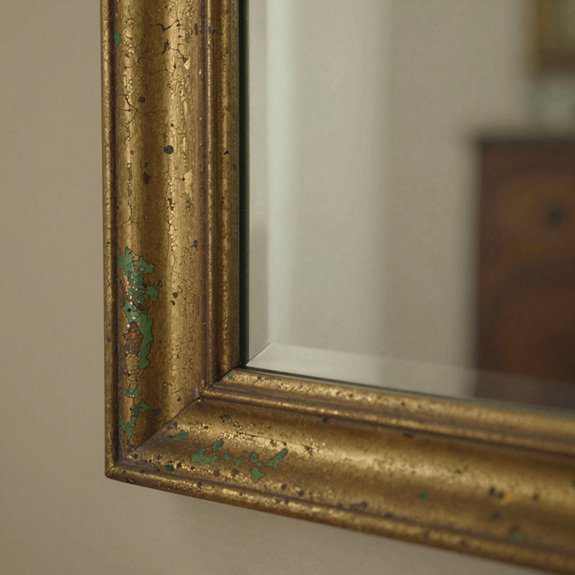
Old frames don’t always need a shiny new look—sometimes they just need that soft, timeworn charm that makes people lean in and say, “Wait, is that really old?” I start by cleaning mine with vinegar or glass cleaner, then I lightly sand the shiny spots so the paint sticks.
Next, I brush on an ivory or soft grey-blue base coat, which gives me that cozy, belonging-to-somewhere feel.
Then comes the fun part! I add a thin dark glaze, wipe it back with a damp cloth, and let it settle into the carvings for that mottled patina effect.
After it dries, I scuff the edges a little, so the worn spots look natural.
I love pairing it with upcycled mirror glass and a vintage hardware refresh.
Seal it if you’ll handle it often—easy, cheap, and gorgeous!
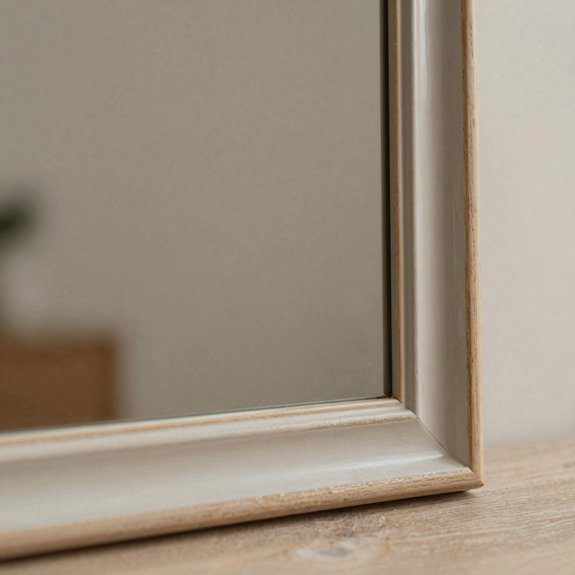
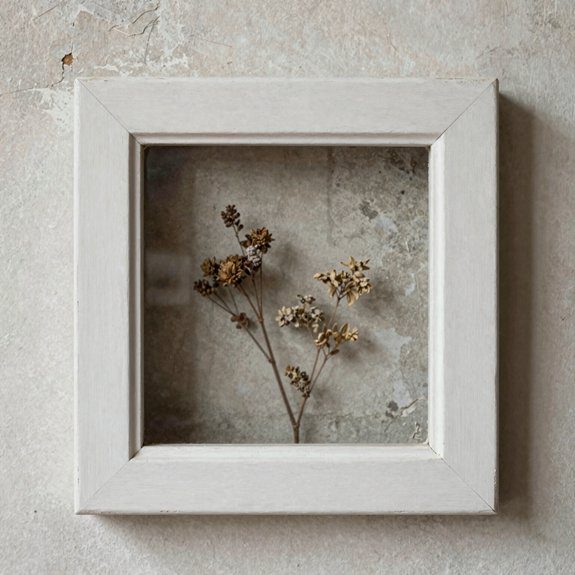
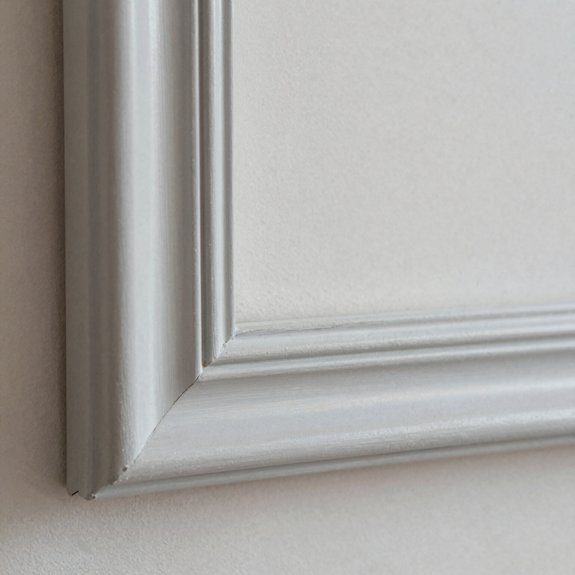
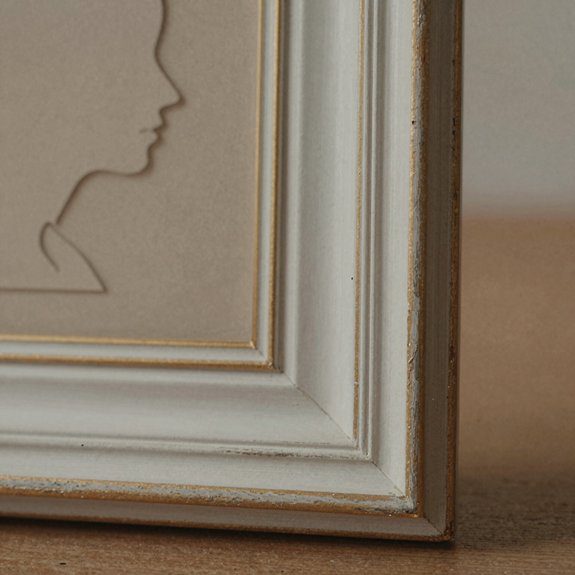
Minimal Frame with Clean Edges
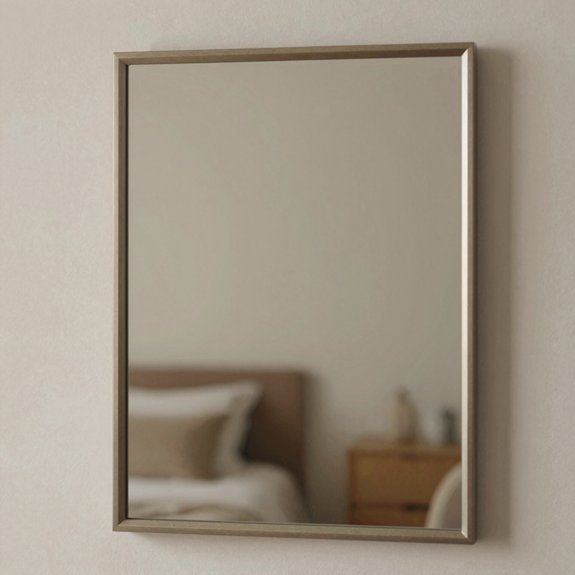
When you want a frame to look crisp, modern, and a little bit stylish, start with a good clean slate!
I wipe mine with a damp cloth, then clean the glass with vinegar, so the paint hugs the surface and my crew of DIY fans gets those clean edges.
- Tape the mirror first, then sand only rough spots.
- Prime if needed, then brush on two coats of white or dark grey.
- Trim drips with a razor, and test a soft accent tone if the frame feels flat.
These edge tape tricks keep things neat, and my color contrast tips help the frame pop without shouting.
I keep strokes away from the inner line, then reveal a sharp finish that looks pricey, not fussy.
Rustic Wood Frame Transformation
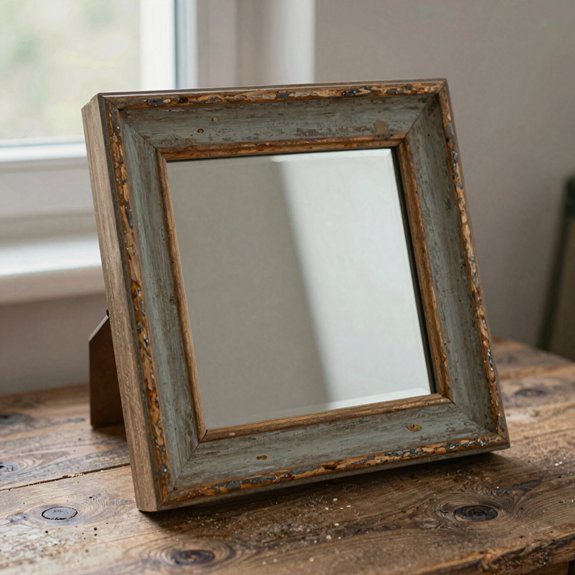
Rustic wood frames bring a whole different kind of charm, and they’re a blast to makeover! I hunt thrift stores for solid frames with only a few cracks or chips, since real wood usually beats plastic, and I budget for fixes.
| Step | Quick tip |
|---|---|
| Prep | Wipe the frame, then clean aged mirror glass with vinegar. |
| Paint | Sand lightly, tape off the mirror, and use two chalk paint coats. |
| Finish | Dry brush, add worn wood staining, and try rub-on transfers. |
I love defining carved details first, because they pop fast. If a frame had a wild old color, a dark base hides it beautifully. A little dark wax brings depth, and gold-leaf accents can really wake it up. In bright light, the grain glows, and you’ll feel right at home with your finished piece!
Frame Wrapped with Rope for Coastal Style
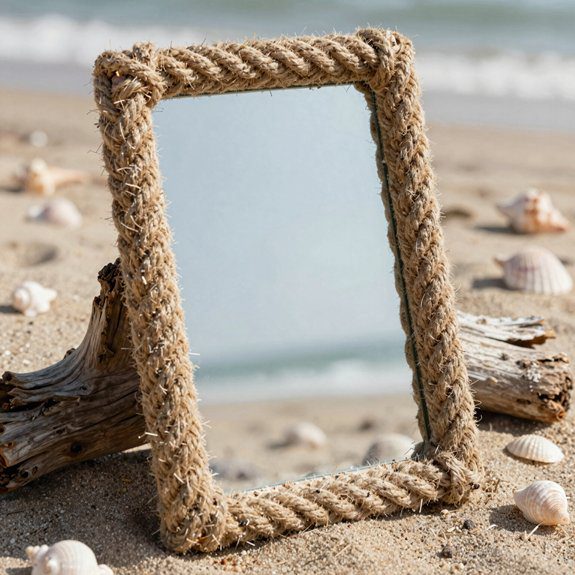
If you’re craving a breezy coastal look, I’d grab a thrift-store mirror frame and wrap it with rope for instant seaside charm! I choose lightweight jute or cotton, then spiral it tightly around the edge, dabbing hot glue at each turn so it stays put. It’s beginner-friendly, budget-friendly, and yes, your frame can still look polished, not beach-shack wild.
- Paint exposed edges with Haint Blue for Coastal color blocking.
- Add rope knot embellishments for a playful dockside vibe.
- Seal everything with a clear matte coat, then pair the mirror with hooks or a rope shelf.
If you want weathered charm, I’ll mist the rope with Driftwood-style neutral first. That tiny step makes the whole piece feel like a happy seaside find!
Decorative Frame with Patterned Paint
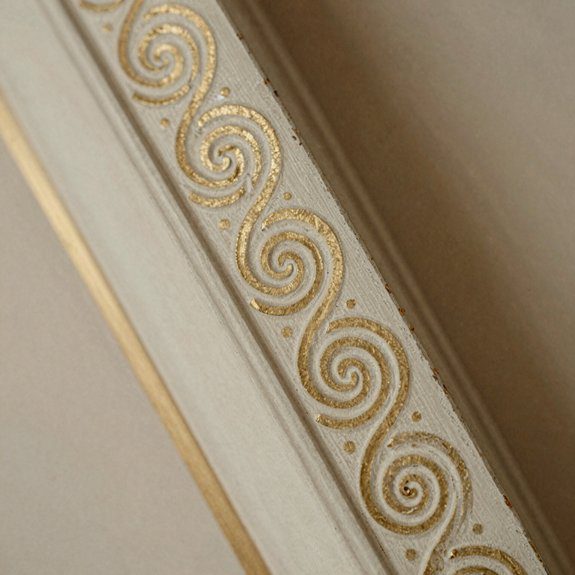
A little prep goes a long way here, and I always start by wiping the old frame clean with a damp cloth, then using glass cleaner or a splash of vinegar where the grime likes to hide. If the finish feels rough, I sand lightly and tape off the mirror, because nobody wants paint freckles on the glass, right?
| Step | What I Do |
|---|---|
| 1 | Brush on a dark grey base coat |
| 2 | Add a stenciled border or geometric motifs |
| 3 | Let carved details peek through for texture |
I keep the look simple, then build up color with stencils or rub-on transfers. If the first try feels off, I repaint and distress again until it feels like mine. That’s the fun part, honestly—your frame starts looking like it belongs with you!
Layered Frame Look for Depth Effect
Once I’ve got the frame clean and painted, I like to push the look a little deeper and give it some real depth, because flat just isn’t nearly as fun! I start with a dark base coat, then let those color undertones peek through like a secret club badge for the frame crowd.
- Dry brush magic: I sweep a lighter paint over carved spots, and Texture contrast pops fast.
- Layered add-ons: A few wood appliqués or gold leaf bits sit on top, giving that “wow, I belong here” feel.
- Finish with distressing: I rub on dark wax or a rose-gold accent, then hang it in bright light so every highlight shows off.
It’s cheap, beginner-friendly, and honestly, it makes old mirrors feel upscale without trying too hard!
Frame with Added Molding Details
With a little trim or faux appliqué, I can make an old mirror frame look way more custom, and honestly, it’s such a sneaky upgrade!
I start by taping off the glass, then I attach simple molding pieces, check trim placement, and prime the whole frame so the new edges blend in like they belonged there all along.
If the frame already has carved details, I keep that character, then define the raised spots with dark wax or paint before adding a touch of gold leaf.
It’s a small step, but wow, it adds depth!
For a softer look, I dry brush white over a driftwood base, and the ridges pop fast.
I also think about lighting considerations first, because ornate molding shines best in bright corners.
It’s beginner-friendly, cheap, and gives that “I belong here” styled finish!