How to Make Your Home Look Expensive Using Simple DIY Tricks
Start with cleanup: declutter, wipe every surface, and swap tired bulbs for warm LEDs, because a tidy room with a soft glow instantly feels pricier. Then paint dingy doors, change switch plates, and update cabinet knobs with one metal finish, like matte black or brass. Next, hang bigger rugs, add taller curtains, and style plants in chunky baskets. Finish by hiding everyday stuff in pretty jars, and you’ll reveal the best trick next!
Love cozy DIY projects? 💕
Get free printable guides, exclusive tutorials & surprise craft goodies straight to your inbox.
Disclosure: This post may contain Amazon affiliate links, at no extra cost to you. Content on DiyCraftNest is created with research support from AI tools and carefully reviewed, edited, and fact-checked by the lead author, Daniel Pat, to ensure accuracy and reliability. Learn more
Key Takeaways
- Deep clean, declutter, and style surfaces simply so rooms look polished, curated, and expensive.
- Upgrade lighting with warm LEDs, dimmers, and layered lamps for a flattering, luxe glow.
- Refresh doors, switch plates, and cabinet hardware to make small details feel custom and well-kept.
- Use larger rugs, higher curtain rods, and balanced proportions to make rooms look designer-made.
- Add scaled plants, framed art, and styled storage to bring in finished, intentional visual details.
Start With the Highest-Impact Fixes
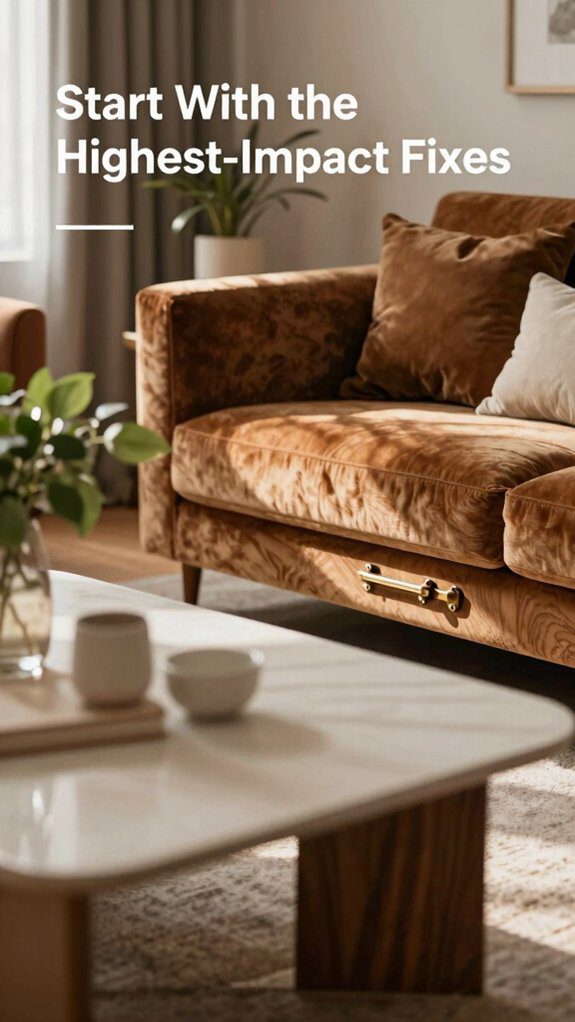
Before you start buying anything elegant, tackle the fixes that give you the biggest payoff fast—because a little cleanup goes a long way!
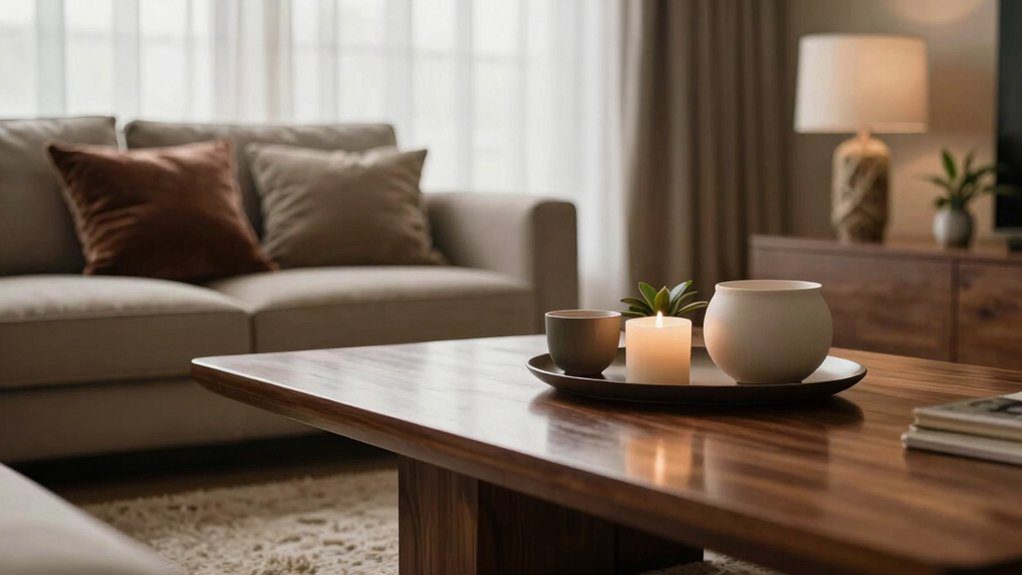
First, do deeper cleaning and decluttering, so your surfaces look clean and curated. Grab boxes, microfiber cloths, and a trash bag, then sort fast. Clutter definitely doesn’t say expensive, but neat shelves do!
Next, try simple surface styling: keep only a few pretty items, and wipe every finish until it shines.
Then hit curb appeal with paint, fresh hardware, and new switch covers. You’ll get a polished, welcoming look, and your home will feel like it belongs.
Upgrade Lighting for a Luxe Look
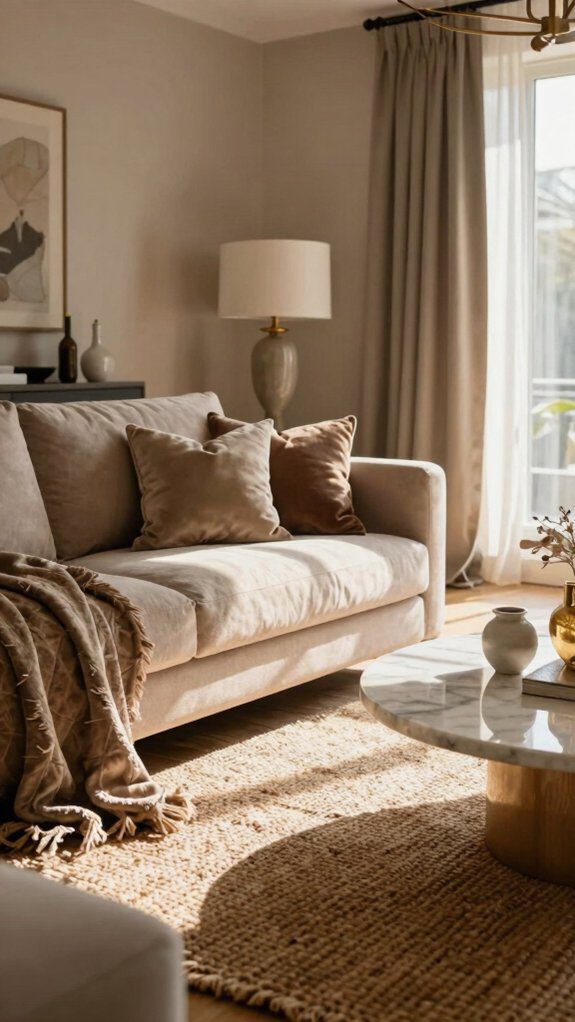
Want your rooms to feel instantly more polished? Start with light that flatters, not fights. Swap tired bulbs for warm LEDs, and pick round ones where you can so fixtures look clean, not chunky.
- Add a dimmer switch for easy mood control.
- Choose LED recessed lights in a warmer tone, which helps stop that old yellowing vibe.
- Mix overhead light with soft lamps for layered ambience, so corners don’t disappear.
- In rooms with height, try a statement pendant or chandelier, or a simple screw-in shade kit for a hanging look.
You’ll get a brighter, friendlier space, fast!
Refresh Doors and Switch Plates
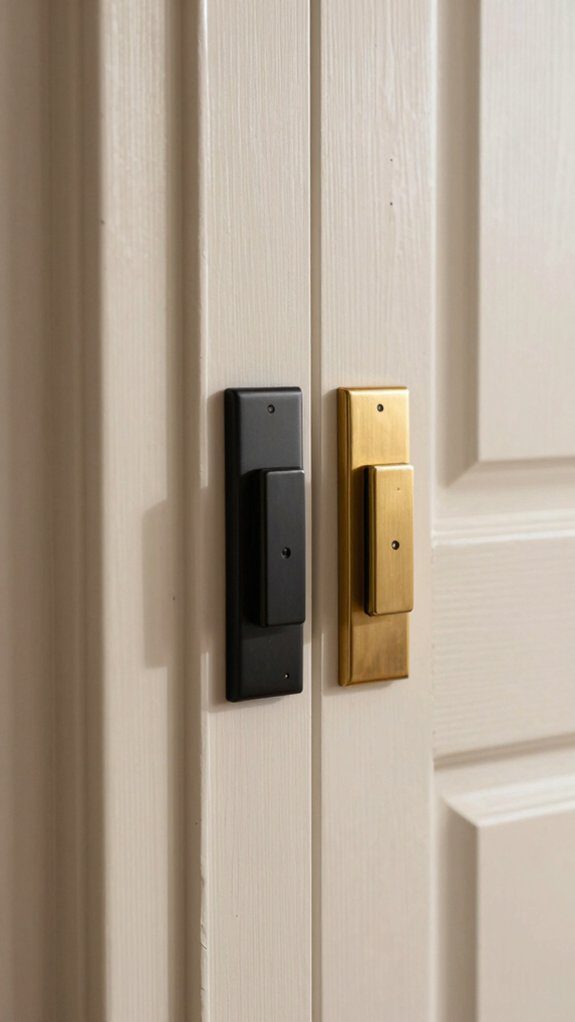
Start with the easy wins, like painting tired doors, because a fresh coat can make a room feel cleaner and more polished in no time.
Then swap out old switch plate covers, and while you’re at it, think about new knobs and vents, since those little details can quietly say, “Yep, this home has its act together!”
Best part? These upgrades are simple, affordable, and you can tackle them one by one without turning your weekend into a full-blown circus.
Paint Doors for Impact
A fresh coat of paint on your interior doors can do a lot more than you’d expect—it’s one of those small changes that makes the whole room feel sharper and more finished, almost like your house got a style upgrade without the drama.
- Pick a bold shade, like black, for instant color contrast.
- Grab painter’s tape, a foam brush, and smooth rollers.
- Clean, sand, and paint in thin coats, letting each dry.
- Swap the knob, and you’ll feel the polish every time you walk through.
It’s beginner-friendly, affordable, and wow, the factory-like finish really makes the whole place feel pulled together.
Update Switch Plate Covers
Those freshly painted doors already make the room feel sharper, and the next little upgrade is even easier: swap out tired switch and outlet covers for clean white, textured flat plates, or even raised frame-style covers for a more polished look.
Grab a flathead screwdriver, pop each one off, and give the room a fast details refresh, about a minute per spot—easy, right?
Start with kitchen backsplash outlets and switches, because they’re the first things people notice.
Tight, even screws and neat positioning make everything look intentional.
Choose insulated-backed plates when you can, especially with smart switches and Energy saving bulbs, and your room feels finished, cared for, and quietly more expensive!
Swap Knobs and Vents
If your doors and walls are already looking fresher, the next tiny upgrades can pull the whole room together fast: swap old knobs and pulls for one consistent finish, then trade tired switch plates and vents for cleaner, better-looking ones. Little details matter, and they help you feel right at home!
- Pick a finish you love, like black or brushed brass.
- Grab a screwdriver and matching hardware.
- Replace covers room by room for a neat look.
- Try Vent cover matching, then aim for Knob finish consistency.
That’s it—easy, cheap, and suddenly your place feels polished, like you belong there.
Update Cabinet Hardware
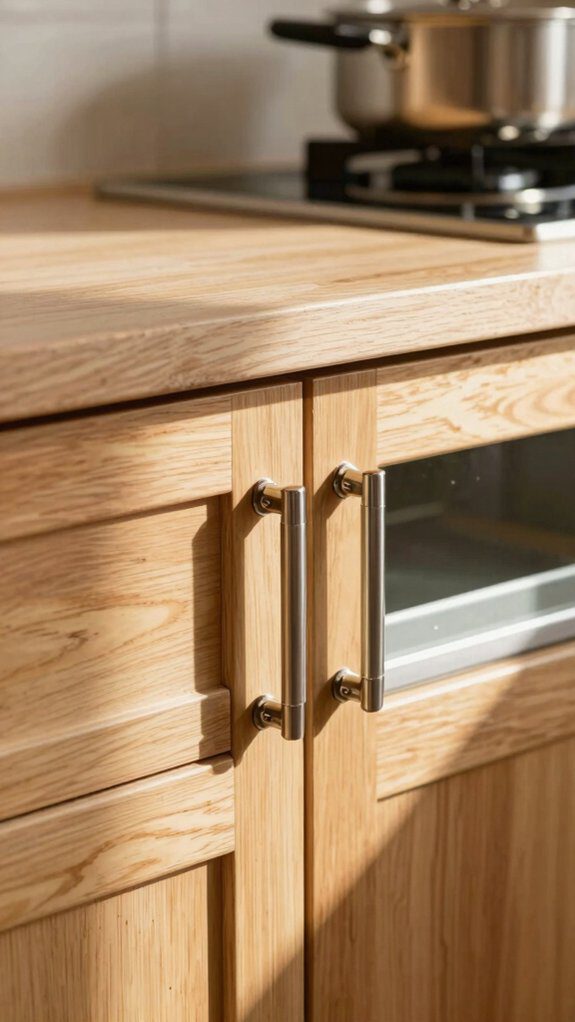
Cabinet hardware might be small, but wow, it can make your kitchen look instantly sharper, so start by swapping in better knobs or adding pulls where they make sense.
You can mix knobs and pulls for a custom feel, and if you like your current shape, a quick spray-paint refresh can save money while still looking polished.
Stick with one metal tone, like warm brass or matte black, and you’ll get that clean, pulled-together look that makes even old cabinets feel upscale!
Choose Better Knobs
A small hardware swap can make a bigger difference than you’d think, and it starts with the little knobs and pulls you grab every day!
Pick styles that feel fresh, like brass, black, or matte finishes, so your cabinets look finished, not tired.
- Buy simple knobs in bulk, because a $2 upgrade adds up fast.
- Use drilling templates so every piece lines up cleanly.
- Try Mixing finishes only if you keep tones coordinated across rooms.
- If your hardware still works, spray paint it for a quick refresh.
That tiny change cuts wear, boosts style, and makes your space feel like the good-looking group you belong in!
Add Pulls and Knobs
Because hardware acts like the jewelry of your kitchen, swapping plain pulls and knobs can make tired cabinets look suddenly polished and expensive, without replacing the cabinets at all!
Start with a few budget upgrades: pick chunky brass or black pieces, then check your finish consistency so every room feels intentional, not random.
Need a quick fix? Clean old hardware and spray paint it for an easy refresh.
Mix matching shapes if you like, but keep the color family steady.
Replace missing or worn pieces first, then add more over time.
Tiny changes, big wow, and your cabinets’ll look like they belong.
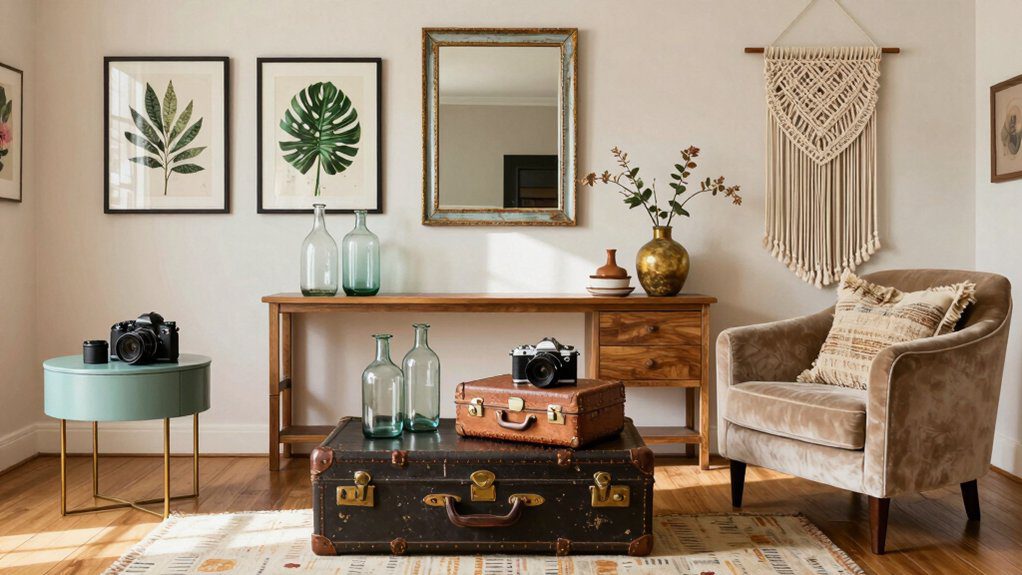
Choose Bigger Rugs and Statement Pieces
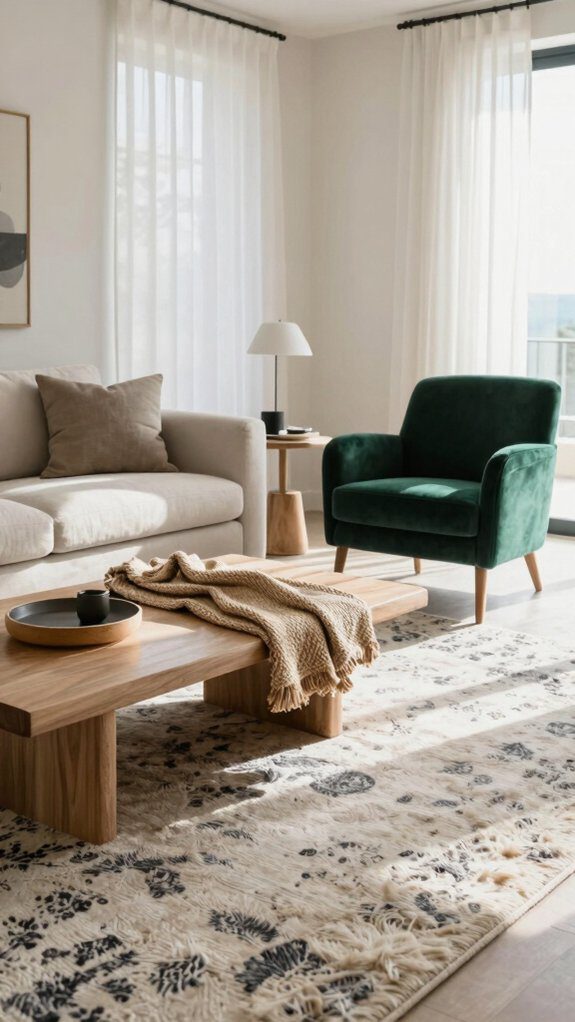
One of the fastest ways to make a room feel more polished is to play with scale, and yes, that starts from the floor up! A big rug gives you instant furniture cohesion, and it keeps the room from feeling choppy.
- Pick the largest rug your budget allows.
- If that’s out of reach, layer layered textures, like jute under a small Persian.
- Add one oversized mirror or lantern for a bold focal point.
- Keep balanced proportions everywhere else, so nothing looks like it wandered in from a giant’s house.
That’s the trick! Cozy, airy, and totally put-together.
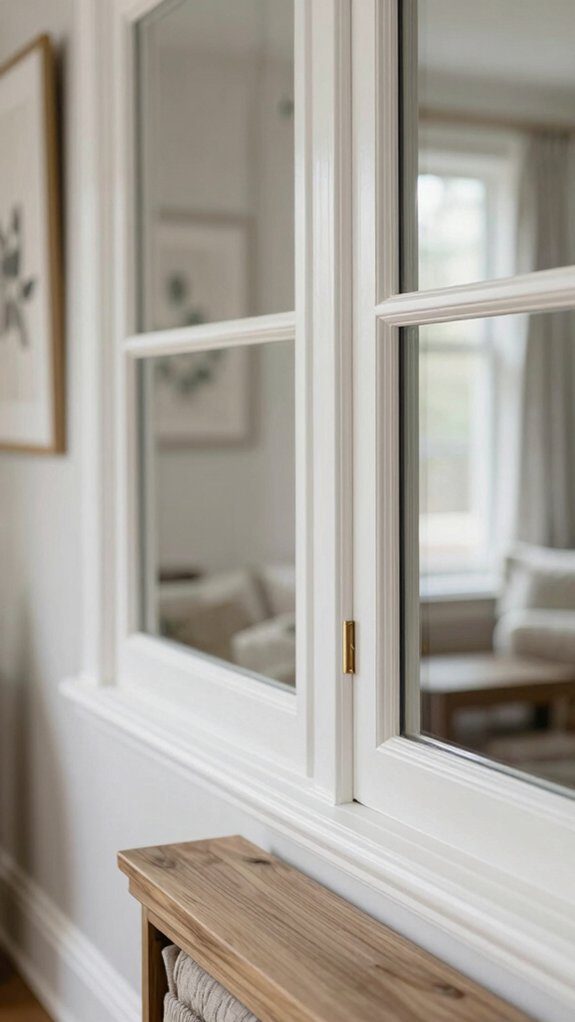
Hang Curtains Higher and Wider
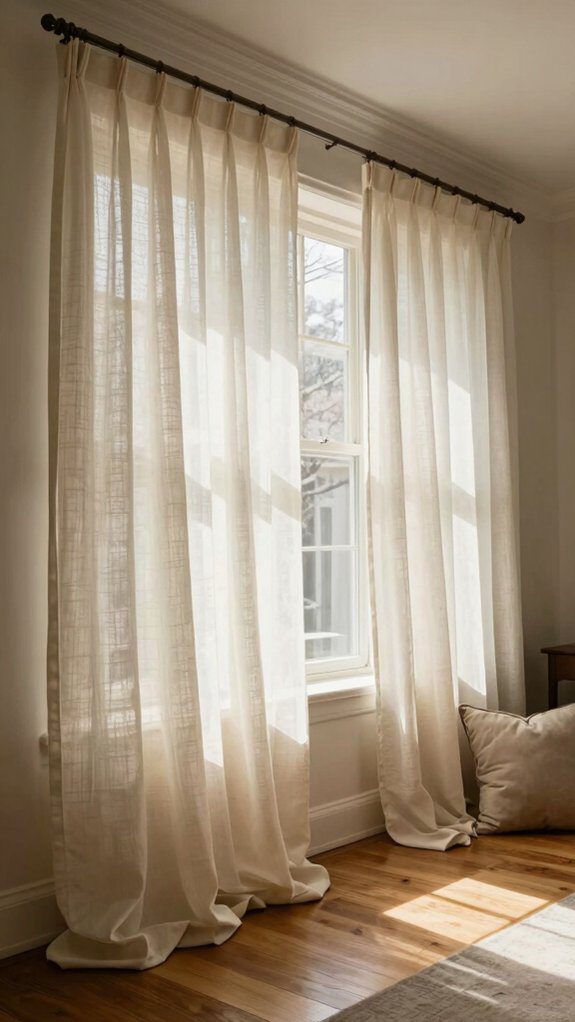
Start by raising your curtain rod a few inches above the window trim and letting it stretch wider than the frame, because that simple move makes everything feel taller and more polished.
You’ll only need a rod, brackets, and full-length panels, and once you hang them high and wide, the window suddenly looks bigger without any lavish remodel—pretty neat, right?
If your curtains still seem a little plain, stick with fabric that drapes well, since those long, clean folds give your room that easy, expensive look.
Raise the Curtain Rod
If you want your windows to look instantly more polished, raise that curtain rod higher and wider than you think you should—it’s a tiny move with a big “wow” factor! You’ll fit right in with the rooms that feel custom and calm.
- Mark the rod 4–6 inches above the trim.
- Extend it 6–12 inches past each side.
- Choose sheers or layer sheers, then let panels kiss the floor.
- Match the rod finish to your hardware, and use pleating tape for neat folds.
Keep curtains clear of the sill, and you’ll get better light plus that tailored, upscale look.
Extend Beyond Window Frames
Above the window frame, curtains can do a lot more than cover glass—they can fake height, add drama, and make the whole room feel way more finished!
Hang your panels a few inches above the trim, or even closer to the ceiling, then let them reach wider than the frame on both sides. You’ll get instant luxury proportions, plus a little Layered texture that feels custom, not cookie-cutter.
If store-bought curtains gap or bunch, add pleating tape behind them, and choose fabric with a nice drape, like linen-style.
Later, upgrade rods and custom valances for an even smarter finish, wow!
Use Full-Length Panels
When you hang curtains higher than the window frame, the whole room suddenly feels taller, cleaner, and a lot more polished—yes, even if the rest of the room is still a work in progress!
- Grab a simple rod, rings, and long panels.
- Mount the brackets close to the ceiling, then extend them 4–8 inches past each side.
- Pick floor-length fabric that kisses the floor, not puddles.
- Use pleating tape or pleated styles to Layer fabric texture and Maintain clean lines.
This small upgrade doesn’t cost much, but it makes your room feel custom, calm, and ready to belong in!
Add Easy Paneling for a Custom Look
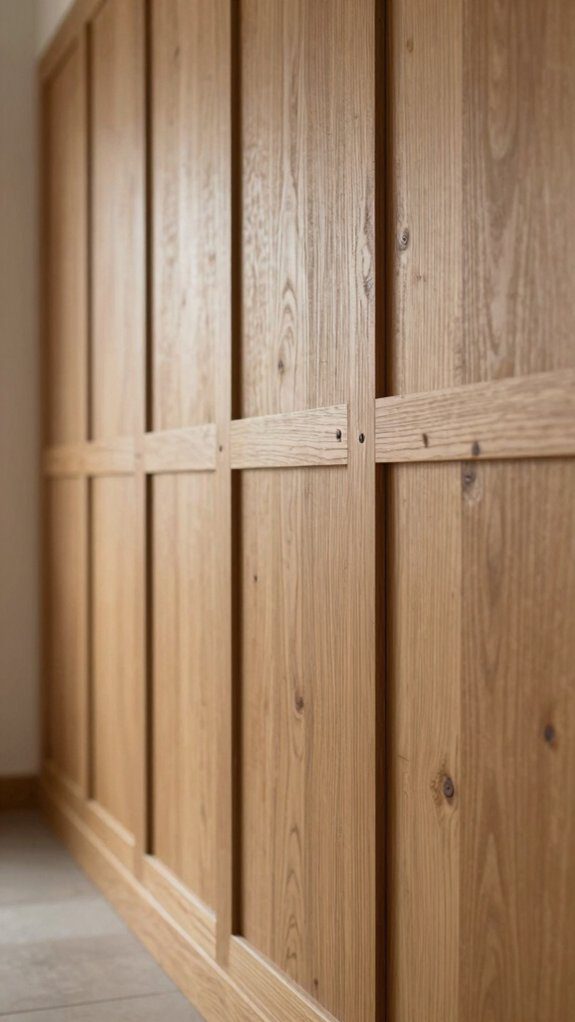
Paneling can work a little magic, because it adds that “oh wow, this room has real bones” feeling without turning your house into a construction zone. Pick board-and-batten or flat-panel wainscoting, and use MDF or primed composite for easy cutting, painting, and a friendlier price tag.
You can install it on studs or over drywall, then prime every piece first for crisp edges.
For Trim alignment tips and Seamless corner methods, add baseboard, casing, and a matching chair rail so everything feels framed, not pieced together.
Keep heights even, paint it a clean semi-gloss, and boom, your space looks custom and calm!
Style Plants in Larger Containers
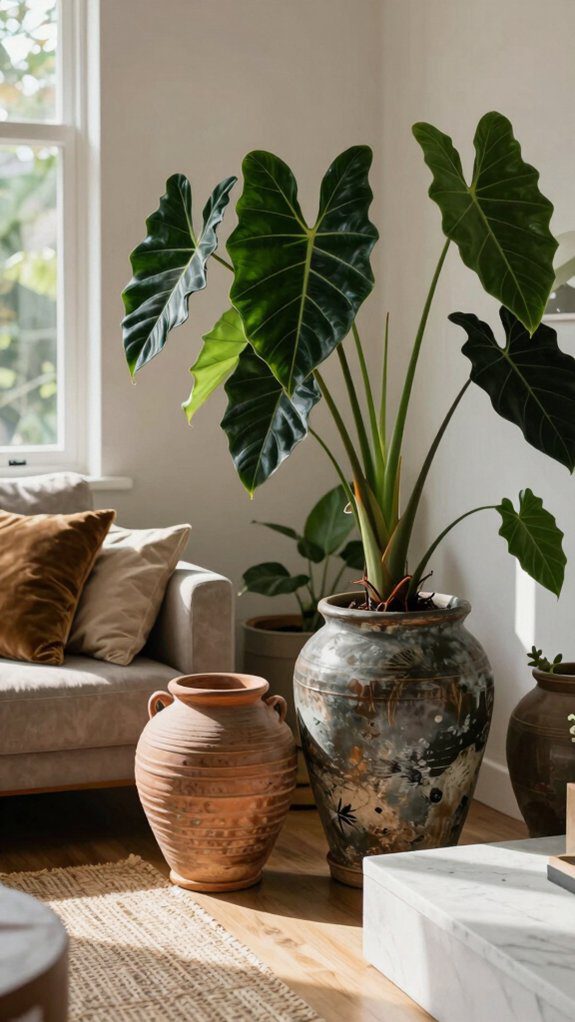
Those clean new walls can make your plants look a little wobbly by comparison, so give them a bigger stage! Move them into larger pots or Weighted baskets, and the whole room feels calmer and richer.
- Pick a container 2–3 times wider.
- Set a cheap plastic pot inside your showy basket.
- Add deep green moss topdressing to hide soil.
- Tuck in a tall plant for extra height.
It’s cheap, easy, and the result looks polished, not potted-after-lunch. Refresh the moss and wipe leaves now and then, and your plant corner will keep saying, “Yep, I belong here!”
Polish Windows and Wall Art
Next, curate a few meaningful pieces, like family photos, postcards, or kids’ art, and frame them well.
Matting and the right frame make cheap prints look polished.
Dust frames often, keep clean lighting nearby, and hang art with purpose so your wall tells one stylish story!
Update Recessed Lights and Fixtures

Once your walls look polished and thoughtfully framed, glance up, because lighting can make or break the whole vibe! Swap old recessed bulbs for warm LED cans, and you’ll ditch that tired yellow glow fast.
- Pick LED trims for a cleaner edge.
- Use a screw-in shade kit for a decorative fixture, no breaker drama needed.
- Try Smart bulb placement with round LEDs that match your room’s style.
- Set Lux dimming settings for soft evening pools that feel luxe.
These updates are cheap, beginner-friendly, and they make your home feel like the friend group’s favorite hangout, in the best way!
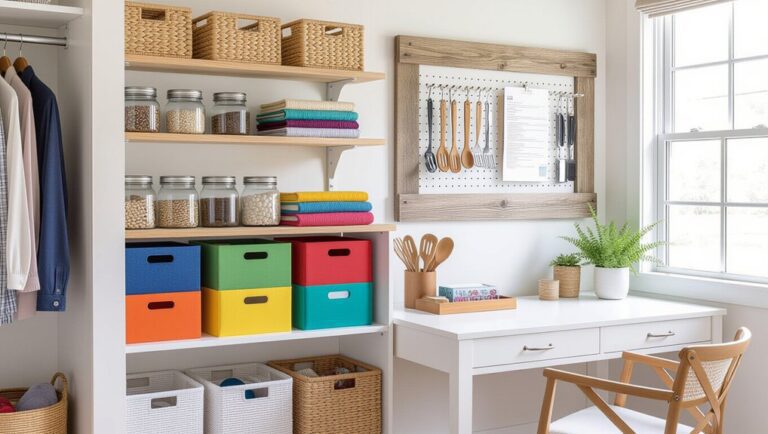
Hide Clutter in Pretty Containers
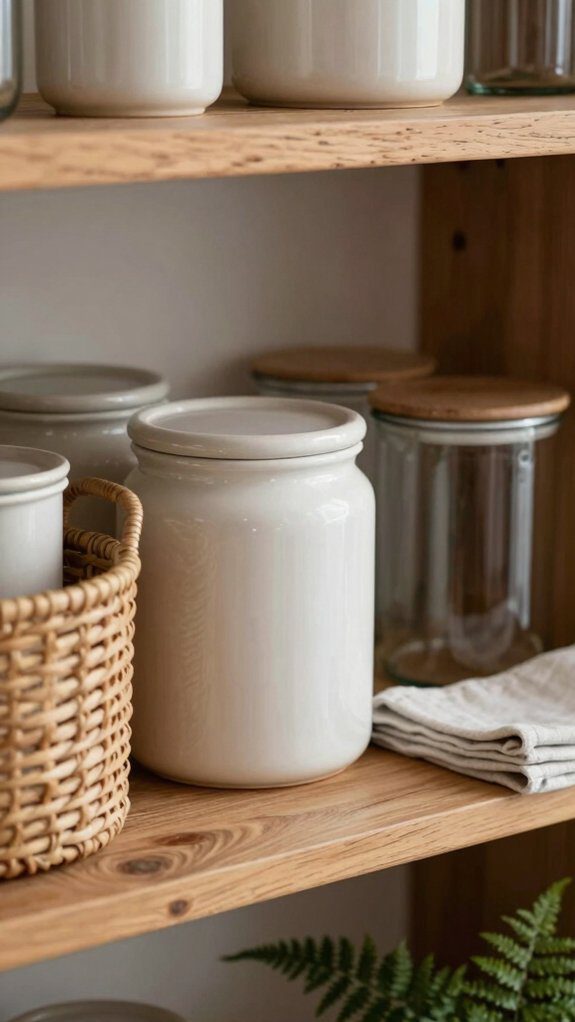
On shelves and counters, clutter can go from “functional” to “why is this even here?” in a flash, so start by decanting everyday stuff into pretty containers that actually deserve to be seen!
Grab matching glass jars, ceramic canisters, or tins, plus simple labels, then pour in laundry detergent, soap, cotton pads, or spray.
Use wide-bottom pieces so they feel sturdy and styled, not wobbly.
Keep a hidden replenish bin nearby for refills, and save under sink organization from overflow chaos.
Swap one ugly bottle at a time, and use the same font or color on each label.
Tiny changes, big wow!