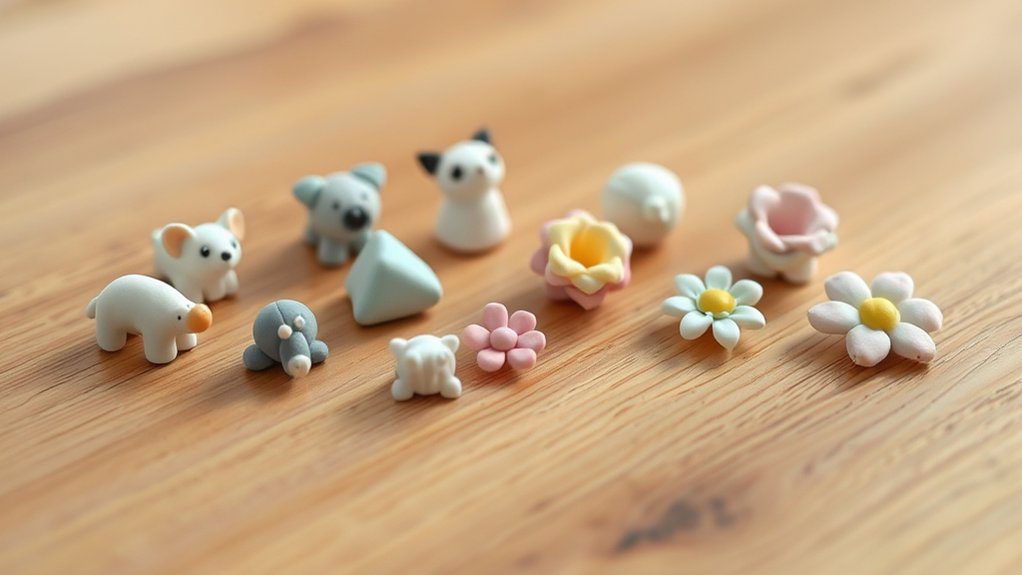
19 Air Dry Clay Crafts for Home Decor & Gifts
I love making air dry clay crafts because they’re cheap, beginner-friendly, and so cute! With clay, a rolling pin, and simple tools, I shape flower coasters, house ornaments, photo holders, vases, bowls, clips, keychains, bracelets, and earrings, then smooth, dry, paint, and seal them for a polished finish. Most projects take just a few hours of hands-on time and make sweet gifts or decor. Stick with me, and I’ll show you the easiest ideas first today!
Love cozy DIY projects? 💕
Get free printable guides, exclusive tutorials & surprise craft goodies straight to your inbox.
Disclosure: This post may contain Amazon affiliate links, at no extra cost to you. Content on DiyCraftNest is created with research support from AI tools and carefully reviewed, edited, and fact-checked by the lead author, Daniel Pat, to ensure accuracy and reliability. Learn more
Key Takeaways
- Make coasters, photo holders, and jewelry dishes from 3–6 mm clay slabs for easy, personalized home decor gifts.
- Create mini planters, candle holders, and tiny vases, then line or seal them for moisture protection.
- Use air-dry clay for clocks, incense trays, and salt spoons; let pieces fully cure before sealing or adding hardware.
- Smooth with a damp sponge, flip flat pieces during drying, then sand and varnish for a professional finish.
- Add color with acrylic paint, marble swirls, gold accents, or speckled finishes to make each gift unique.
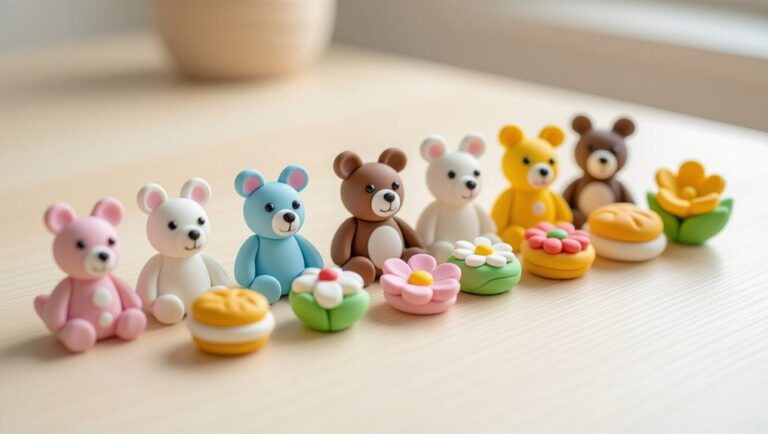
Air Dry Clay Flower Coasters
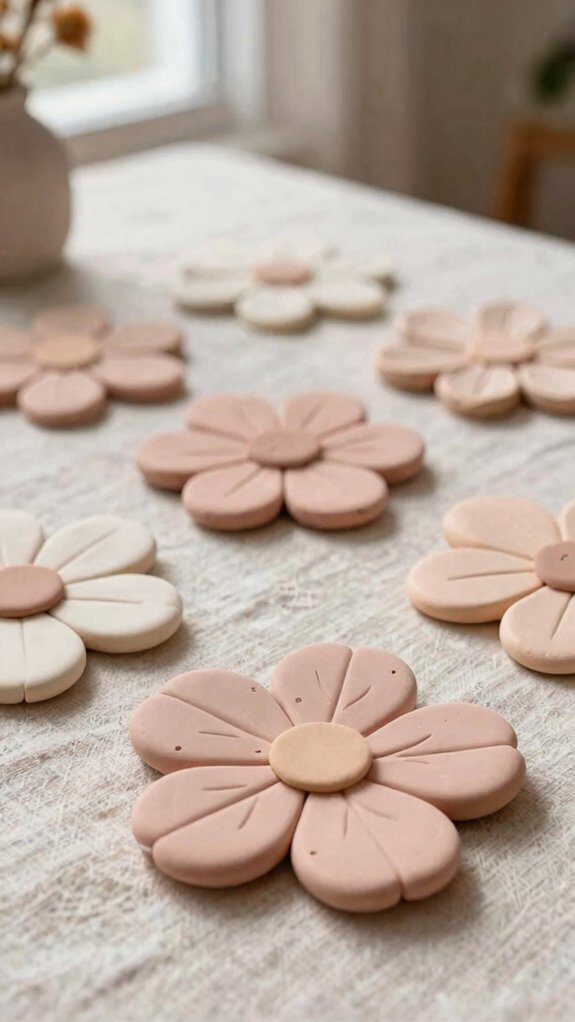
If you want a cute project that won’t cost much, I love whipping up air-dry clay flower coasters! I roll the clay to 1/4 inch, stamp petals, and smooth the edges—so easy!
Mix in a tiny bit of acrylic paint, or paint after drying, then add a clear varnish.
I dry them flat on parchment, flip them once, and sand them lightly for a pro finish. Want charm? Try leaf prints, gold edges, or seasonal variations.
A soft tea stain patina can look lovely, especially for a handmade set that belongs on your table, not in a craft stash.
Air Dry Clay House-Shaped Ornaments
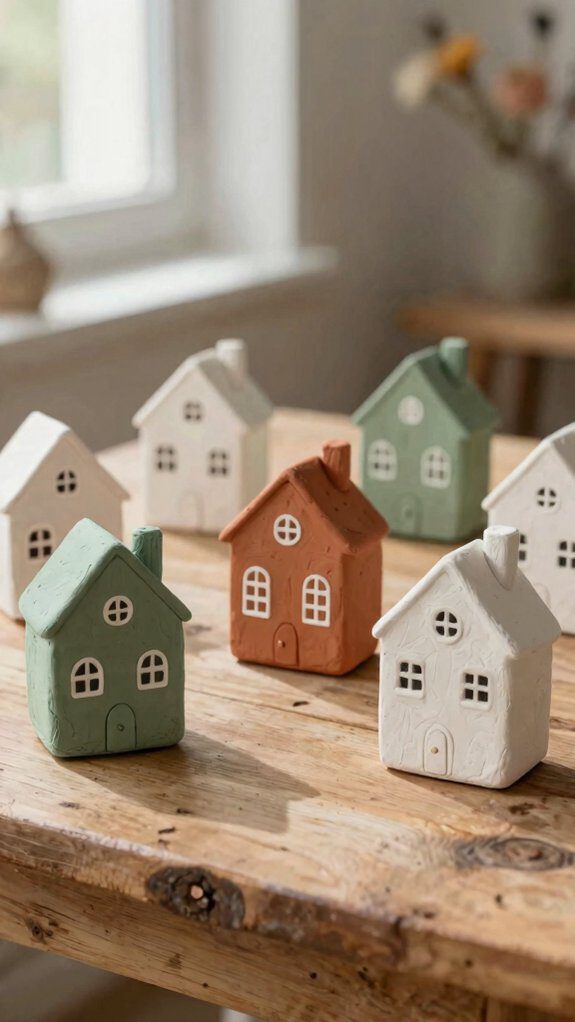
Tiny clay cottages are one of my favorite air-dry projects, because they look adorable and start with almost nothing more than clay, a rolling pin, and a little patience!
I roll the clay to 1/4-inch, cut a little house shape, and smooth the edges, then stamp windows, doors, or even a tiny house number. After drying 24–48 hours, I paint them in soft pastels, terracotta, or gold-touched monochrome, seal them, and thread ribbon through a hole. You’ll get cheerful seasonal themes and sentimental keepsakes, and the best part? A whole set feels elegant without costing much at all, honestly!
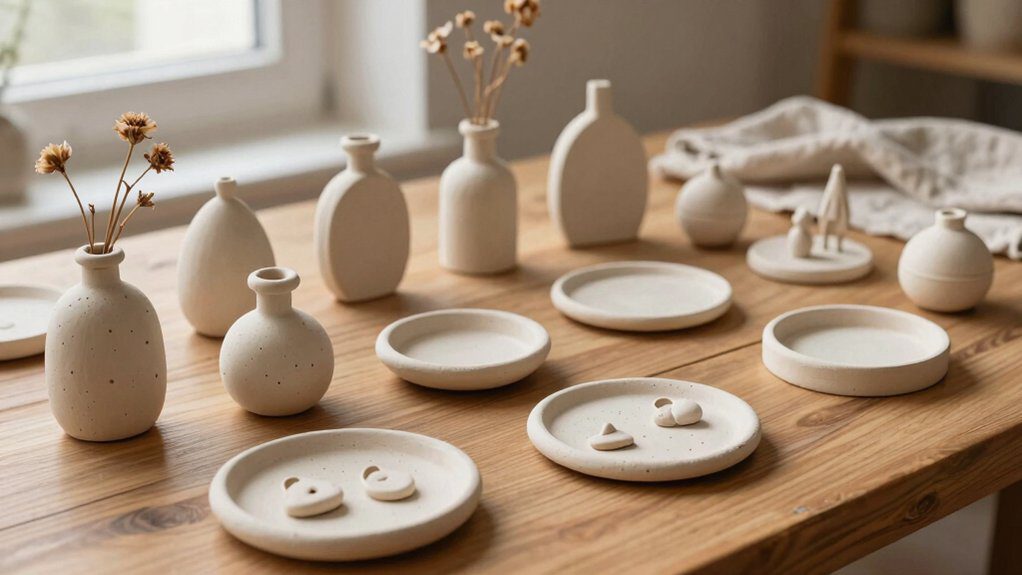
Tiny Air Dry Clay Magnet Vases
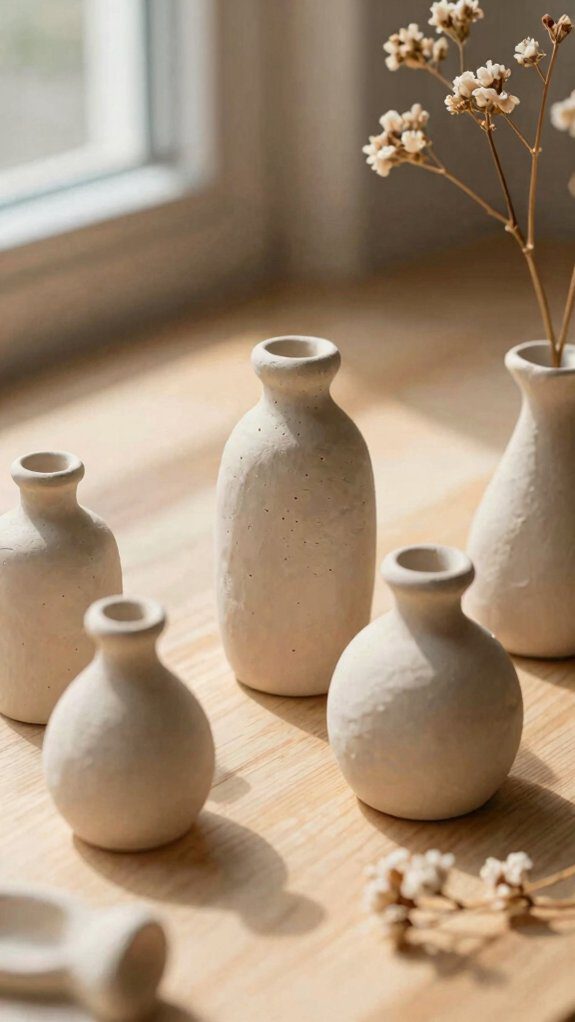
I love making little clay bud vases because they start with just air-dry clay, a dab of strong glue, and a tiny disc magnet, yet they end up looking like something you’d spot in a cute gift shop!
I shape a tiny hollow vase, let it dry 24–48 hours, then glue on a neodymium disc magnet. Check the magnet strength so it grips the fridge without sliding—no one wants a runaway bouquet!
After painting, I brush on a waterproof lining inside, which helps protect the clay and keeps faux or single-stem blooms looking fresh. It’s easy, cheap, and charming!
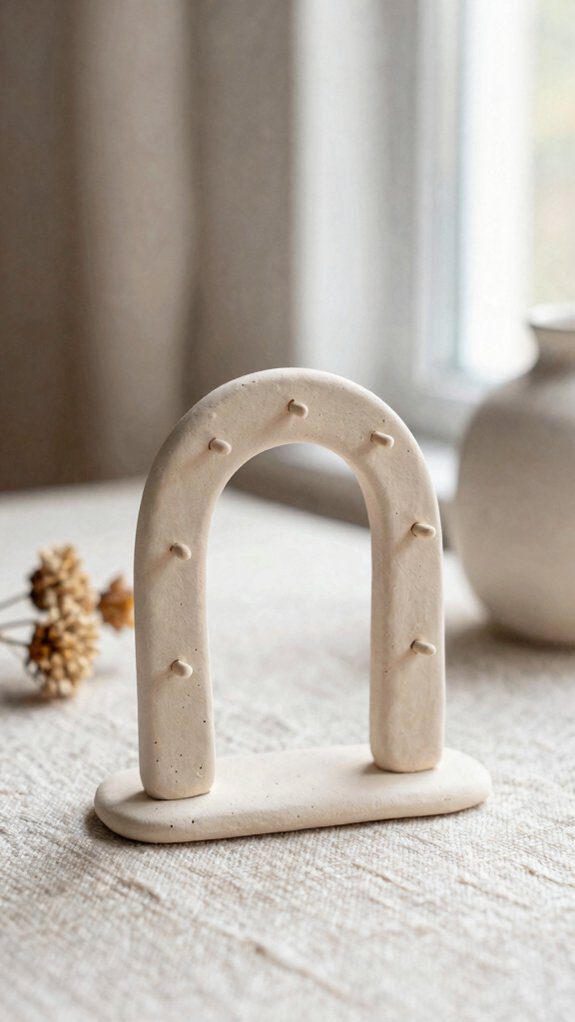
Air Dry Clay Photo Holders
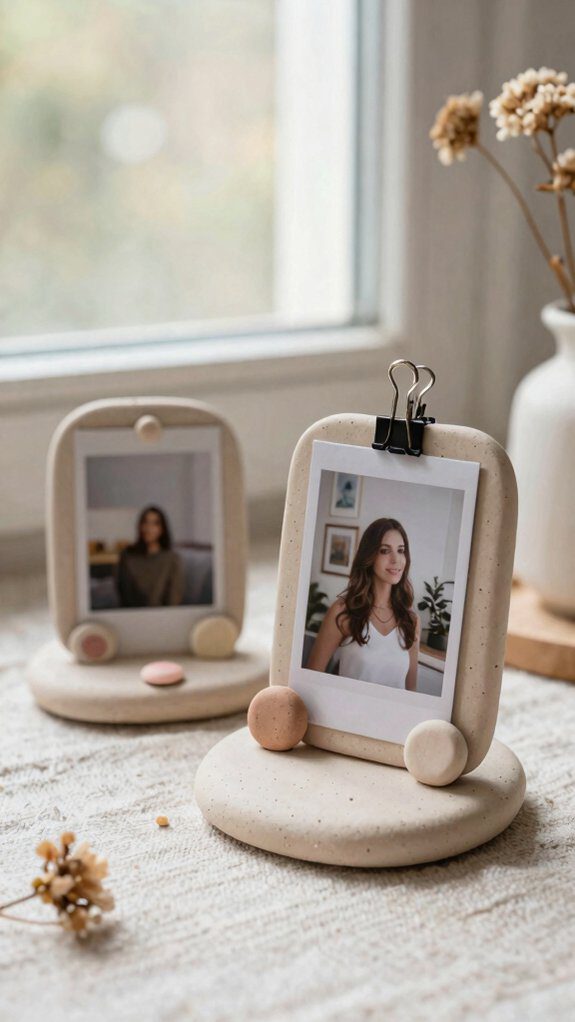
I love making air dry clay photo holders because a simple slab, a cheap cutter, and a tiny groove can turn into a modern display that looks way fancier than it costs—yay, budget craft magic!
Start with a 3–6 mm sheet of clay, shape it into a circle, rectangle, or abstract form, then add a slot, clip, or thin clay strip so your photo sits snug and secure.
If you want the real showstopper, I build in a weighted back or tuck in a small magnet, and after it dries, a little paint or gold leaf makes the whole piece pop!
Modern Holder Designs
How do you turn a little strip of air dry clay into a modern photo holder that doesn’t look homemade in the awkward way? I roll a three to four mm base, cut a slot, and let it dry for 48 hours. For geometric negative space, I like half moons or arches, painted monochrome or speckled.
A wider six to eight cm base adds stability, and a wire loop, metal clip, or initials before drying makes it yours. Seal it with varnish, and you’ve got modular stackability for gifts that feel polished, not precious! Honestly, it’s cute, quick, fun.
Photo Display Ideas
Where do you even begin when a tiny slab of clay needs to hold a favorite photo without face-planting? I roll 1/4-inch clay, cut a base, and score a slot—easy, cheap, and so welcoming.
- Wire stand: I press bent coated wire deep, let it dry, and paint it; it stays sturdy.
- Clip holder: I glue a paperclip into a hole, so you can swap wallet-size prints fast.
- Fridge combo: I seal a flat-back mini vase, add minimalist magnets, stackable frames, and get a cute surprise for gifts!
You’ll fit right in here, and I promise it.
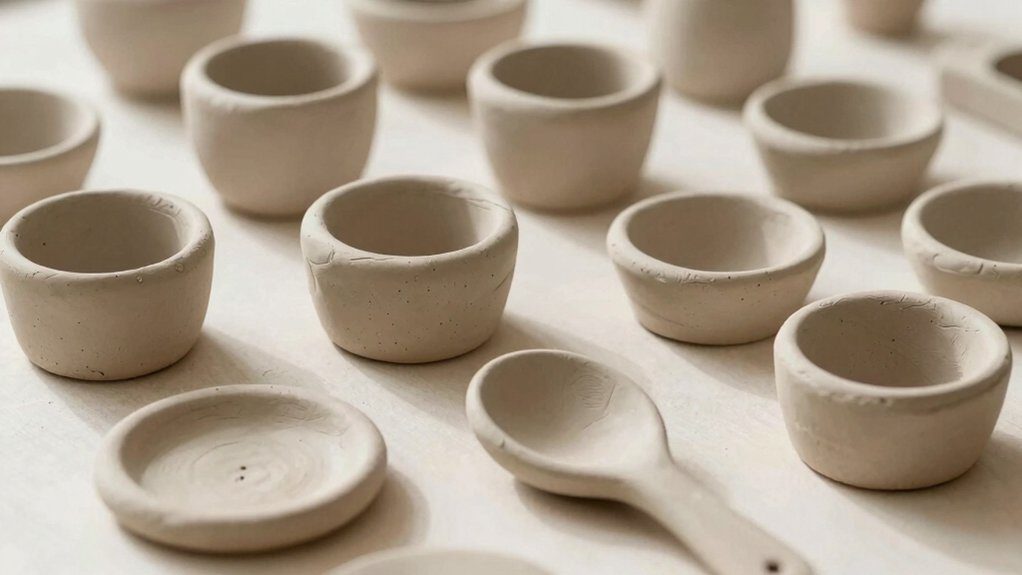
Air Dry Clay Wavy Painted Bowl
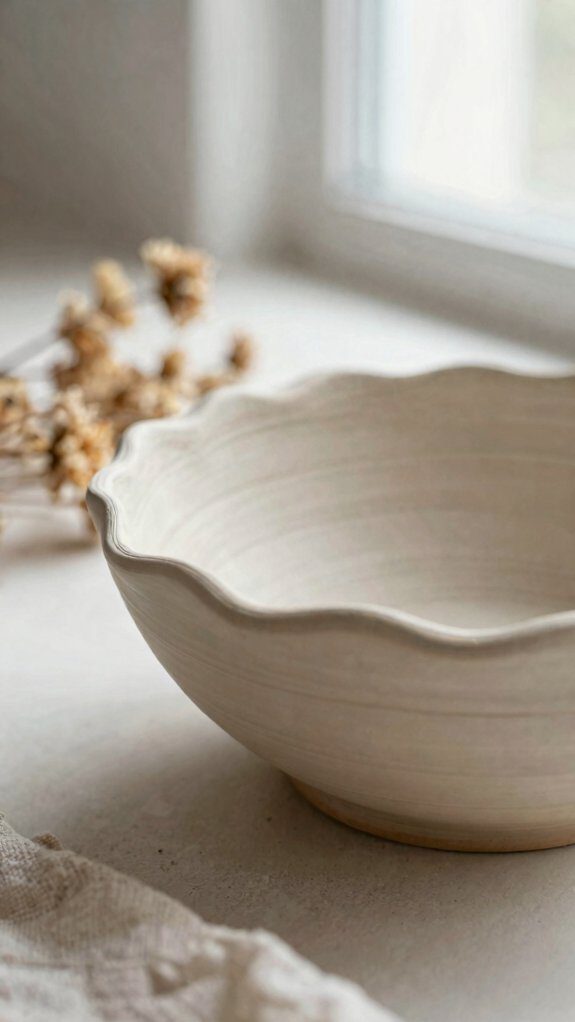
A wavy painted bowl is one of my favorite beginner air dry clay projects, because you only need clay, a rolling pin, a small bowl or mold, and acrylic paint to turn a plain slab into something that looks surprisingly elegant.
I roll a 3–6 mm slab, cut a circle, and pinch the edges into waves over a rounded bowl so it dries in 24–48 hours without warping. After sanding, I paint color blocks or pastels, then add textured glazing, sculpted rims, and a clear varnish; it looks polished, dries fast, and makes a spot for keys or jewelry!
Air Dry Clay Beaded Dishes
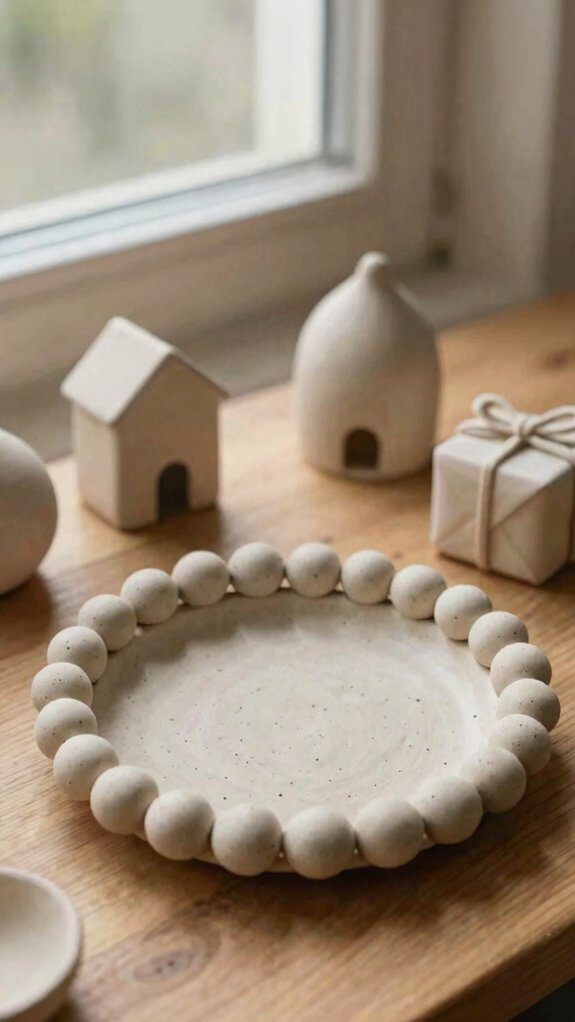
I love making air-dry clay beaded dishes, and I start with a flattened clay base plus tiny, even beads, because that scalloped rim looks so cute!
I press each bead gently into place, keep the sizes pretty uniform so the dish dries evenly, and let it sit on a flat surface for 24–48 hours—patience, I know, but it’s worth it.
After that, I paint the dish in soft pastels or speckles and seal it with varnish if it’ll sit near water, and suddenly your little dish looks elegant enough to brag about!
Shaping Beaded Edges
Start by rolling skinny clay snakes, about 2–4 mm thick, then cut them into even little pieces and place them around the rim—I like this part because a plain dish suddenly starts looking like something from a cute little boutique!
I press each bead gently with a damp fingertip, blending the inside without flattening the curve. For results, I keep:
- even bead spacing
- tiny slip at each join
- slow drying on a flat surface
That texture contrast helps the rim pop, and the whole dish feels handmade. You’ll really love it too, everywhere you gather, honestly.
Painting And Sealing
Brush in hand, I always let my air-dry clay beaded dishes cure all the way first, usually 24–72 hours, because wet clay and paint don’t get along, and nobody wants a cracky little surprise!
Once it’s dry, I sand lightly with 220–320 grit, then brush on thin acrylic layers for color, using texture techniques like marbling or speckle for a fun, custom look.
After that, I seal with non toxic sealants, and for coasters I do two coats, drying between them. If you want food contact, choose food-safe epoxy; otherwise, keep the dish for keys, rings, or treasures.
Air Dry Clay Earring Holder
Little clay circles can tame earring chaos, and I’m kind of obsessed with how easy this one is! I roll an 8–12 cm disk, punch paired slits, and let you know it’s earring storage without cost.
- Shape a flat slab.
- Add holes or a folded stand, then dry 24–48 hours.
- Sand, seal, and decorate with paint or gold leaf.
If you want extra material durability, I slip in a dowel or pin before drying. Add felt feet, and your earrings finally get a cute home that feels yours! You’ll love the tidy vibe, trust me too.
Air Dry Clay Ring Holder
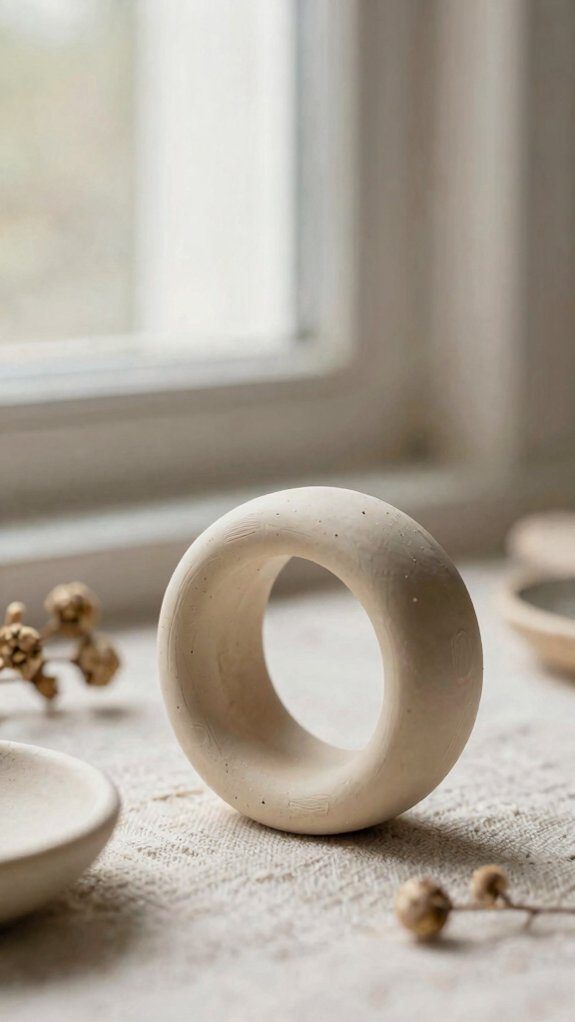
If your earrings finally have a cute home, I think your rings deserve one too! I like shaping air dry clay into a cone or shallow dish, because it’s cheap, quick, and for clay ring storage I smooth the surface with a damp sponge, let it dry 24 to 48 hours, then seal it for everyday use.
For stability, I make the base 3 to 5 cm wide or press it into a shallow dish, so it won’t tip. Then I add paint, gold leaf, or marbled clay for a textured ring display that feels gift-ready and totally elegant!
Air Dry Clay Book Ends
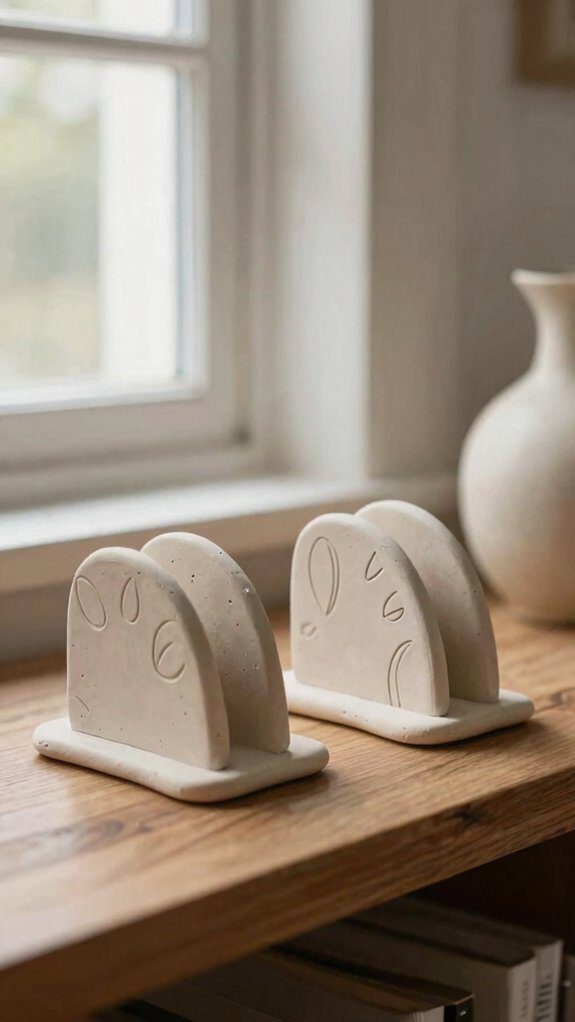
Let’s turn a couple of chunky air dry clay pieces into book ends that actually keep your shelf from wobbling in style! I make two weighted slabs, or sculpt little arches, and press in a thin cardboard insert for strength.
- Mix clay for a marbled texture, then stamp or carve.
- Let them dry 48 hours, so they won’t crack.
- Paint, add gold leaf, and seal.
They’re cheap, easy, and honestly feel like a cozy little club for your books! Seal with varnish, and you’ll get sturdy ends that look store made and feel like yours today.
Air Dry Clay Drink Stirrers
I love turning a little air dry clay into drink stirrers, because all it takes is clay, a splash of water, and a few minutes to roll skinny rods about 4–6 mm thick and 15–20 cm long—tiny sticks with big party energy!
I smooth each rod with water, dry it 24–48 hours, then sand and coat with food-safe epoxy. Twists, braids, and seasonal motifs make sets feel personal, and I can add color or initials. For a better grip, I make ergonomic handles, then pack 4–6 in kraft boxes with care cards. They’re cheap, beginner-friendly, and party-perfect for you!
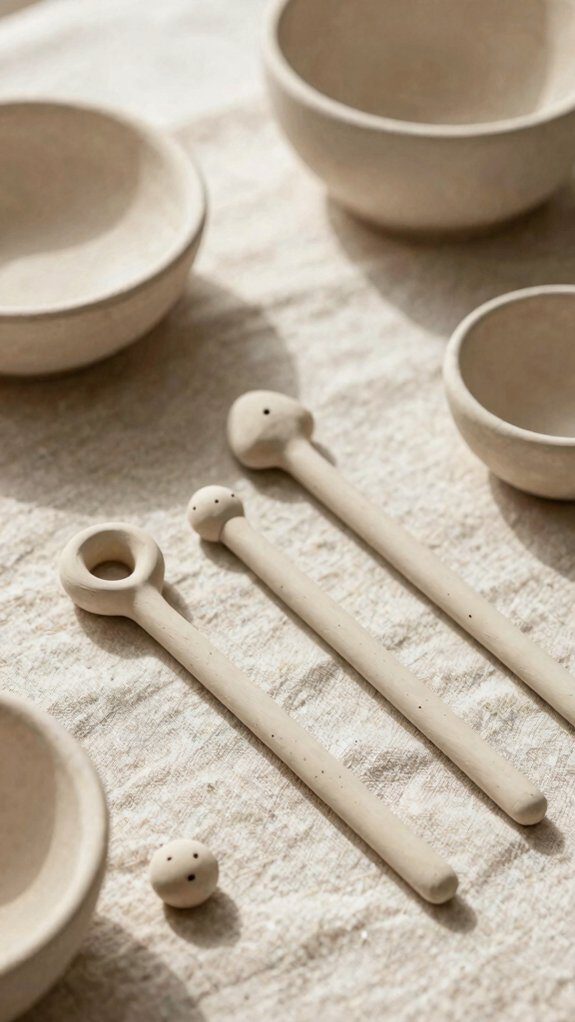
Air Dry Clay Salt Spoons
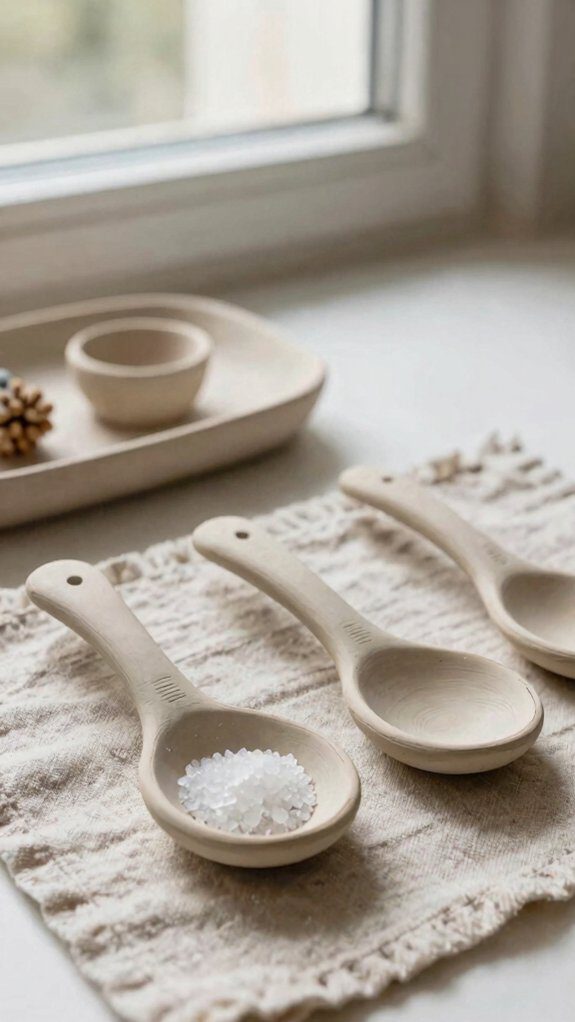
After making drink stirrers, I like keeping the clay party going with tiny air dry clay salt spoons—little 2–3 inch scoops that look adorable beside a salt cellar and only need a pinch of clay, a few drops of water, and a damp sponge to get started!
Here’s my plan:
- Shape a tiny bowl and handle.
- Smooth it with a damp sponge, then dry 24–48 hours.
- Paint, seal the bowl, and add initials.
My maintenance tips: wipe, don’t soak, so it stays sturdy.
For a sweet finish, I tuck matching spoons into gift packaging with twine—cute, cheap, and wow-worthy!
Air Dry Clay Incense Holders
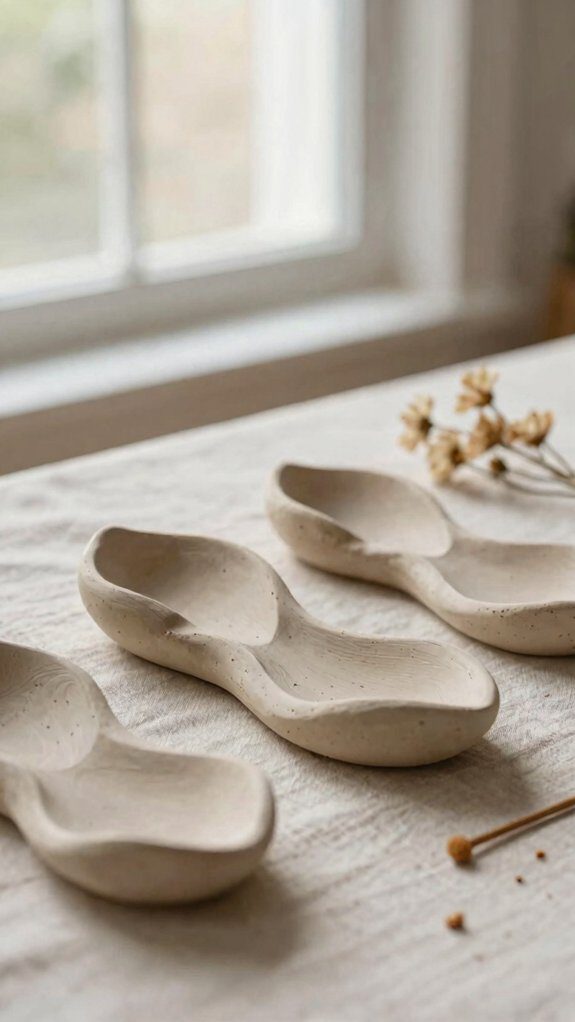
I love starting with just air-dry clay, a little water, and a craft knife, then shaping a slim groove dish or a tiny minimalist tray that looks modern without a lot of fuss.
After I let it dry for about 48 hours, I sand it smooth, add a quick coat of paint or a speckled finish, and seal it with a heat-resistant varnish so it stays cleaner and lasts longer—nice! For stick incense, I cut a small angled slot, and for cones I press a shallow well, so the ash lands where it should and your shelf stays happy instead of smoky.
Minimal Holder Designs
Tiny clay tray, big chill—I love how a minimal air-dry clay incense holder can start with just a lump of clay, a toothpick, and a smooth table, because you can shape it into a flat slab or a gentle curved trough, then add a 2–4 mm groove and a 3–5 mm hole so the stick sits steady without getting wobbly.
I love simple silhouettes and geometric minimalism—they make a room feel friendly. Try:
- Roll flat.
- Pierce straight.
- Add ash well.
That’s cheap, easy, and the tiny holder looks like it already belongs on your shelf here!
Painting And Sealing
Once your holder has that clean minimal shape, I like to let it dry fully—usually 24 to 72 hours, depending on thickness—then I smooth any rough spots with fine-grit sandpaper so the paint won’t catch on little clay bumps.
Then I paint with acrylic or water-based paints, because they layer well and make color mixing feel easy, warm, and shared.
After that, I do sealer testing on a scrap piece, then brush on 2 or 3 thin coats of clear water-based varnish or acrylic sealer, drying between coats, and I choose heat-resistant sealer near the hole and ash spot.
Air Dry Clay Candle Holders
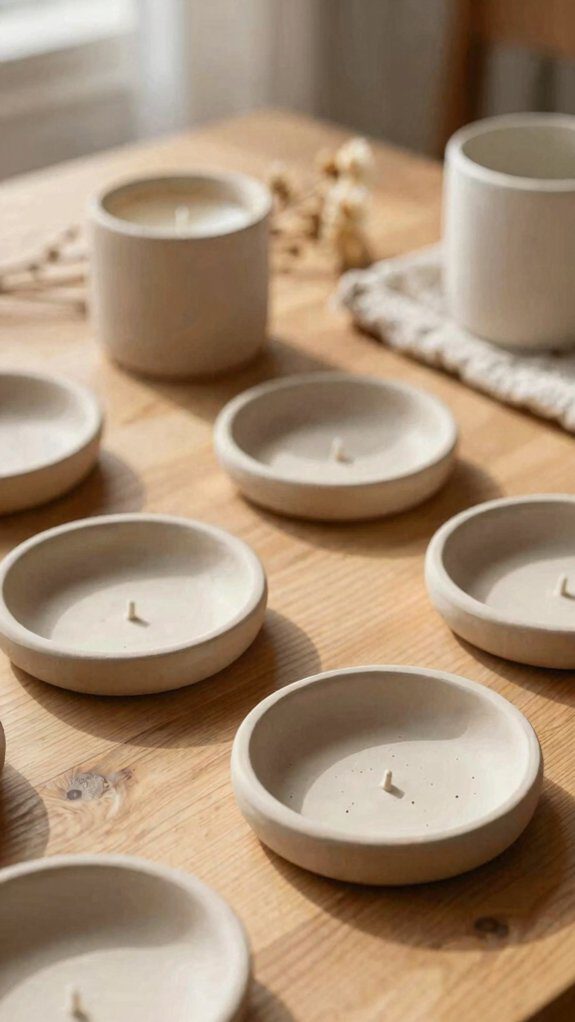
With just a lump of air-dry clay, you can make a candle holder that looks like it came from a cute little shop, and it’s honestly a very friendly beginner project!
I like shaping tea-light cups, taper holders, or shallow votive dishes, then letting them dry 24–48 hours.
Try:
- stamp or marble it,
- seal it with heat-safe varnish,
- use battery candles for peace of mind.
I keep my set consistent, which makes sweet gifts.
Air-dry clay gives kiln alternatives and gentle scent diffusion, too, if you pair it with wax nearby for cozy little home magic.
Air Dry Clay Clock
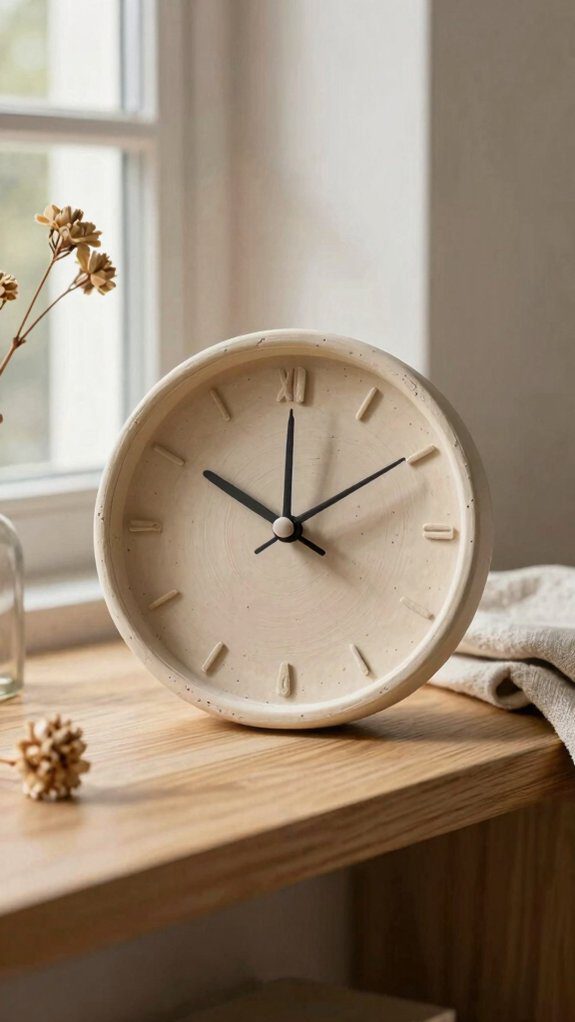
I start an air dry clay clock with just a few basics—clay, a rolling pin, a cutter, sandpaper, and a small clock kit—so it’s a fun, low-cost project, not a scary one!
Next, I roll the clay, cut a clean round or half-moon shape, smooth the edges, and let it dry, because a neat shape makes the whole clock look polished.
After that, I paint it with acrylics or marble swirls, add the clock hands, and seal it up for a clean finish that looks store-bought, plus a little hanging plate on the back makes it extra easy to display.
Materials And Tools
For the finish, I reach for acrylic paints or water-based pigments, plus a matte or gloss sealer to protect the surface, and if you want a little sparkle, gold leaf or Rub ’n Buff is a fun bonus.
I grab:
- mid-weight air dry clay, about 500–1000g for a small clock,
- a smooth rolling pin, a craft knife, and fine-grit sandpaper,
- a slim battery-operated quartz kit, a cardboard drying board, and strong glue.
I work with proper ventilation, and kiln alternatives like air drying keep things renter-friendly and welcoming from start to finish, honestly, for us, too.
Shape The Clock
Roll out the air dry clay into a circle, half-moon, or modern geometric shape, and keep it about 1/4 to 3/8 inch thick so your clock face stays sturdy instead of saggy—nobody wants a wall clock that looks like it melted in the sun!
I smooth the surface with a damp sponge, add texture if I want, then let it dry flat for 24 to 48 hours.
I check clock proportions early, because a centered hole must match mechanism compatibility, and common shafts run about 8 to 10 mm.
That step saves headaches and keeps your piece at home!
Paint And Assemble
Now comes the fun part, because a plain clay shape turns into a real clock with just a little paint and a few easy hardware pieces! I brush on gesso, then acrylic color, and I let each layer dry so the finish stays smooth.
Try this:
- Marble swirls for instant charm.
- Hand lettering for a personal touch.
- Texture experiments with sponges or combs.
After sealing, I drill the center hole, attach the quartz movement from the back, and add the hands. It’s beginner-friendly, affordable, and honestly, your wall’s about to brag a little for your place!
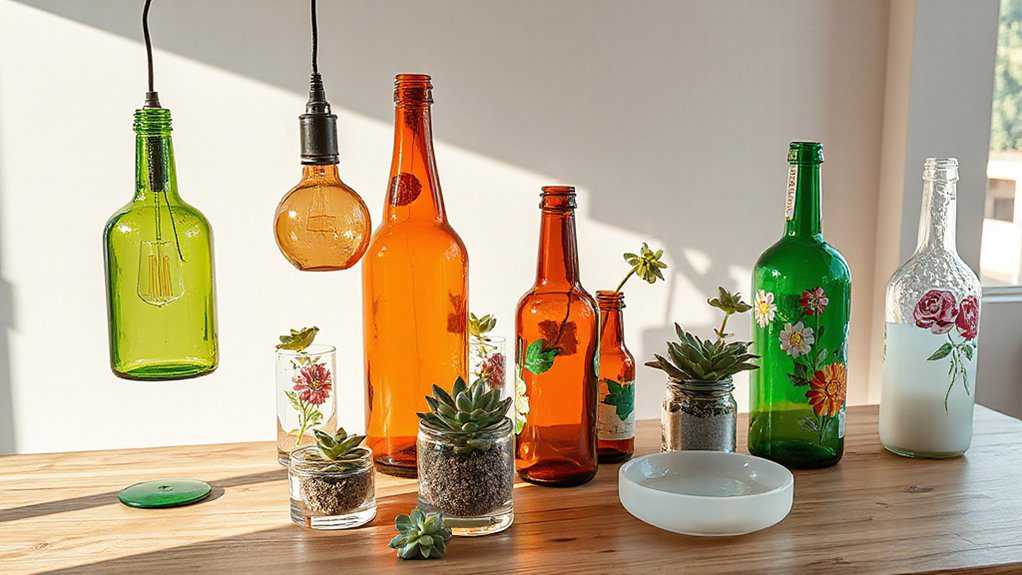
Air Dry Clay Mini Planters
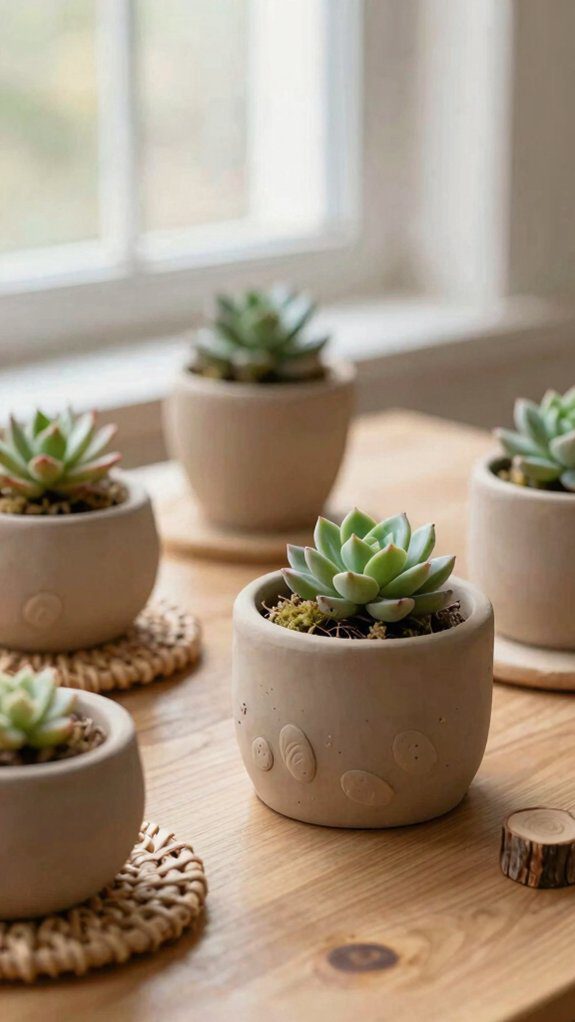
I love turning a lump of air-dry clay into tiny planters—just grab a small bowl, a balloon, or even your hands, press in the shape, and smooth the sides with a damp sponge for that clean, modern look!
Then I let it dry 24–48 hours, but I wait 48+ hours before sealing, because strength matters.
For succulent sizing, I keep them 2–3 inches wide and 1–2 inches deep, so roots stay cozy and moisture won’t linger.
My waterproofing tips: add a plastic liner or drainage hole, tuck in pebbles, and finish with sealer. Painted pastels make every pot gift-ready!
Air Dry Clay Hair Clips
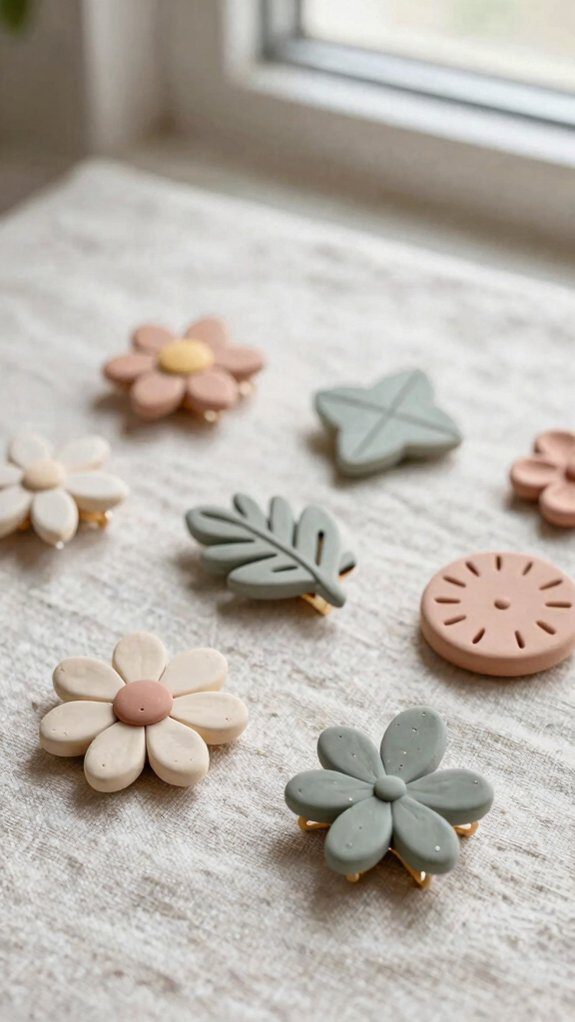
I love starting air dry clay hair clips with simple shapes like hearts, stars, or tiny flowers, because all you need is clay, a metal clip, and your fingers.
Once I smooth the clay on, I let it dry, then paint soft pastels, marbled swirls, or a little gold leaf for a finish that looks elegant fast!
If you want them to last, I always wait until they’re fully cured before I attach or wear them, since patience here saves you from sad, cracked clips.
Easy Clip Shapes
Usually, I start with simple shapes like hearts, stars, or tiny arches, because air dry clay makes cute hair clips without a kiln, and it’s honestly one of the easiest beginner crafts out there!
I keep the vibe light, using minimal silhouettes and geometric staples, so you can feel crafty fast.
Grab clay, a rolling pin, cookie cutters, and a metal clip, then try:
- Roll clay 2–4 mm thick.
- Cut clean shapes.
- Dry, glue, and press firmly.
They’re cheap, beginner-friendly, and the finished clips look sweet, sturdy, and very “I made this!”
Save one for friends.
Custom Color Finishes
Once you’ve got those cute clip shapes, the real fun starts—color! I mix acrylic paint into softened clay, adding custom pigments pea-sized for a golf-ball lump, so the color stays bold and won’t flake. For swirls, I twist two or three thin ropes, then fold lightly—color theory loves a little chaos!
| Step | Tip |
|---|---|
| Mix | custom pigments |
| Swirl | color theory |
| Seal | clear varnish |
After 24–48 hours, I sand edges smooth, then seal with matte or gloss varnish. If I want a pop, I tap on gold leaf or Rub’n Buff sparingly, add one last coat, and call it clip magic!
Air Dry Clay Keychain Charms
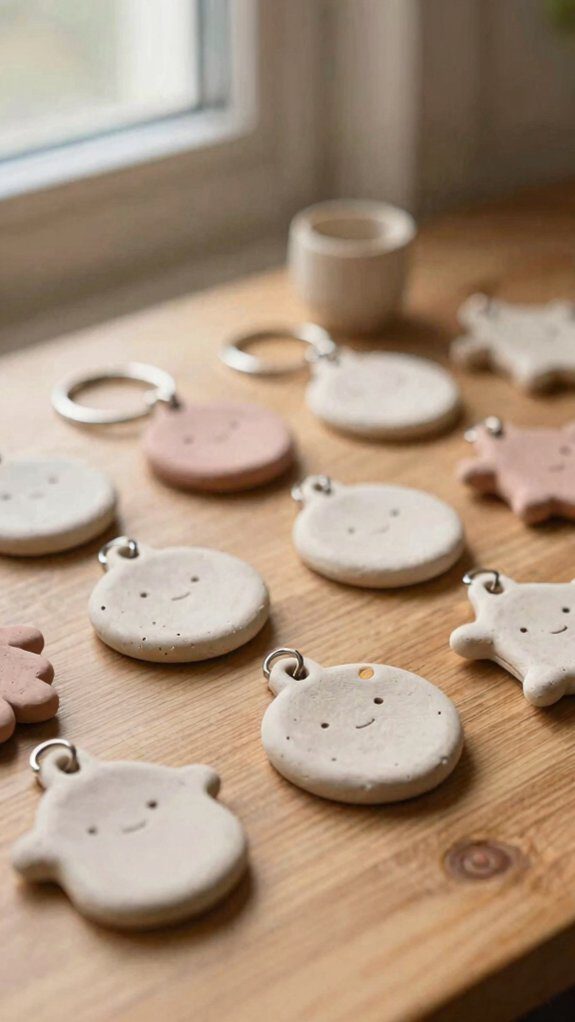
Roll out a little air-dry clay to about 3–5 mm thick, and you’ve already got the base for a super cute keychain charm! I like using cutters or a craft knife for custom silhouettes, then I poke a straw hole and let it dry 24–48 hours. It’s cheap, easy, and so satisfying.
- Stamp names or dates for a personal touch.
- Marble two colors, then add tiny gold leaf details.
- Seal with weatherproof coatings, add a jump ring, and gift a tiny set—three charms feels extra special!
I love how low-cost they are, and they make gifts.
Air Dry Clay Braided Bracelet
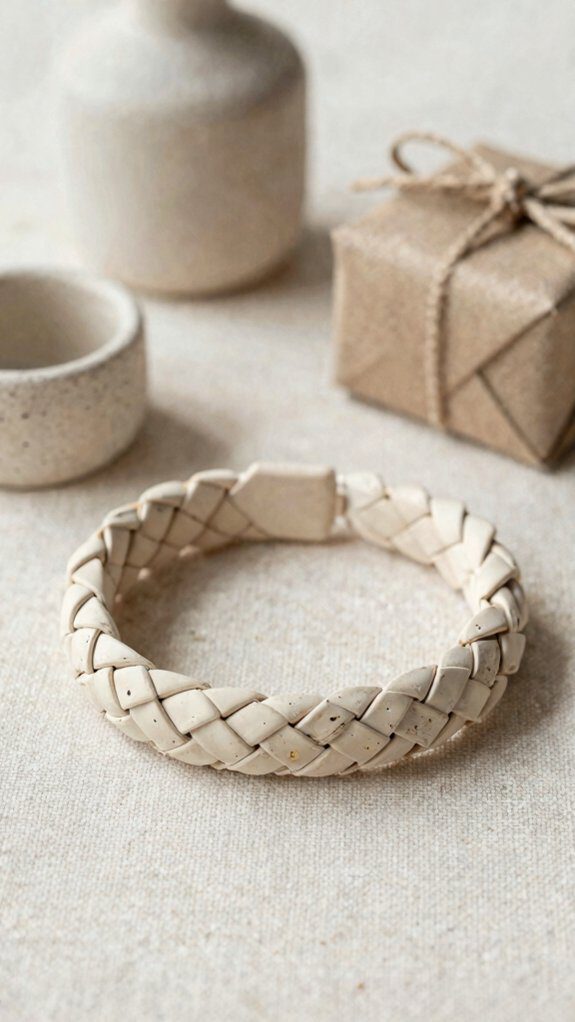
Twist three skinny snakes of air dry clay together, and you’ve got the start of a bracelet that looks way fancier than it is!
I roll three even strands, braid them into a cuff, and smooth the joins with a dab of water. After drying 24 to 48 hours, I flip it once on a flat surface if it starts leaning, and that little trick saves the cuff from weird banana vibes too. I sand it, paint it in neutrals or metallics, then seal it so sweat doesn’t win.
For braided symbolism and DIY gifting, I love hiding a thin elastic cord inside before drying, because the finished fit feels personal, sturdy, and ready to share. Easy, cheap, and magical on your wrist!
Air Dry Clay Earrings

I love shaping air dry clay into tiny earrings, because they’re light, cute, and way cheaper than they look! To make your own, I use small cutters, a roller, acrylic paint, and hypoallergenic findings.
- Cut arches or studs, then dry them 24–48 hours.
- Sand, paint, and seal with varnish for lightweight durability.
- Add hooks or posts, and try marbled or gold-leaf accents for a shop-ready finish.
I’ve sold these, and people love the tiny, handmade vibe!
Reinforce holes with eye pins before drying, and you’ll avoid cracks, which is honestly the secret sauce for earrings that last and look polished!
Frequently Asked Questions
How Long Does Air Dry Clay Usually Take to Fully Cure?
I’d say air dry clay usually fully cures in 24 to 72 hours, though drying times vary. I’ve found thickness effects matter most: thicker pieces need longer, so I’ll help you check carefully for safety.
Can Finished Air Dry Clay Pieces Be Made Water-Resistant?
Yes, I can make finished air dry clay pieces more water-resistant by sealing, coating, and protecting them with waterproof coatings or resin sealing. You’re not alone—I’d help your pieces last longer and feel cared for.
Which Sealant Works Best for Protecting Painted Clay Crafts?
I think acrylic varnish works best for painted clay crafts because it protects color and invites a finish; for tougher wear, I’d choose polyurethane spray. You’ll feel confident sealing pieces that belong in your space.
How Do You Prevent Air Dry Clay From Cracking?
To prevent cracking, I keep clay evenly thick, work in small sections, and choose slow drying. I also mix in flexible additives when needed, then cover pieces lightly so you’ll feel confident making them too.
What Is the Best Way to Store Unused Air Dry Clay?
I store unused air dry clay in airtight containers, wrapped with damp cloths, so it stays soft and ready for us to create again. You’ll feel confident when your clay stays fresh for next project.