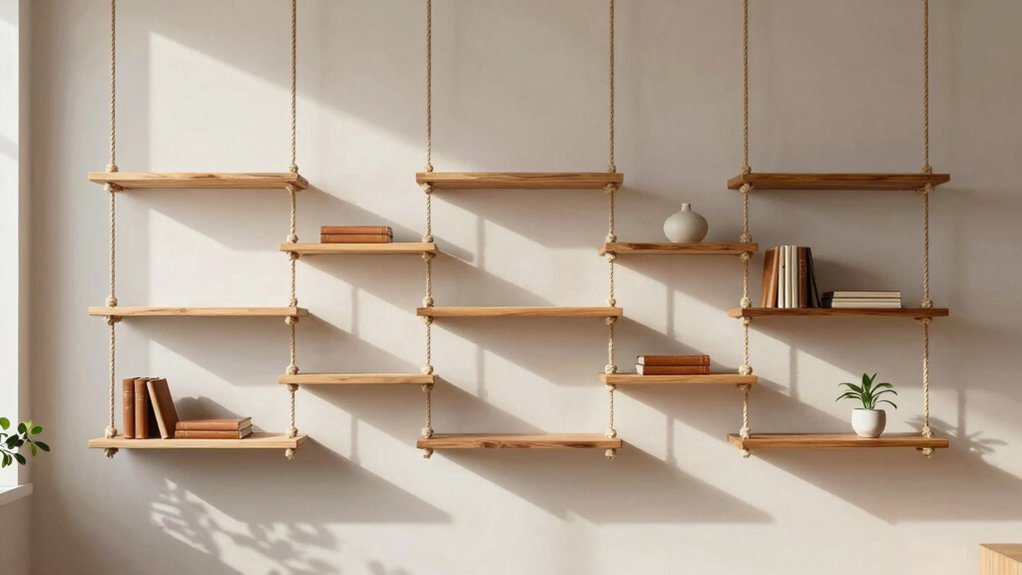
10 Rope Hanging Shelf Ideas That Feel Minimal and Aesthetic
I love a rope hanging shelf that feels calm and handmade, and I’d start with light wood, jute rope, and a simple board cut to about 8 x 24 inches—easy, cheap, and pretty! Try a double-layer version, chunky knot details, or a tiny corner shelf, then mix in plant displays, dark wood, neutral finishes, or bedroom-friendly soft shapes. Even small walls work, and the best part might be the most surprising one up next…
Love cozy DIY projects? 💕
Get free printable guides, exclusive tutorials & surprise craft goodies straight to your inbox.
Disclosure: This post may contain Amazon affiliate links, at no extra cost to you. Content on DiyCraftNest is created with research support from AI tools and carefully reviewed, edited, and fact-checked by the lead author, Daniel Pat, to ensure accuracy and reliability. Learn more
Key Takeaways
- Use light wood and natural jute or sisal rope for a warm, minimal shelf with visible grain.
- Keep boards slim, around 8 by 24 inches, to create a clean look that fits small spaces.
- Thread rope through drilled corner holes and tie adjustable knots underneath for a simple floating effect.
- Choose thick rope and even knot placement for a handcrafted style that still feels balanced and aesthetic.
- Paint or dye lightly in neutral tones to soften the shelf for boho, bedroom, or plant-display styling.
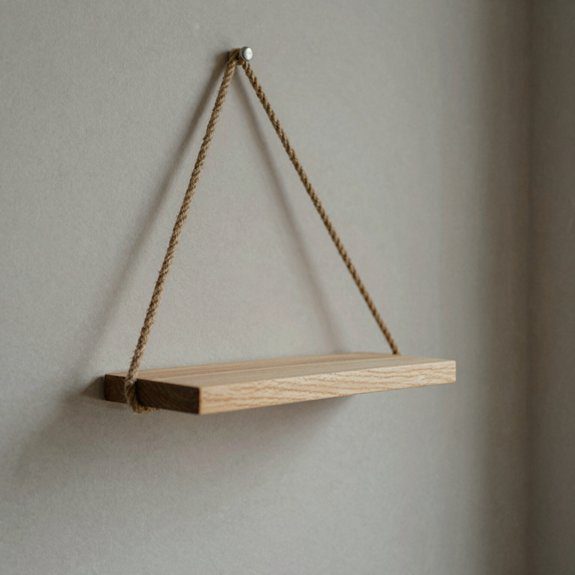
Simple Rope Shelf with Light Wood
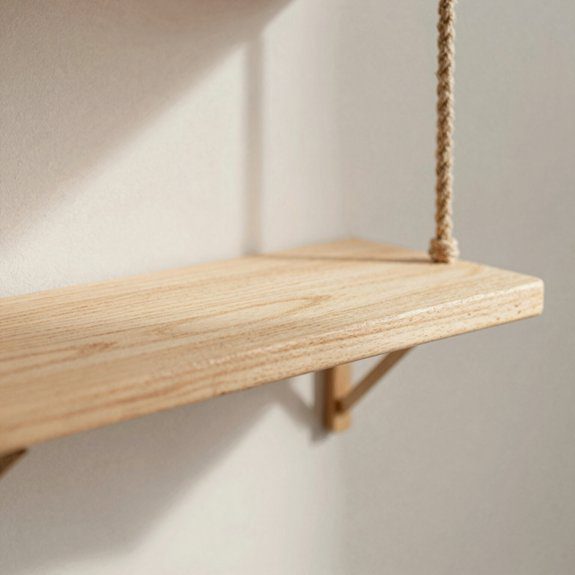
If you want a rope shelf that looks clean, warm, and easy to live with, I’d start with light wood and a simple jute or sisal rope—nothing elaborate, just a really pretty little project! I love this rope shelf because it feels friendly, not fussy, and it fits right into a cozy room.
I cut my light wood boards to about 8 by 24 inches, painted them with diluted paint so the grain still showed, then marked the corners with a tiny paper template.
After drilling, I threaded 25 feet of rope through the holes and tied adjustable knots underneath.
For hanging, I used minimal hardware, and that kept the whole thing simple.
The best tip? Test the tension slowly, because level shelves are essentially the universe saying, “Yes, you belong here.”
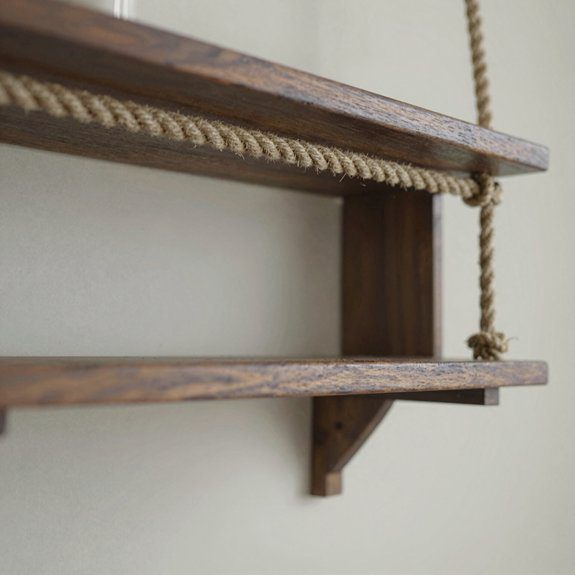
Double Layer Rope Hanging Shelf
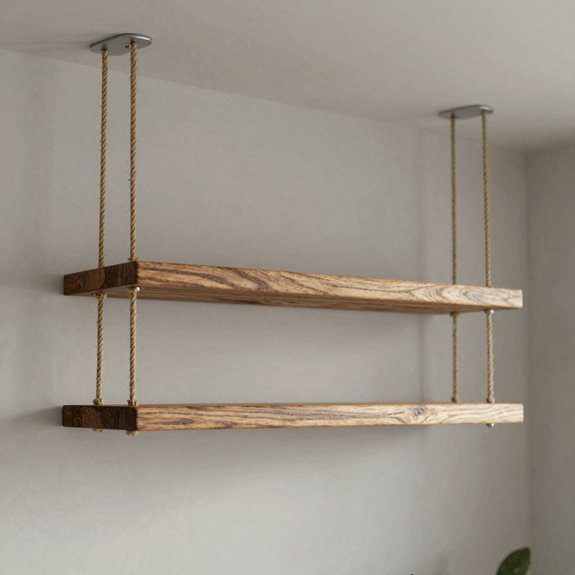
For a double-layer rope hanging shelf, I like to keep the look clean but a little more interesting, because two shelves stacked together instantly feel more finished and useful!
I start with two simple boards, drill rope holes, and thread the rope from the underside so both shelves hang free. Then I tie a knot under the lower board, check the level, and adjust the height spacing until it sits flat.
Next, I pass the ropes through the top board, pull everything snug, and secure it with sturdy wall mount hardware, like a cleat or a 50 lb monkey hook.
A little rope tassel at the end keeps it tidy and cute. The result feels calm, modern, and easy to live with—like your wall finally joined the group!
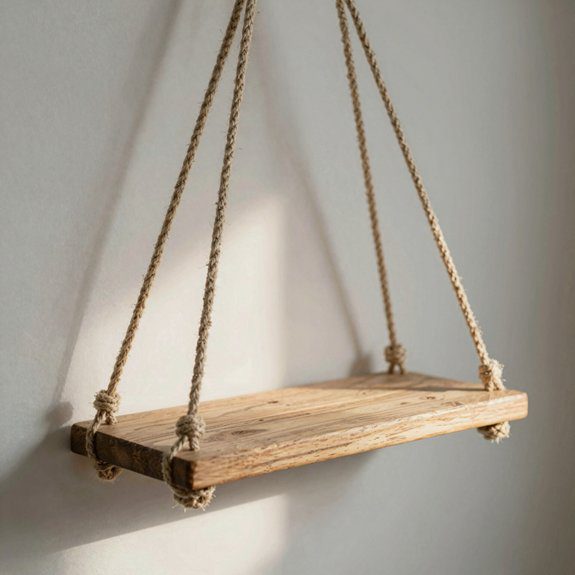
Rope Shelf with Thick Knots Detail
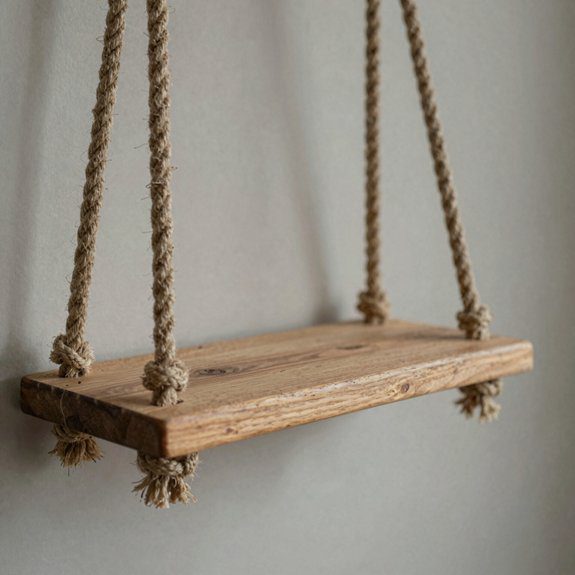
Thick knots give a rope shelf that satisfying, chunky look, and I love how they make even a simple board feel handmade and a little bit stylish! I use thick rope, about 3/8 to 1/2 inch, and I leave extra length so I can trim later without panic.
I drill 3/4 inch holes at the corners, thread each strand through, then tie my first knots at the same measured spots, so the knot spacing stays even and the shelf feels balanced. If it starts to lean, I loosen, tug, and retie until it sits level.
After the last knot, I fluff the rope ends into little tassels, and sometimes I add a tiny sisal accent for a quiet pop. It’s simple, affordable, and honestly, pretty charming!
Small Rope Shelf for Corners
A small rope shelf for a corner is one of those tiny projects that makes a room feel instantly smarter, and honestly, a little more charming! I start with a narrow board, about 8 by 24 inches, and mark four holes near the corners with a quick paper template, so corner space planning stays easy.
Then I dye the rope first if I want a softer look, thread it through, and tie knots underneath each hole. With rope tensioning tips, I can lift, loosen, and level the shelf without drama, which is great if you’re a beginner and watching your budget.
I mount two hooks on the adjacent walls, test-hold it, and tweak until it wraps the corner neatly. A little trim below the shelf, and boom, it feels clean, cozy, and totally mine!
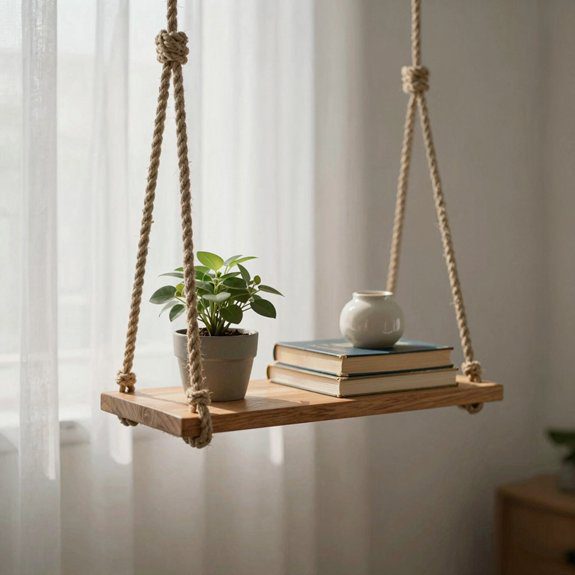
Rope Shelf for Plant Display
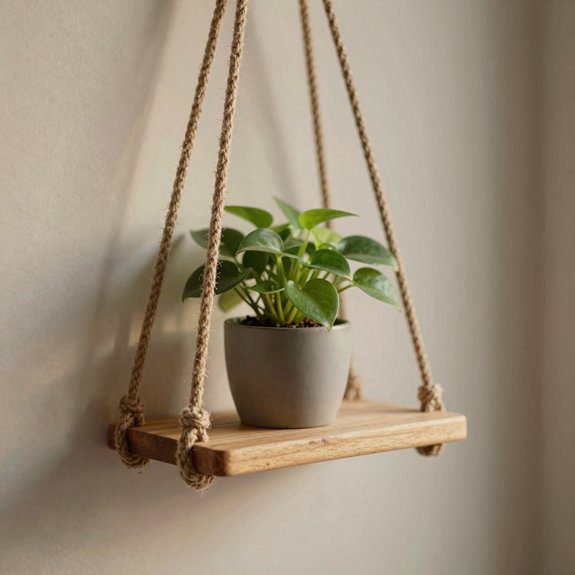
When I want a rope shelf to pull double duty as decor and a plant perch, I start with a sturdy 8 x 24-inch board and drill 3/4-inch rope holes, then I thread in 3/8–1/2-inch jute or sisal rope and give the fibers a quick cleanup so leaves don’t end up wearing a fuzzy accessory!
I keep it easy: I brush on diluted acrylic or milk paint so the grain still peeks through, and I tint the rope with watered-down acrylic for a soft, plant-friendly look. A pair of rope strands under each knot helps with plant support, and I hang the shelf with heavy-duty drywall hardware, not bulky brackets.
The best part? Once the rope dries fully, the whole display feels airy, neat, and welcoming, like your plants finally found their people!
Boho Style Rope Hanging Shelf
I love carrying that plant-shelf energy into a boho rope hanging shelf, because it feels relaxed, artsy, and just a little bit beachy in the best way!
I dye 3/8–1/2″ sisal or jute with diluted yellow acrylic paint, then trim stray fibers so the Natural twine looks neat, not fuzzy-chaotic.
Next, I drill 3/4″ holes in my wood shelves, using a 1.5″ paper template at each corner so everything lines up fast.
I thread the rope from underneath, tie matching knots, and space them around 11″ and 13″ from the midpoint for a steady, balanced hang.
For extra personality, I loosen the last twists into rustic fringe and tuck in a tiny turquoise accent rope.
Cheap, beginner-friendly, and honestly, it makes the room feel like we all belong.
Rope Shelf with Dark Wood Contrast
Under a dark walnut board, light jute rope looks seriously sharp, and that high-contrast combo gives the whole shelf a clean, modern-meets-rustic vibe! I love this Dark wood look because the jute contrast feels friendly, not fussy, so you’ll fit right in with a calm, collected room.
| Step | Material | Result |
|---|---|---|
| Drill | 3/4″ bit | Clean rope holes |
| Thread | 3/8″ jute | Smooth hang |
| Finish | clear coat | Rich grain glow |
I’d use minimalist hardware, then tie knots under each hole, level it, and snug the rope. A light clear coat keeps the grain showing, while the shelf still feels easygoing, not busy. Best part? It looks custom, costs less than most store shelves, and gives your wall instant “you belong here” energy!
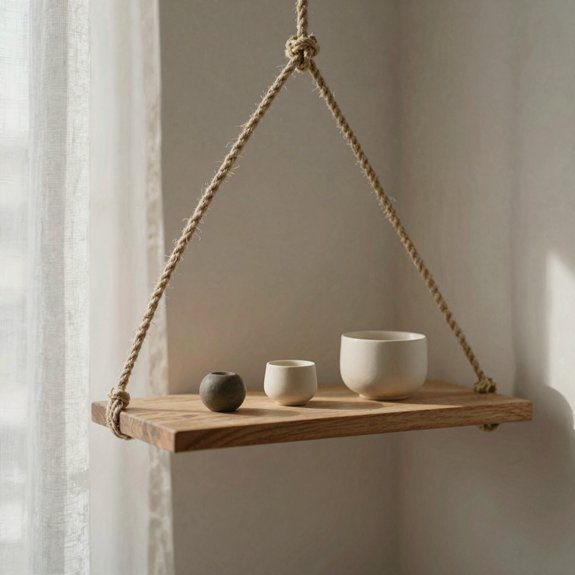
Minimal Rope Shelf for Neutral Spaces
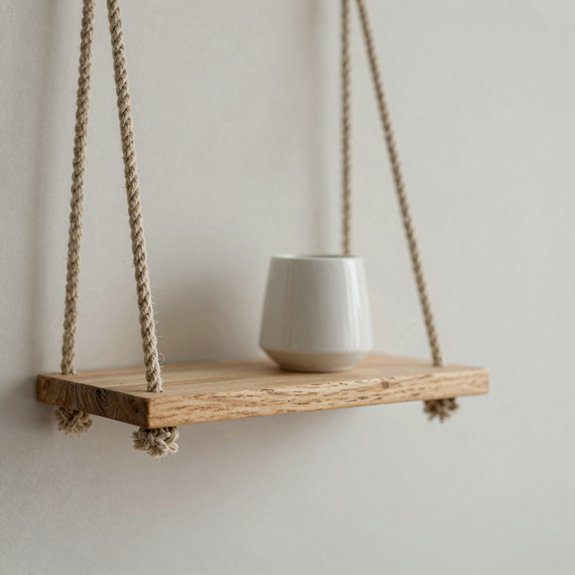
For a neutral room, a minimal rope shelf can look calm, clean, and a little stylish without trying too hard! I use natural jute or sisal in one steady thickness, so the shelf feels cohesive instead of busy, and it blends right into neutral wall styling.
I start with a simple drilled shelf, using a paper template to mark the centers, then I drill neat holes about 3/4 inch deep. After threading the rope, I tie a rope knot finish under each hole and trim any fuzzy bits, because nobody invited the frizz.
For a softer look, I lightly tint the rope, let it dry fully, and hang the shelf with one sturdy hook or cleat. The result feels tidy, balanced, and quietly designed!
Hanging Rope Shelf for Bedroom Decor
In a bedroom, a hanging rope shelf can feel light, cozy, and a little dreamy, especially when you keep the colors soft and the shape simple! I like using an 8-by-24-inch board, rope that fits my drill bit, and a small paper template so the holes line up fast.
I thread the rope from below, test the height, then use knotless securing for a cleaner look, which keeps the shelf calm instead of busy.
After that, I anchor it with sturdy hardware, leaving an airy ceiling gap that makes the whole corner feel open.
A quick trim of loose fibers, plus optional dyed rope, gives me a polished finish.
It’s easy, affordable, and honestly, it makes the room feel like it knows your name!
Compact Rope Shelf for Small Walls
When I’m working with a tiny wall, I keep the shelf slim and tidy, because nobody wants a cute little DIY project bumping into a doorway or elbow!
I cut boards to about 8 inches by 24 inches, then drill rope-sized holes with a 3/4-inch bit, keeping the centers 1.5 inches from each corner with a paper template.
Next, I thread natural jute from the underside of the bottom shelf, leave 10 to 15 inches for knots, and add the top board after threading the next holes.
For compact storage, I tighten everything before trimming the extra rope.
I mount it with a strong wall anchor, like a 50-pound monkey hook, then level it while knotting.
The result feels light, calm, and totally ours!