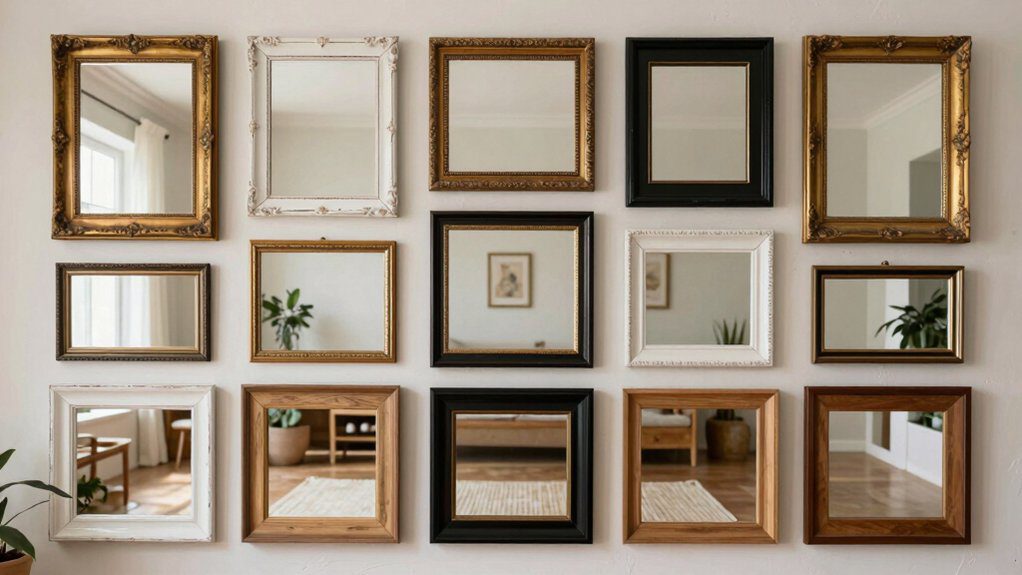
16 Mirror Craft Ideas That Add Style and Personality to Any Space
I love turning plain mirrors into personality pieces! Try broken-shard mosaics, rope wraps, beads, wood sticks, clay borders, or a thrifted recycled frame, all cheap and beginner-friendly. Add plaster texture, painted patterns, shells, faux flowers, or hanging charms for extra flair, then seal, clean, and hang. Want a wow factor? Finish with an LED light border for a sleek glow. Stick around, because the coolest tricks are still up my sleeve!
Love cozy DIY projects? 💕
Get free printable guides, exclusive tutorials & surprise craft goodies straight to your inbox.
Disclosure: This post may contain Amazon affiliate links, at no extra cost to you. Content on DiyCraftNest is created with research support from AI tools and carefully reviewed, edited, and fact-checked by the lead author, Daniel Pat, to ensure accuracy and reliability. Learn more
Key Takeaways
- Recycle broken mirror shards, tiles, shells, beads, or scraps into mosaiced frames for a custom, budget-friendly look.
- Use rope, fabric, shells, or faux flowers to create coastal and nature-inspired mirror borders with texture and charm.
- Add clay, plaster, or beads for sculpted, dimensional frames that feel handcrafted and unique.
- Build rustic or modern styles with wood sticks, geometric layouts, painted patterns, or industrial metal details.
- Enhance mirrors with LED borders or mixed-media accents to make them both decorative and functional.
Mosaic Mirror Frame Using Broken Pieces
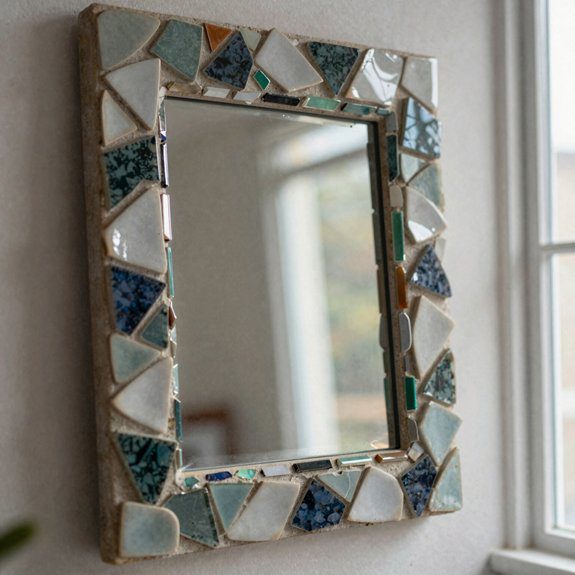
If you’ve got a broken mirror sitting around, don’t toss it just yet—I’d turn those shiny shards into a mosaic frame that looks way more intentional than “oops, it fell”! I sort the pieces by color and pattern first, and my Color grading tips help me cluster similar tones so the frame feels calm, not chaotic.
Then I spread a thin layer of adhesive on a backing board, press the shards around the mirror, and slip in tiny spacers for crisp lines. After it sets, I grout the gaps, wipe the glass clean, and let it cure.
For small joints, I like a grout-like caulk, and my mosaic sealants comparison always points me toward a clear sealer for durability. It’s cheap, beginner-friendly, and honestly, it makes the whole room feel like it belongs to you!
Rope Wrapped Mirror for Coastal Decor
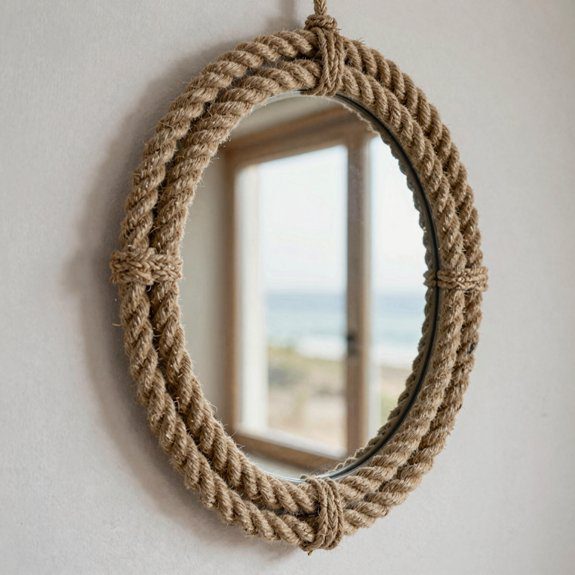
For a quick coastal upgrade, I like starting with a simple round or oval mirror and wrapping the frame in sisal or jute rope, because that rough, beachy texture instantly feels like a little vacation on the wall!
I keep my supplies simple: rope, strong clear-drying glue, scissors, and a matte sealer. Then I work in small sections, pressing the rope in tight coils so the jute rope texture stays neat and budget-friendly.
To make it pop, I add a double row outside and a single row inside for sandbar fringe details, which gives the frame a soft coastal color palette vibe. A light sealer protection layer helps it handle humidity, and the finish stays tidy.
Hang it up, and your room suddenly feels collected, calm, and a little beach-house lucky!
Beaded Mirror Frame for Texture
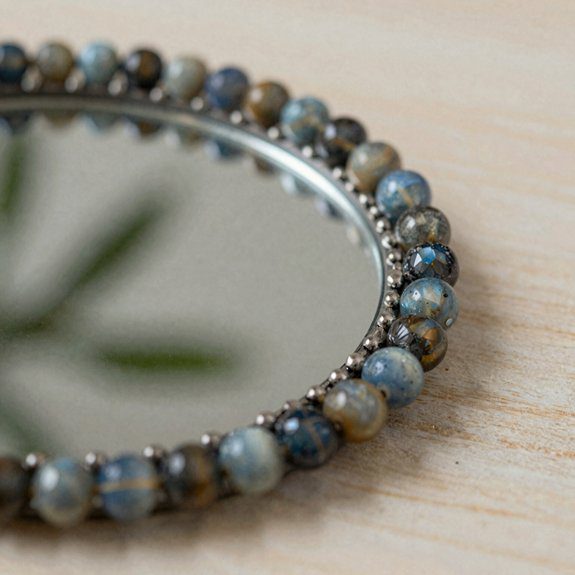
A beaded mirror frame can turn a plain mirror into a little piece of art, and I love how it adds instant texture without making the project feel fussy! I start by building a slim border with a thin layer of clay or plaster, then I press on beads with hot glue or strong adhesive.
For Color palette planning, I pick beads that fit my room, like sea-glass blues for a breezy feel or warm neutrals for a calm, cozy look. I keep bead spacing consistency so the frame feels neat, but I’ll loosen it up a bit if I want a more relaxed vibe.
Here’s the fun part: mixing bead sizes and finishes makes the light dance! Seal it, wipe it clean, and you’ve got a sturdy, sparkling mirror that feels so welcoming.
Wooden Stick Frame for Natural Look
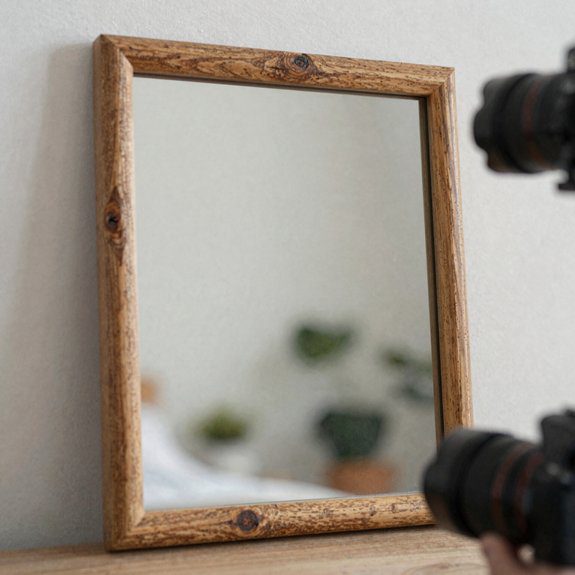
When I want a mirror to feel calm, warm, and a little bit rustic, I reach for wooden sticks, because they make such a pretty natural frame without much fuss! I pick evenly sized sticks, fit them around the edge, and let the spacing match the mirror so the look stays balanced. For a larger focal mirror, I use wider sticks; for a smaller one, I keep the lines finer.
| Step | Tip |
|---|---|
| Glue corners | Use wood glue first |
| Hold tight | Add clamps or small staples |
| Finish it | Paint, stain, or leave raw |
| Hang it | Use hooks or a stand |
That simple stick weaving gives me rustic wall decor with a soft, airy feel, and yes, it’s beginner-friendly, low-cost, and secretly stylish!
Clay Embellished Mirror Frame Design
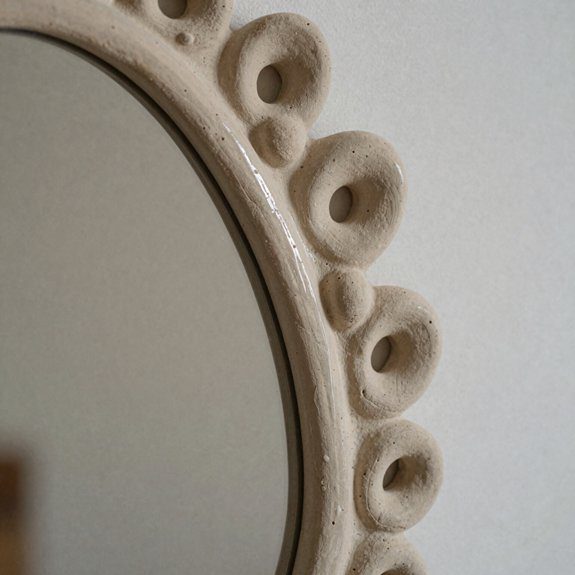
If you want your mirror to look a little stylish, a little artsy, and totally one-of-a-kind, I love using clay or plaster to build the frame right onto the edges! I press soft air-dry clay around the mirror, shaping it into a snug border, then I add beads, shells, or tiny tiles while it’s still workable. That gives me a lovely Color accent and keeps the texture balance just right.
If I want crisp lines, I start with a simple trim form and glue it on first, which sounds elaborate but isn’t hard. The drying timeline matters, too, since clay can need about 24 hours, plus a little extra. After that, I brush on a finishing sealant, and I dust it often so the whole piece stays glossy and charming!
Fabric Wrapped Mirror Frame Idea
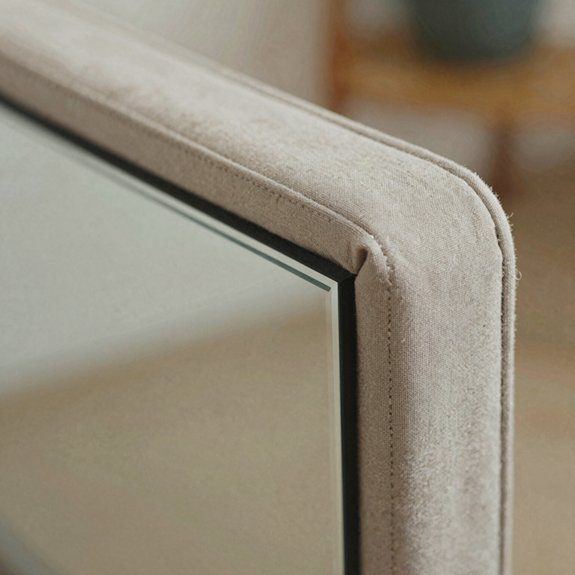
Since I wanted a cozy, tailored look, I’d start with a mirror that has a clean, flat edge, then I’d measure the perimeter so the fabric wrap fits snugly without puffing out like a grumpy pillow!
I’d choose upholstery-weight fabric, or cotton canvas, because it feels sturdy and welcoming.
With small beads of fabric glue, I’d work in sections, keeping tension control steady so the wrap stays smooth and doesn’t fray at the corners.
For neat fabric corner creases, I’d fold the edges like gift wrap, press them flat, and glue them down.
If I want extra charm, I’d add a thin braid along the seam or layer a second band of fabric for a designer touch.
Let it cure fully, then wipe only the glass.
Your room will feel warmer right away!
Shell Decorated Mirror for Beach Theme
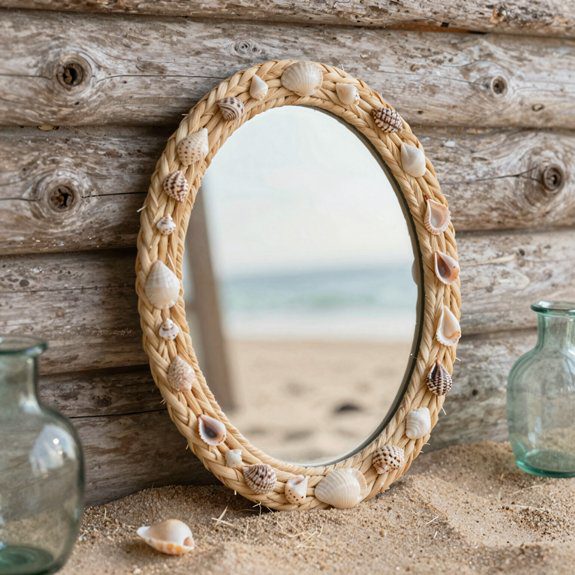
For a breezy beach vibe, I’d turn a plain mirror into a shell-covered showpiece by building a border with small seashells, shell mosaics, and a few airy accents that feel like they washed in with the tide.
I’d use a simple frame base, strong adhesive, and shells in sand, cream, and weathered white for easy nautical color matching.
This project fits coastal home styling perfectly, and it’s easier than it sounds, promise!
I’d lay the shells directly to the mirror’s size, then tuck in larger pieces first and fill gaps with tiny shells or clear adhesive for a tidy finish.
Want extra sparkle? Add a few pale beads.
Dust it gently, wipe the glass with a damp cloth, and you’ll have a warm, welcoming piece that feels like vacation at home.
Geometric Mirror Frame with Layers
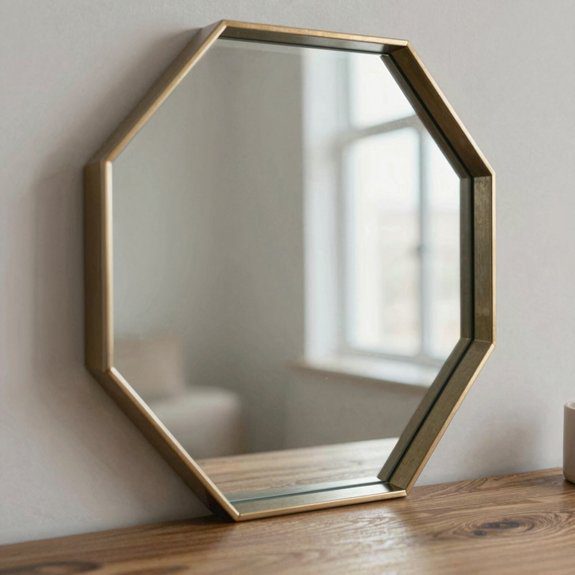
A geometric mirror frame can look super sleek and artsy, and I love how the angles make the mirror itself feel like the star of the show!
I start with a triangle, chevron, or sunburst concept, then use rhythmic angle layout so the edges feel lively, not messy.
For a clean build, I glue or staple molding right onto the mirror sides, then clamp the corners tight if I’m using wood.
Next comes the fun part: layering thin clay strips, tiles, or bands in alternating depths for a bold 3D effect.
I keep color contrast planning in mind, so the mirror pops instead of getting lost.
I finish with repeating beads or crystals, let everything cure, and wipe it clean.
Easy, classy, and very “yes, I made this!”
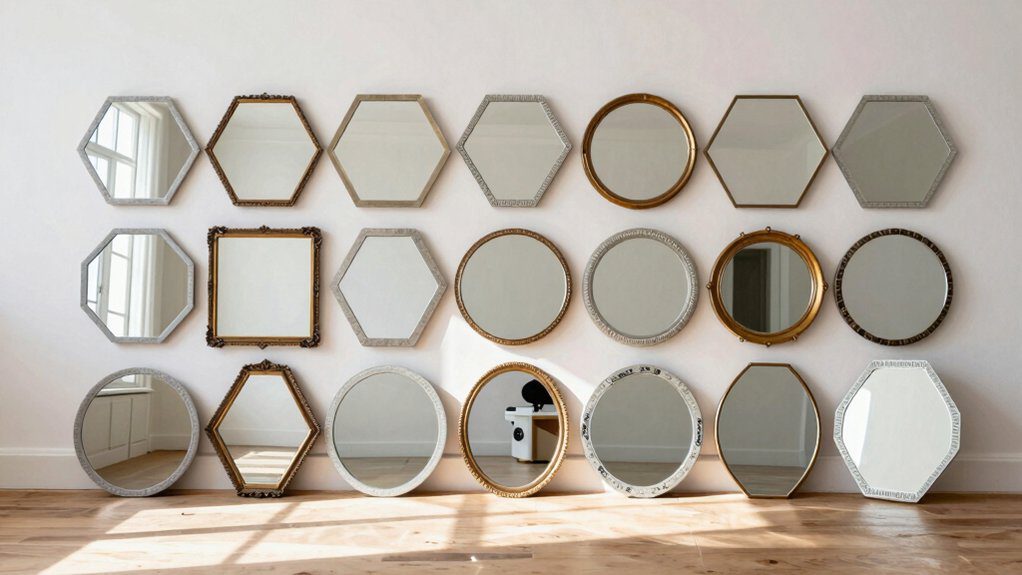
Minimal Round Mirror with Thin Frame
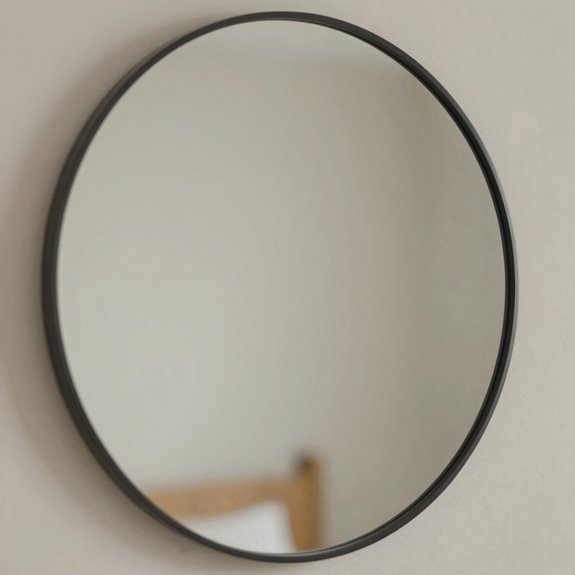
I love how a minimal round mirror can quietly steal the show without trying too hard! I’d keep it clean with one thin frame, like wood, metal, or painted trim, so it feels fresh, not fussy.
| Tip | Why it works | Quick win |
|---|---|---|
| Center it | Feels balanced | Easy on the eyes |
| Eye level | Looks natural | Guests notice it fast |
| Near light | Boosts brightness | Makes small rooms feel bigger |
| Single finish | Keeps it calm | No clutter drama |
For Mirror placement tips, I place it above a mantel or shelf to soften hard lines. For Light reflecting positioning, I set it near a window, and wow, the room opens up! Want a focal point? Let it stand alone, or pair it with one small print. Cheap, simple, and super stylish—yes, please!
Mirror Frame with Artificial Flowers
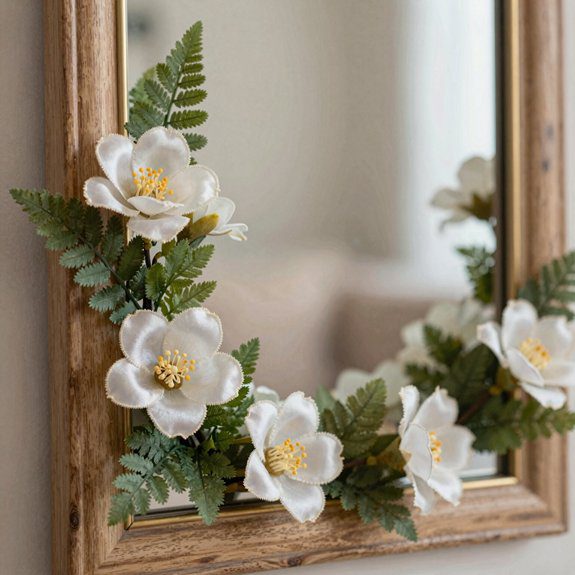
That clean round mirror can get a playful glow-up, and wow, this one’s fun! I glue artificial flowers onto the outer frame, keeping the glass open so the blooms feel like a ring of layered florals.
- Pick faux stems in beachy neutrals, spring pastels, or warm creams.
- Arrange denser clusters at the corners, lighter along the sides.
- Hot glue gives fast placement; small wire ties help heavy blooms stay put.
- Seasonal floral swaps keep the look fresh without buying a whole new mirror.
I like color coordinated styling, because it makes the piece feel like it belongs in your space, not like a random craft project. It’s cheap, beginner-friendly, and honestly, a little elegant.
Dust it often, wipe the glass with a wet cloth, and keep the flowers dry so they stay perky.
Industrial Style Metal Frame Look
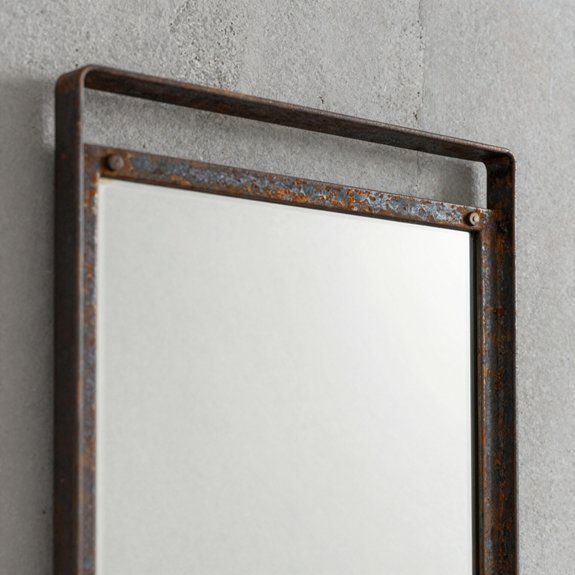
One sturdy metal frame can turn a plain mirror into a cool, factory-style showpiece, and it’s easier than it sounds! I like using black or distressed iron tones, because they make the mirror feel crisp and grounded.
| Quick Pick | Why It Works |
|---|---|
| Pipe fittings | Give that assembled, workshop vibe |
| Rivets and washers | Add honest, rugged detail |
| Matte brackets | Keep the look clean, not fussy |
For a simple build, I pair steel pipe accents with straight metal-look moulding, then choose a long rectangle for the best balance. That shape feels right above a mantel or console, and it fits right in with Industrial tabletop mirrors too.
Dust it often, wipe with a lightly damp cloth, then dry it well. Easy upkeep, big style—your space gets the cool-kid welcome!
Painted Pattern Frame for Artistic Style
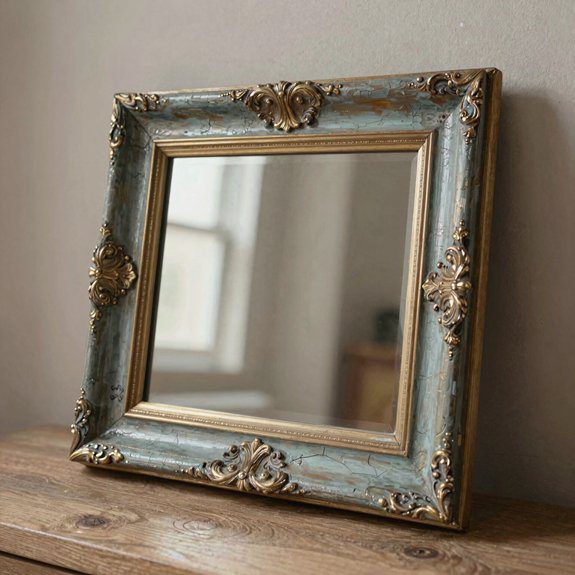
After that cool industrial look, you can swing the vibe in a more playful direction with a painted pattern frame that feels like wall art and mirror in one—how fun is that! I start by cladding the mirror’s sides with picture-frame molding, then I miter-cut the corners, glue, staple, and clamp until it’s solid. It’s beginner-friendly and budget-wise, too.
- I pick colors with simple Color matching tips so the frame blends with the room.
- I paint stripes, shapes, or a soft distressed wash using paint technique tricks.
- I add beads, shells, tile, or crystals as tiny accents, not clutter.
- I wipe the glass and dust the frame so it stays crisp and bright.
That’s the surprise: your mirror stops acting shy and becomes the room’s favorite conversation starter!
Mirror with LED Light Border

I’ve got a soft spot for a mirror with an LED light border, because it gives the whole space that sleek, glowing, almost spa-like feel without making the room look harsh or cold!
I like choosing one with a built-in perimeter strip, and I pick warm white for cozy mornings or cool white when I want vanity-ready brightness.
If you’re DIY-ing it, grab a sturdy wall-mount bracket, an LED strip, and a diffuser channel, then tuck the light around the back edge for an even halo.
That little trick hides hot spots—nice, right?
For bathrooms, I always check Waterproof placement and anti fog lighting, because clear reflections matter when you’re rushing out the door.
Wipe the glass with a wet cloth, skip harsh cleaners, and your glow stays crisp and inviting!
Recycled Material Frame Design
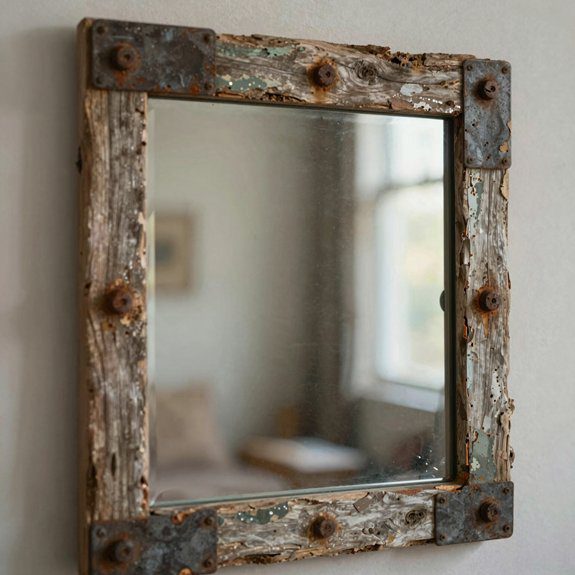
If you want your mirror to feel custom without spending a fortune, a recycled-material frame is such a fun place to start! I like building mine with broken tiles, shells, beads, or salvage scraps, then wrapping the glass in a mosaic that feels totally me.
- I sketch the shape, cut picture-frame molding, and secure mitered corners with wood glue and staples.
- I glue on thrifted frame finishing, then press in Upcycled border trim for color and shine.
- I keep the room vibe in mind, so the border matches my pillows, art, or rug.
- I plan for dry time, because the coolest part can take patience, but wow, it’s worth it!
When I’m done, the mirror looks one-of-a-kind, sturdy, and like it belongs in my space.
Mirror Frame with Textured Plaster Finish
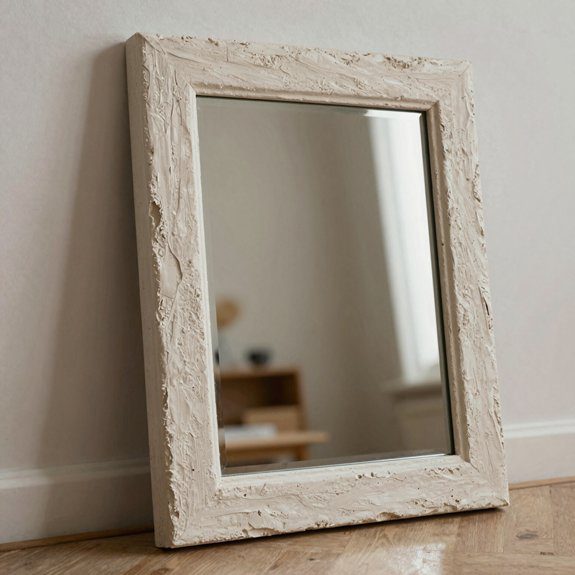
I love taking a mirror from “nice enough” to “wait, you made that?!” with a textured plaster frame, especially when I want something that feels custom without looking too perfect. I start by cladding the sides with thin plaster, then shape the Sculpted plaster before it sets, so it looks cast, not flat.
| Step | What I do |
|---|---|
| 1 | Fit mitered corners with glue and clamps |
| 2 | Press in embedded beads or shells |
| 3 | Watch drying timing, then let it cure |
| 4 | Dust, then do surface cleaning with a damp cloth |
It’s beginner-friendly, low-cost, and honestly, a little addictive! The best part? Those tiny texture bumps catch light and make the frame feel like it belongs in your space, not a store.
Decorative Mirror with Hanging Elements
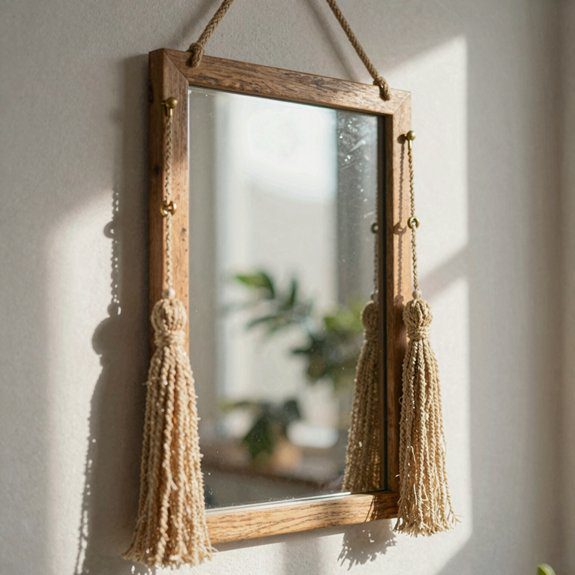
A hanging decorative mirror can turn a plain wall into a little moment of magic, and yes, it’s easier than it sounds! I like to start with sturdy hooks or wire, then add clustered small frames, charms, or ornaments along the bottom edge for gentle movement and sparkle.
- Use picture-frame hardware for small mirrors.
- Choose wall-mount hooks for larger mirrors.
- Clip on seasonal greenery or florals with suction cups.
- Try a DIY clay or plaster frame, then add beads or shells.
This kind of layered wall art feels warm, personal, and welcoming, like it belongs in your home already. I love the soft jingle and the way reflective styling catches daylight.
Keep it clean with quick dusting and a wet cloth, and you’ll get a fresh, polished look without much cost or fuss!