15 Functional Polymer Clay Projects That Are Beautiful and Useful
You can turn polymer clay into 15 useful beauties, like necklaces, earrings, pendants, bracelets, beads, stamped plant pots, keychains, ring cones, and hair clips! Start with cheap clay, simple tools, and basic shaping, then bake, cool, and add hooks, magnets, or sealing as needed. You’ll get custom pieces that look store-bought but cost way less. Best part? A few clever projects get even more fun and practical as you go, so keep scrolling for the good stuff!
Love cozy DIY projects? 💕
Get free printable guides, exclusive tutorials & surprise craft goodies straight to your inbox.
Disclosure: This post may contain Amazon affiliate links, at no extra cost to you. Content on DiyCraftNest is created with research support from AI tools and carefully reviewed, edited, and fact-checked by the lead author, Daniel Pat, to ensure accuracy and reliability. Learn more
Key Takeaways
- Make wearable pieces like necklaces, pendants, earrings, bracelets, and beads that combine color, texture, and durability.
- Create practical home items such as coasters, stamped plant pots, and wall decor that are both decorative and functional.
- Add fridge-ready usefulness with polymer clay magnets and memo-style pieces in custom shapes, patterns, and playful designs.
- Design desk accents like personalized clocks, bud vases, and glow sculptures that enhance rooms while serving a purpose.
- Finish projects with smooth edges, proper baking, sealing, and secure attachments for long-lasting beauty and everyday use.
Polymer Clay Necklaces That Turn Heads
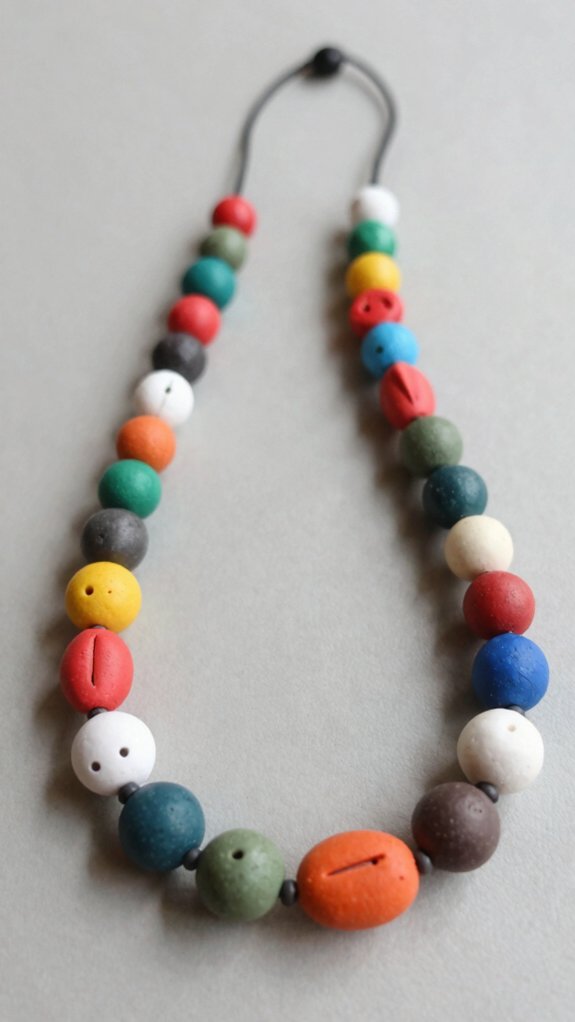
If you want a necklace that gets noticed fast, polymer clay is your new best friend! You can roll, twist, and shape bright clay into beads, layered strands, or one bold pendant, then bake it for a tough, wearable finish.
Mix colors, press in textures, and keep it simple, or go elaborate with a charm at the center, wow!
If you’re on a budget, grab a jewelry kit and speed things up.
Then pair the look with polymer clay magnets or even glow in the dark decor vibes for extra fun.
You’ll end up with a necklace that feels totally you.
Easy Polymer Clay Earrings
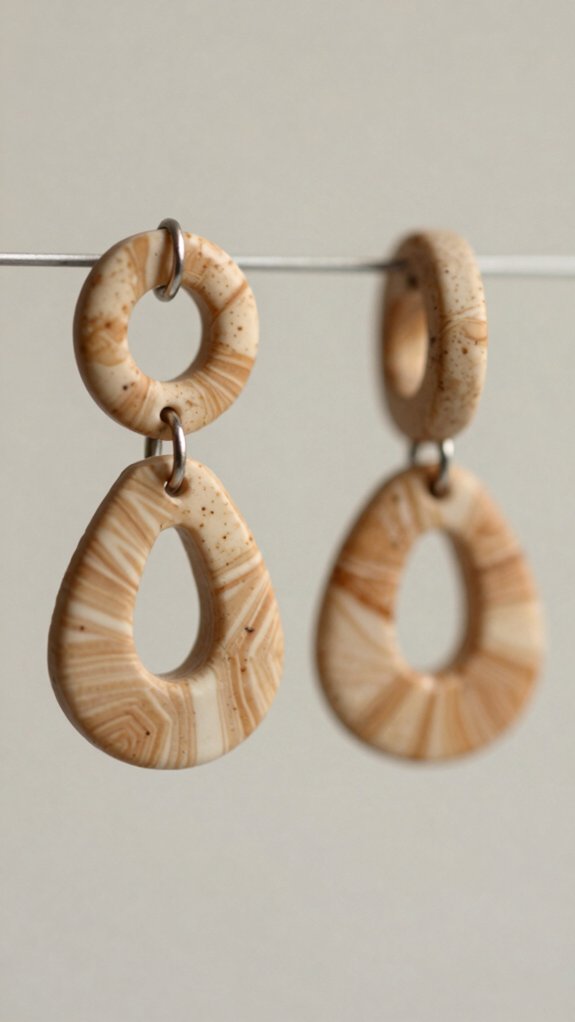
You can start with simple shapes like circles, teardrops, or tiny arches, and they’re perfect if you want an easy first project that still looks cute!
Mix in color and texture by marbling thin clay sheets, pressing in little dots, or adding swirls and leaf prints, then bake them fast so the details stay crisp and ready to show off.
Keep the backs smooth, add your hooks or studs after baking, and you’ll have lightweight earrings that look elegant without making your wallet cry.
Simple Shape Ideas
Start simple and have fun with polymer clay earrings! You can join the easy-clay crew with teardrops, circles, or half-moons, since they’re quick to roll, cut, and smooth.
Blend two shades with marbling or layering, and you’ll get miniature charms that feel fresh, plus gift ready ideas without extra fuss.
Press in stamps, lace, or patterned fabric for gentle texture, then add a tiny pinch of clay to hold hooks or studs before baking.
After they cure, sand the edges, then glaze them for a polished finish.
Cheap, cute, and totally wearable—what’s not to love?
Color And Texture
Once you’ve got those simple earring shapes down, color and texture are where the fun really kicks up a notch! You can join the club of makers who love bold, handmade style without spending much. Try these:
- Blend marbled clay or contrast colorways, then roll and cut teardrops or circles for a playful pop.
- Press lace, stamps, or a textured roller into the surface, and watch the light dance after baking.
- Add tiny dots or leaf veins before baking, then finish with sanding and glossy finishing for a crisp, polished look.
Cute, easy, and totally you!
Fast Baking Tips
Because polymer clay can be a little picky, a fast bake starts with a smart setup: preheat your oven to the temperature on the package, usually around 265°F/130°C, and bake your earring pieces on a flat tile or a sheet of parchment so they don’t warp like a sad little potato chip!
Keep each shape the same thickness, a few millimeters works great, so your oven safe timing stays steady and your tiny treasures cure evenly.
Cut clean edges with a sharp blade, add texture first, then bake in a single layer.
Cool them 15–30 minutes, sand lightly, and choose glaze finish options only if your clay needs it.
Make Polymer Clay Pendants
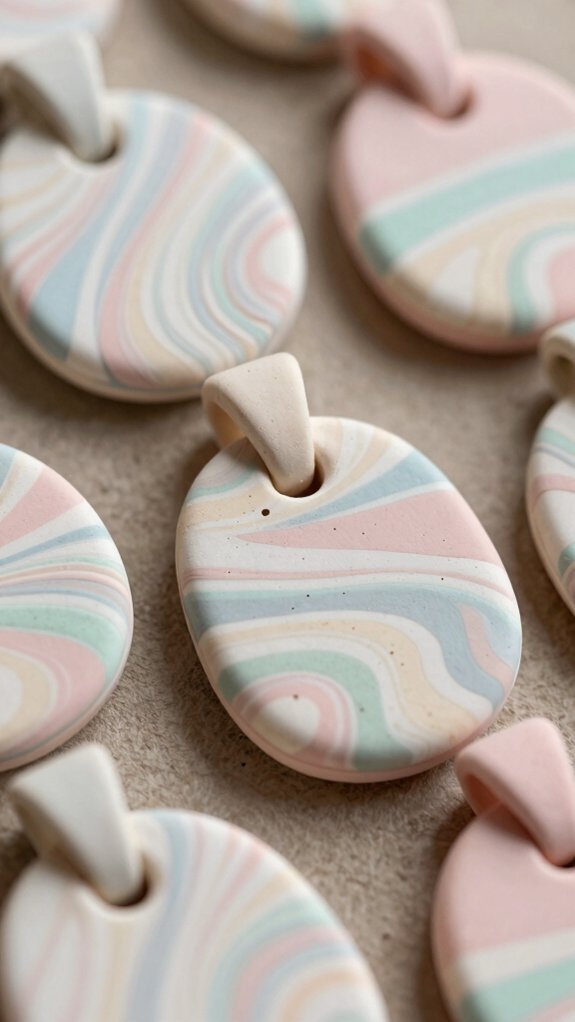
You can start your polymer clay pendant with a simple shape like a round disc, teardrop, or even a fun custom silhouette, and honestly, the shape can already tell a story!
From there, add texture with stamps, lace, or patterned tools, then layer thin sheets of clay for marbled or ombré color that looks way fancier than it is.
Keep an eye out for a hidden wow factor, because a smooth finish, centered hole, and neat bail can turn a cute clay piece into a necklace you’ll actually want to wear every day.
Pendant Shape Ideas
Start with a shape that makes you smile, then let the clay do the rest! You’ll fit right in when you pick a teardrop, heart, round cabochon, or sharp triangle, then roll and cut the clay to match.
- Simple cutout: use a cookie cutter or knife; keep it easy and low-cost.
- Focal charm: add tiny dots or swirls, then smooth edges so they stay put.
- Smart finishing: set bail placement early, check hole alignment, bake, cool, and seal.
That last step helps your pendant hang straight, and hey, nobody wants a lopsided necklace surprise!
Adding Texture And Color
Once you’ve picked a pendant shape that makes you grin, the fun really kicks in with color and texture! Start by conditioning clay, then marble two or three shades so the pattern looks intentional, not accidental-from-the-laundry kind of accidental.
Press in lace, floral stamps, or a textured rubber stamp, then smooth the edges so the detail stays sharp after baking. Poke your hanger hole before the oven, easy peasy.
Bake as directed, then add glaze finishing or durable sealers only if you need extra shine. You’ll get a crisp, colorful pendant that feels handmade, friendly, and totally wearable—nice!
Polymer Clay Bracelets and Bangles
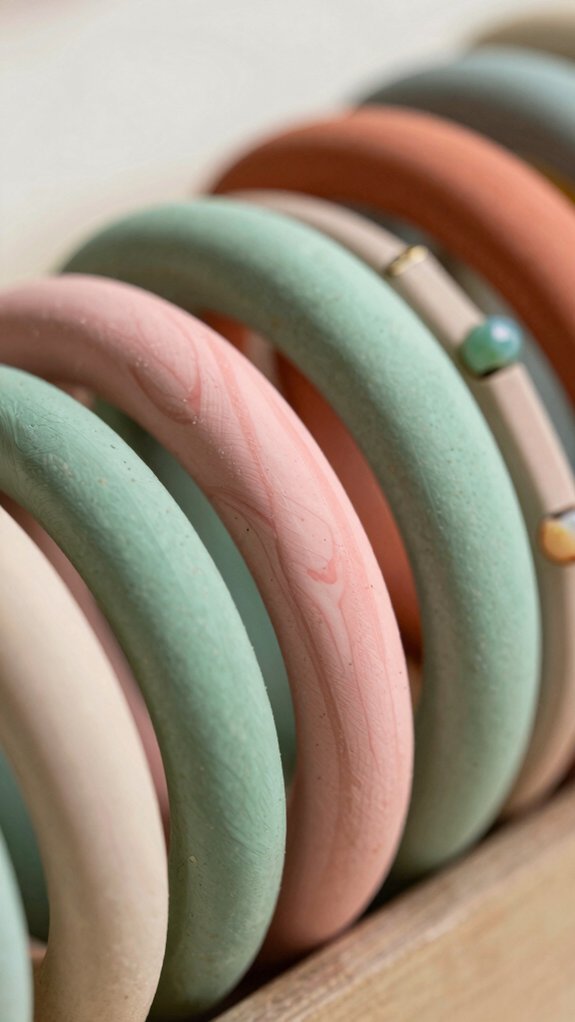
Flex your creativity with polymer clay bracelets and bangles, because this material is wonderfully beginner-friendly and stays soft while you roll, press, and shape it into smooth curves that bake up nicely.
Grab Safety first tools, then try these easy wins:
- Color matching marbling: swirl two colors, form a band, and bake for a one-of-a-kind look.
- Bracelet sizing: wrap around a jar for a comfy fit, no guesswork!
- Stress free curing: bake on a tray, cool fully, and wear with pride.
Want extra flair? Add tiny animal details or stone-like textures—your wrist crew will notice!
Stylish Polymer Clay Beads
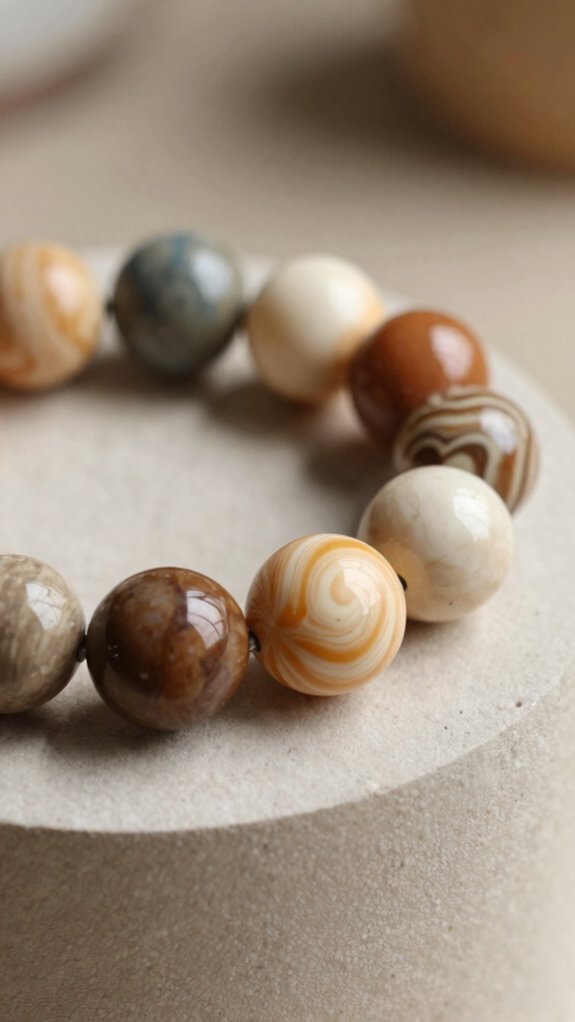
Bead making feels a little magical, because tiny balls or short cylinders of polymer clay can turn into jewelry that looks way fancier than the effort you put in! You can blend colors, add marbling, or make gradients that match your vibe, so your necklace or bracelet feels like it belongs to you.
Roll each bead, poke a neat hole with polymer clay tools, and bake. After cooling, sand lightly, then add clear glaze for shine.
For bead stringing tips, mix small spacers with bigger focal beads, and textured stamps can sneak in detail.
Cute, affordable, and beginner-friendly—yay!
Geometric Wall Decor
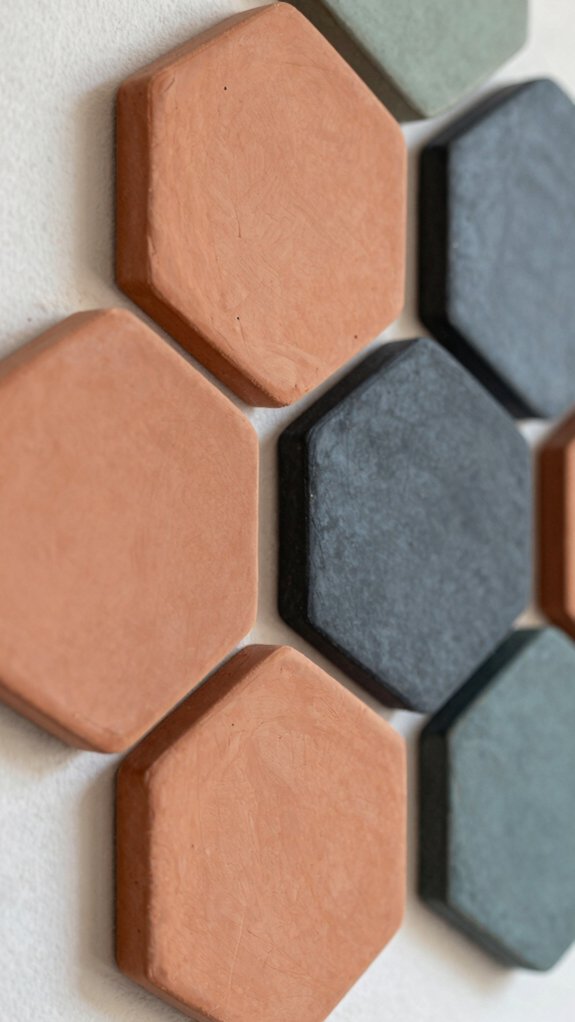
Building a geometric wall piece with polymer clay is like turning a blank wall into a tiny modern art gallery, and it’s easier than it sounds!
You’ll fit right in with this cozy maker crowd.
- Roll clay into even sheets, then use color matched templates to cut triangles or hexagons.
- Arrange them into mosaic panels, mix matte and glossy finishes, and bake on heatproof surfaces for crisp edges.
- Add durable mounting so your art stays put.
The best part?
You can swap in your friend’s favorite colors, making a gift that feels personal, not pricey.
Polymer Clay Magnets
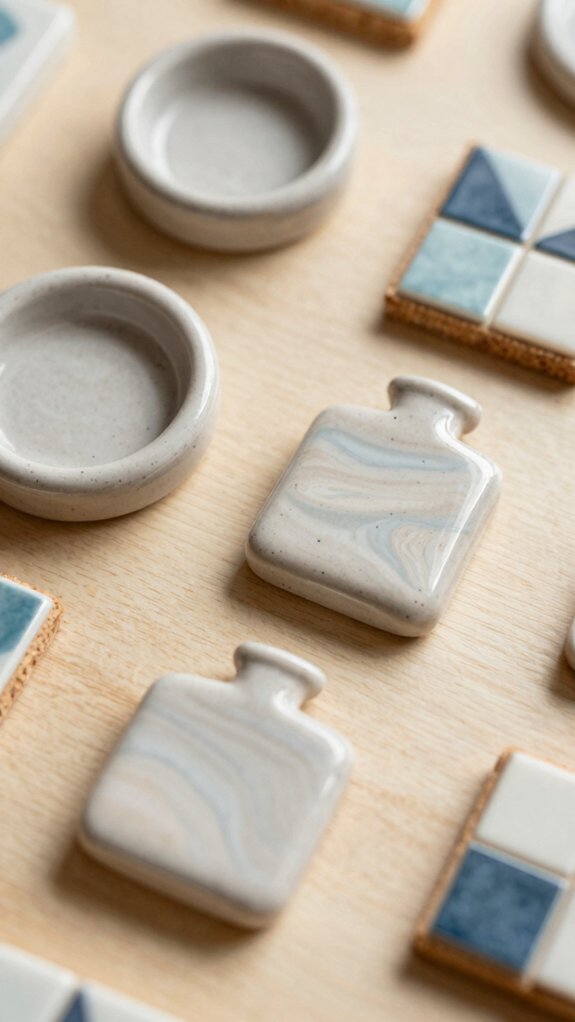
You can turn polymer clay into easy fridge art that’s both cute and useful—just shape, bake, and attach a strong magnet so your notes don’t go rogue!
Start with simple materials and playful ideas like florals, stars, or tiny food shapes, then mix in colors and textures for a look that feels totally yours.
Want a gift that gets a grin?
Make matching sets with custom shapes and colors, and you’ll have little keepsakes that stick around in the best way.
Easy Fridge Art
If your fridge could smile, polymer clay magnets would probably do it! You can make easy fridge art that feels like your own little clubhouse display. Try stamped clay patterns or miniature character designs for a playful touch.
- Roll, shape, and bake small clay pieces with tiny floral patterns or abstract swirls.
- Let them cool fully, then glue on a strong magnet so they hold notes and photos.
- Mix colors and textures for a set that pops on any fridge.
They’re cheap, beginner-friendly, and super fun, and your kitchen gets a cheerful upgrade fast!
Whimsical Gift Ideas
Ready for a tiny gift that feels big on charm? You can make polymer clay magnets that brighten a fridge or memo board and keep notes and pictures in sight. They’re cheap, easy, and feel personal—perfect for friends who love handmade surprises!
| Step | What you do |
|---|---|
| 1 | Shape clay, press in a pattern, and bake it. |
| 2 | Let it cool, then attach a small magnet backing. |
For extra joy, use gift packaging tips like a paper bag or tin, plus handwritten note ideas such as “You make life stick together!” Cute, right?
Custom Shapes And Colors
Tiny circles, hearts, stars, and even little fruit slices can all turn into polymer clay magnets that feel way more special than store-bought decor! You can shape, stamp, and swirl them into pieces that fit your vibe.
- Try floral stamp ideas with clay, a toothpick, and a magnet back. Bake, then glue it on.
- Use color matching for a set that feels like it belongs together, even on a messy fridge.
- Mix marbled clay for a playful finish; it’s cheap, easy, and looks elegant fast.
These little magnets make great gifts, and your board suddenly feels like home!
Make a Personalized Polymer Clay Clock
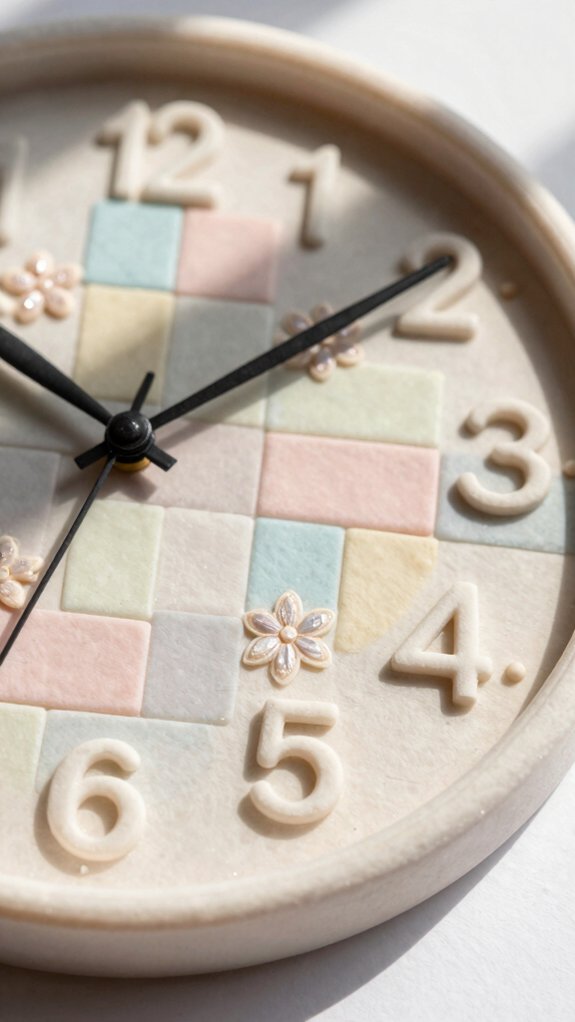
With a simple clock base and a bit of polymer clay, you can turn a plain timepiece into something that looks straight out of a craft shop window! You’ll love the mix of fun and function, and polymer clay durability means your design can handle daily life.
Start by shaping flowers, stars, or swirls onto the base, then press in stamps for extra charm and vintage clock styling.
Use colors that fit your room, and blend textures for a themed face that feels like yours.
Bake it, attach the hands, then seal it if your brand recommends it.
Voilà, your wall gets style and keeps time!
DIY Polymer Clay Bud Vases
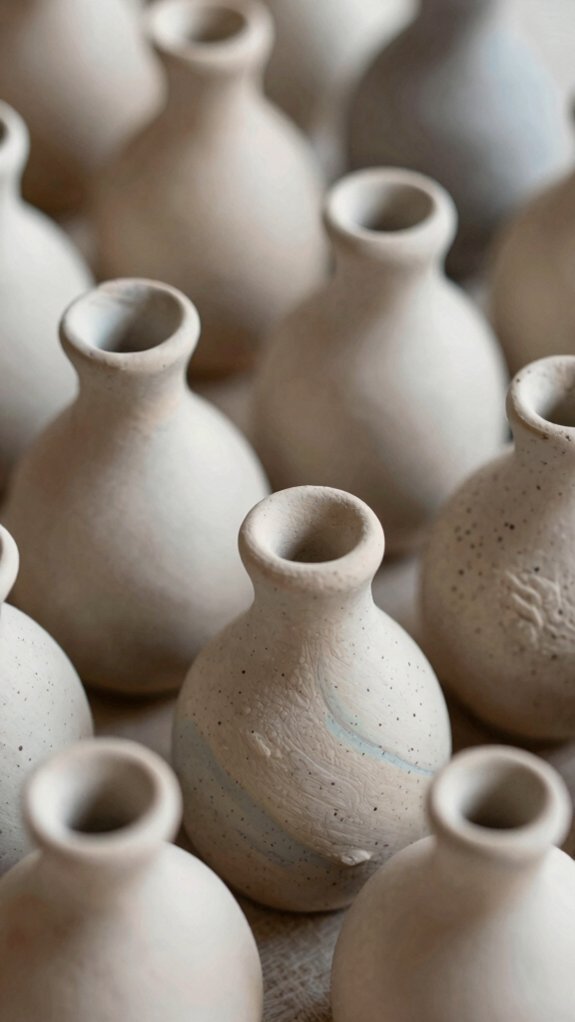
Bud vases are such a sweet little project, and polymer clay makes them feel extra special right away! You can shape yours into sleek or rustic forms, then give them color and tiny details that feel like your style tribe.
- Pick clay, a toothpick, and a small stem.
- Hand-mold a tiny vase, add veins, swirls, or dots, then smooth edges.
- Bake, cool, and seal for a sturdy finish.
They’re cheap, beginner-friendly, and perfect for mini bud bouquets. Try muted greens or jewel tones, and they’ll look lovely beside textured wall hangings, too. Great gifts, honestly!
Glow-in-the-Dark Decor Sculptures
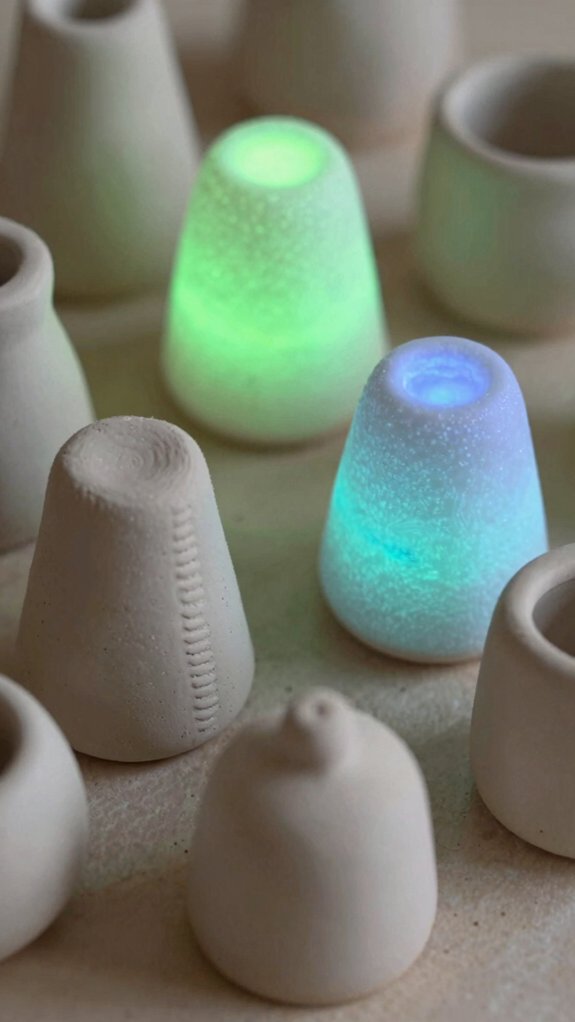
If you loved making little polymer clay bud vases, glow-in-the-dark decor sculptures are the next fun thing to try—same handmade charm, but with a sneaky nighttime twist!
Shape a tiny moon, pet, or abstract swirl, then bake it hard and let it cool.
Cheap glow pigments mix in easily, so this project stays beginner-friendly and budget kind.
Charge your piece under sunlight or a bright bulb, and it’ll softly shine on your shelf or bedside.
Keep details shallow for even baking and brighter glow.
Bonus: they pair well with polymer clay bookmarks and gift ready packaging for sweet, handmade surprises!
Stylish Polymer Clay Coasters
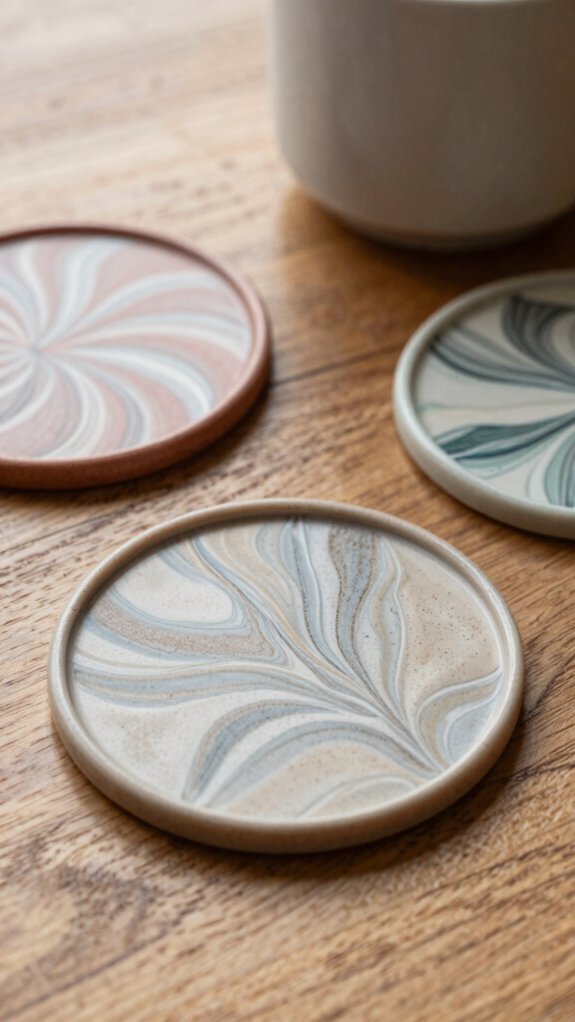
Round, square, or totally custom, polymer clay coasters are an easy way to protect your table and make it look cute at the same time! You’ll fit right in crafting these little helpers, and they’re beginner-friendly, too.
- Pick clay, a roller, and a cutter, then shape, bake, and enjoy.
- Press in stamps or textures before baking, so your set matches your vibe.
- Finish with weatherproof sealing and table safe finishing, then let them cure.
They handle hot mugs, water rings, and spills like champs. Best part? You can make a sweet housewarming gift without spending much—yay!
Stamped Clay Pots for Plants
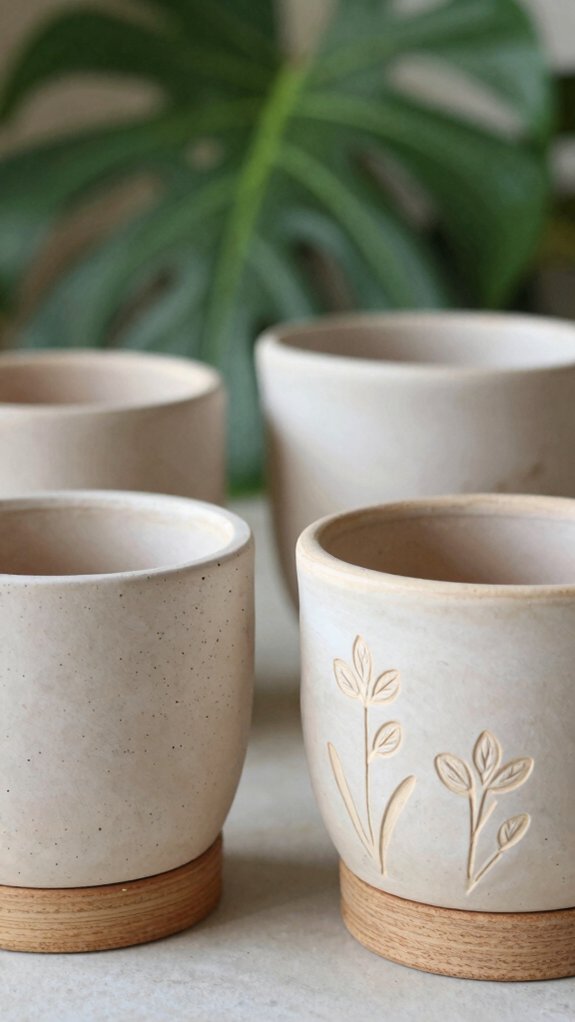
With a little stamped polymer clay, you can turn a plain plant pot into something that feels handmade, modern, and totally you! Pick a cheap pot, roll on clay, then press in floral or abstract stamps for texture that pops.
You can mix colors and shapes to match your room, windowsill, or garden nook, and it’s easier than it looks, promise.
Bake it by the package directions, and the finish gets sturdy enough for real plants, not just show-off shelf life.
These pots make sweet gifts, too, like mini glow in the dark sculptures or polymer clay magnets, only wetter.
Polymer Clay Keychains
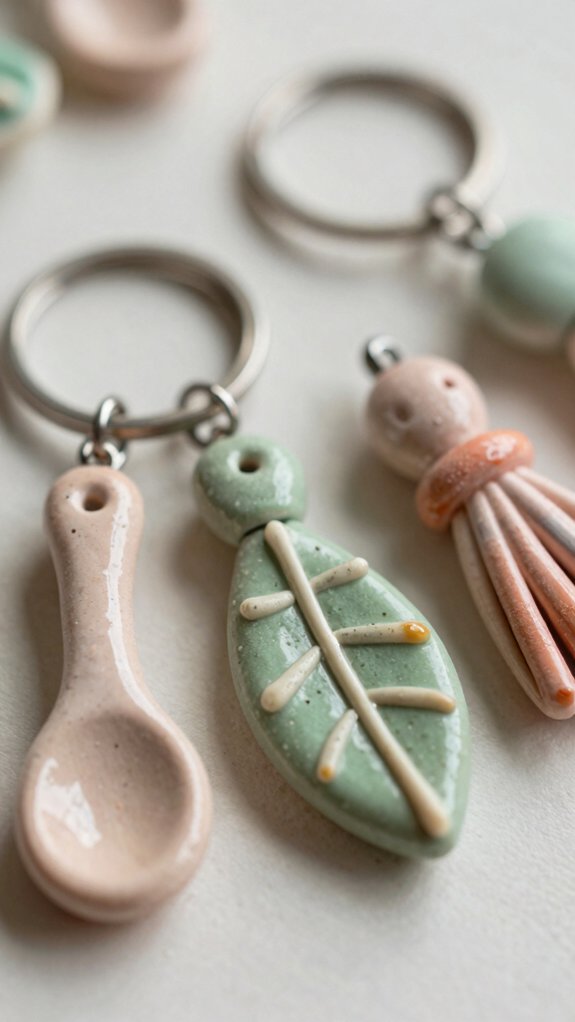
Polymer clay keychains are such a fun little project, and honestly, they’re one of the easiest ways to make your keys feel less boring!
You can join the crew with a tiny design that’s colorful, sturdy, and all yours.
- Roll, cut, and bake a shape with simple tools.
- Add stamp ideas, then press on charm attachments before baking.
- Mix colors or textures for a look that helps you spot your keys fast.
They’re cheap, beginner-friendly, and great for gifts, too.
Best part? Your handmade keychain feels useful every day, with a little personality riding along.
Make a Polymer Clay Ring Cone
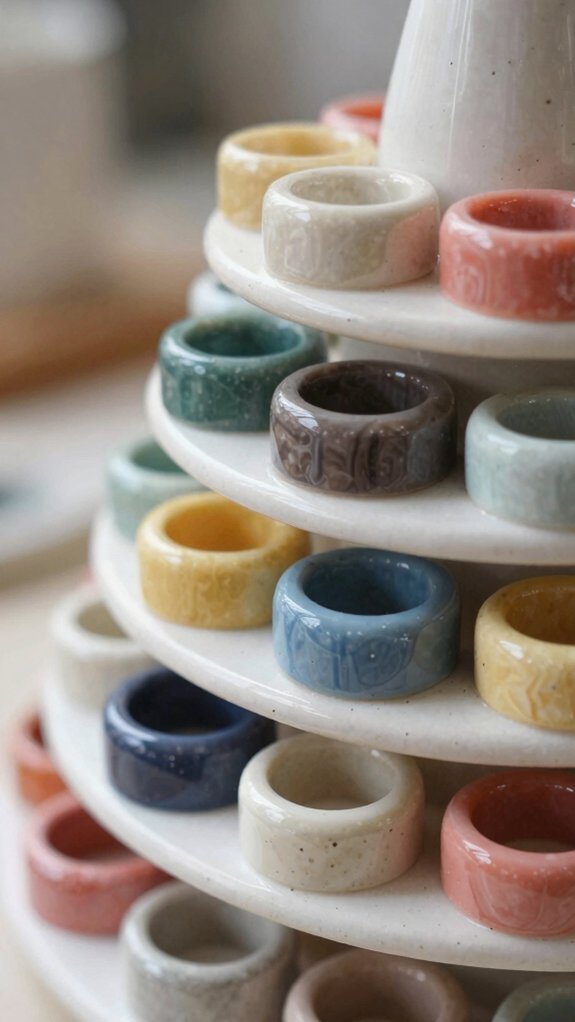
Start by choosing a cone shape that feels just right for your rings, then roll your polymer clay into a smooth, stable form with a flat base so it won’t wobble like a tired coffee mug!
Next, add texture with stamps, lace, or simple pressed patterns, because a little surface detail can make your piece look elegant without making it hard to use.
Finish by cutting a neat top opening, baking it, and if you want a slick final touch, seal it for a glossy or matte display that looks great on a dresser or vanity.
Choosing A Cone Shape
- Pick a classic tapered cone for everyday rings.
- Try a rounded wedding-cake cone for stacked bands.
- Use a shallow dome for tiny rings and a sweet, low profile.
Roll a base disk, pinch and smooth gently, and keep the bottom wider than you think.
That little wobble fix? Total game-changer!
Adding Clay Texture
That comfy cone shape you just made is ready for a little personality now, and texture is where the fun really kicks in! Use a texture roller, lace, or a stippling sponge to press patterns evenly over the clay, keeping the marks shallow so they stay crisp after baking.
Smooth the rim where rings will rest, then gently polish the opening with your finger or a small sculpting tool so it stays even.
Bake it by your clay brand’s directions, because clay curing matters, then cool it fully.
That boost helps texture durability, and a thin sealant can protect the details.
Decorating And Displaying
With your clay cone baked and cooled, you can turn it into a cute little ring display that looks way fancier than the effort it takes! Add a quick waterproof sealing coat if your clay brand recommends it, then let everything dry for safe finishing.
- Set it on a tray or dresser, so your rings have a home.
- Slide on a smooth, tapered cone, and the different sizes’ll fit without wobbling.
- Use texture, marbling, or stamped patterns before baking for extra charm.
That’s it—you’ve got a stylish buddy for your jewelry, and your rings stay put instead of wandering off like tiny escape artists!
Polymer Clay Hair Accessories
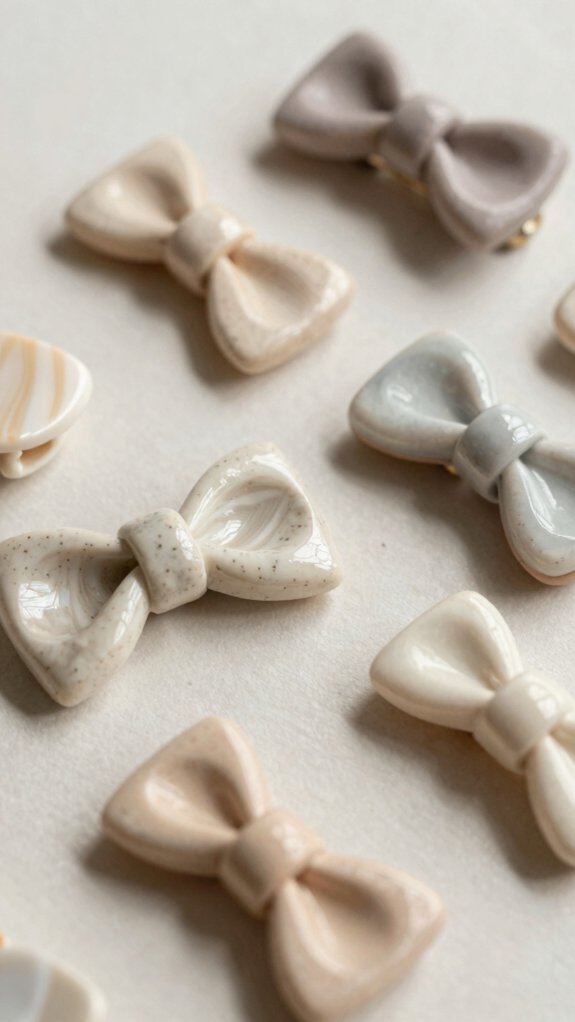
Polymer clay hair accessories are a fun place to start if you want to make something cute, wearable, and surprisingly easy!
You can shape barrettes, clips, or headbands into flowers, butterflies, or a custom charm unicorn, then use color theory to choose pastel shades that feel soft and friendly.
Grab clay, a clip base, and simple tools, then bake it as the package says.
After that, add paint or sealant for shine and strength.
Better yet, butterfly hairpins make sweet gifts, and they won’t cost much.
Honestly, you’ll feel like part of the cool crafty crowd!