Granny Square Love: A Simple Crochet Pattern
Disclosure: This post may contain affiliate links, at no extra cost to you. Content on DiyCraftNest is created with research support from AI tools and carefully reviewed, edited, and fact-checked by the lead author, Daniel Pat, to ensure accuracy and reliability. Learn more
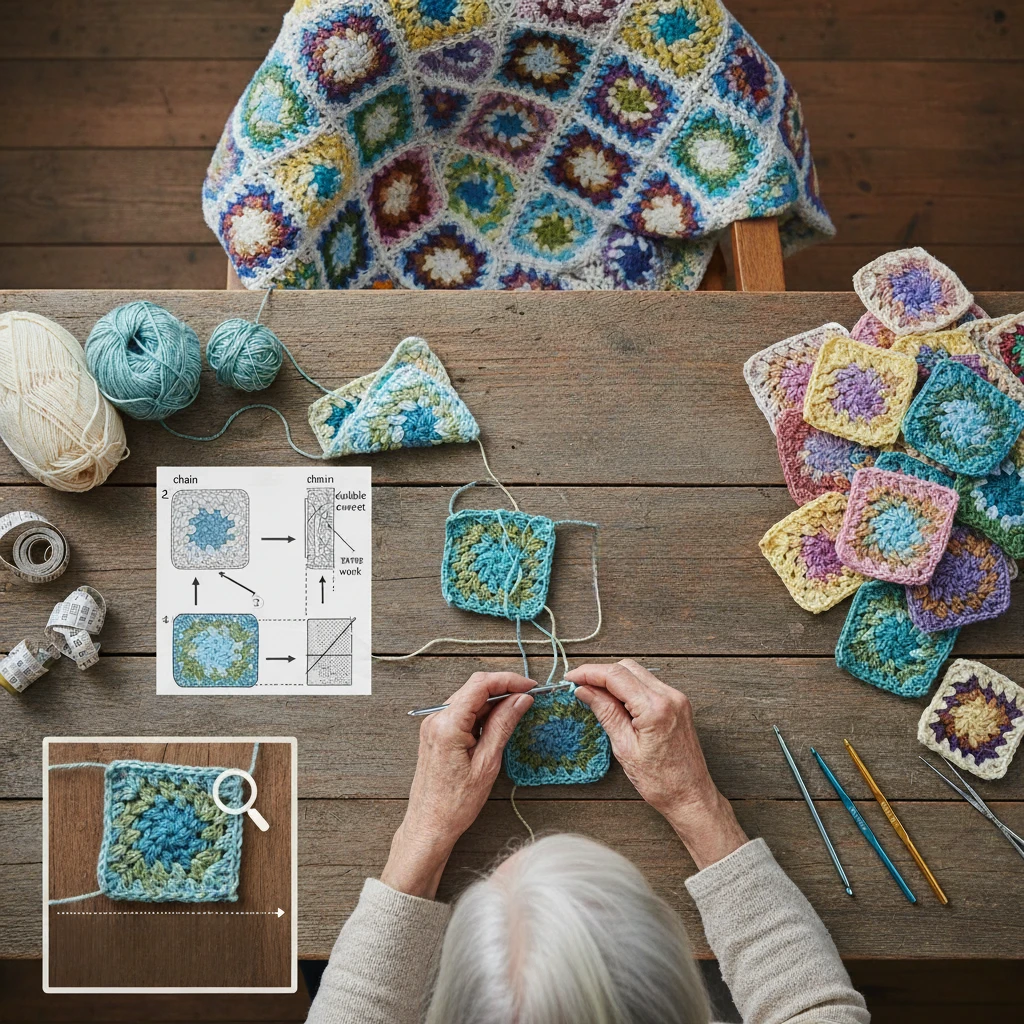
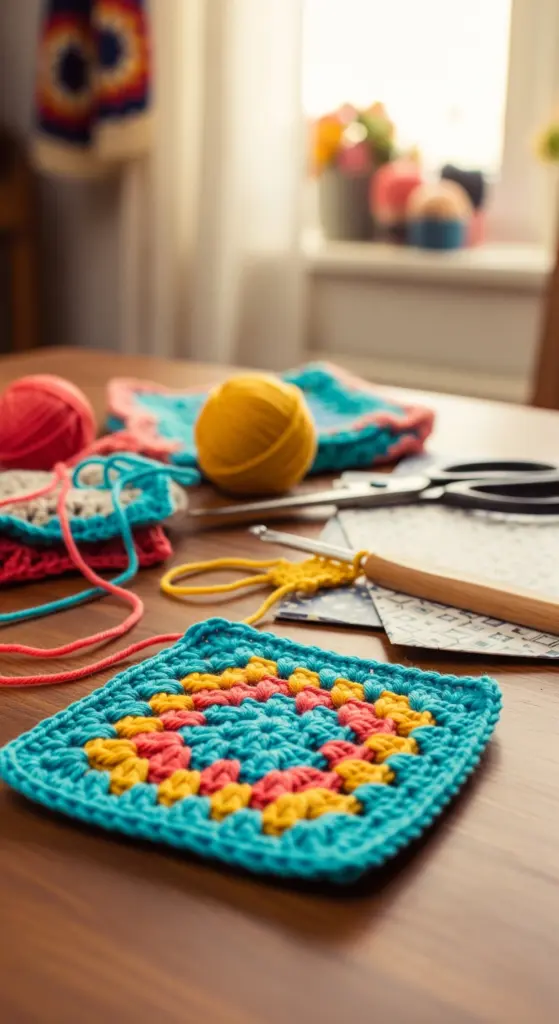
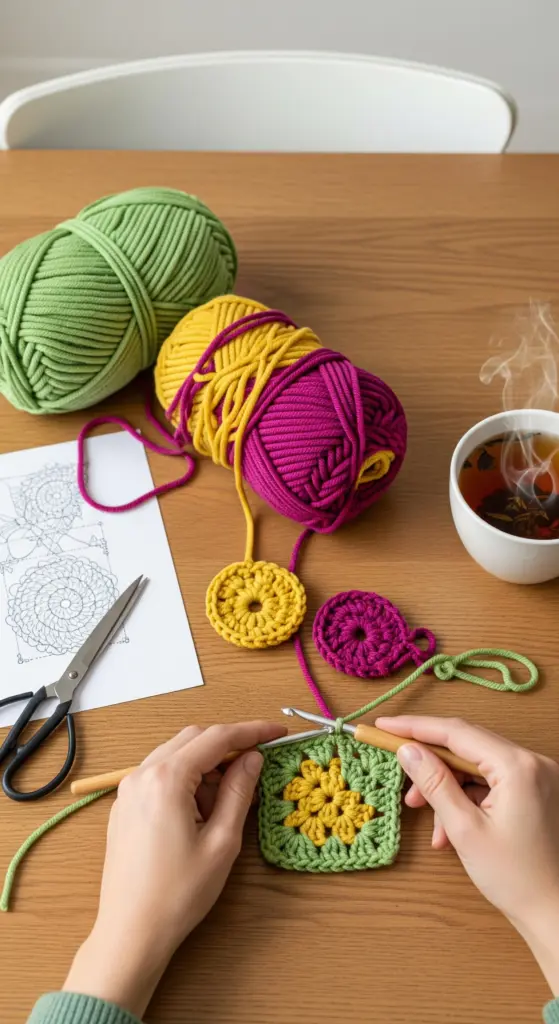
So, you want to learn how to make a granny square crochet pattern? It’s a classic for a reason, right? It’s one of those stitches that pretty much everyone knows, or at least recognizes. I remember making my first one, and let me tell you, it wasn’t perfect. But the great thing about this pattern is how forgiving it is. Whether you’re a total beginner or just looking for a quick project, the granny square is your friend. We’ll go through everything you need to know, from picking out yarn to joining your finished squares.
Key Takeaways
- The granny square crochet pattern is a foundational skill in crochet, perfect for beginners.
- Understanding basic stitches like chain and double crochet is key to this pattern.
- Turning your work after each round helps prevent twisting and creates a neater square.
- Consistency in yarn weight and hook size is important for achieving the desired gauge.
- Granny squares are incredibly versatile and can be used in a wide variety of projects.
- Experimenting with different yarn colors can dramatically change the look of your granny square.
- Joining finished squares is a common technique for larger projects like blankets.
- Troubleshooting common issues like uneven edges or tension problems is part of the learning process.
Understanding The Classic Granny Square Crochet Pattern
The Timeless Appeal Of The Granny Square
The granny square is a crochet icon, instantly recognizable and beloved by crafters for decades. Its simple construction makes it a fantastic starting point for anyone new to crochet, and it’s surprisingly versatile. You can create anything from a simple dishcloth to a large, cozy blanket with just this one motif. It’s a project that feels both nostalgic and completely modern.
A Beginner’s First Crochet Project
If you’re just starting out with a hook and yarn, the granny square is an excellent choice. The basic stitches involved are usually just the chain stitch and the double crochet. You’ll quickly get the hang of making the clusters and corners, and before you know it, you’ll be making squares without even needing to look at a pattern. It’s a confidence builder for sure!
Iconic Stitches: Chain And Double Crochet
The magic of the granny square lies in its simplicity, primarily using just two fundamental crochet stitches: the chain stitch (ch) and the double crochet (dc). These stitches, worked in specific groupings and spaces, create the characteristic look of the granny square. You’ll typically see groups of three double crochets, often called ‘clusters’, with chain stitches used to create spaces, especially at the corners.
Variations On The Classic Design
While the classic granny square is wonderful, there are many ways to put your own spin on it. Some people skip the chain stitches between the double crochet clusters along the sides, creating a more solid fabric. Others might change the number of chains in the corners or the number of double crochets in each cluster. Experimenting with these small changes can lead to very different looks.
The Importance Of Turning Your Work
Here’s a little tip that makes a big difference: turning your work after each round. It might seem like a small thing, but consistently turning your square helps keep the edges straight and prevents it from getting wonky. It’s a simple habit that leads to a much neater finished product, especially if you’re aiming for a perfectly square shape for something like an easy crochet blanket pattern.
Why Granny Squares Remain Popular
Granny squares have stayed popular for so long because they are just so adaptable. They’re great for using up yarn scraps, and you can make them any size you want by simply adding more rounds. Plus, they have a comforting, handmade feel that people love. They’re a staple in many crochet projects, from blankets to bags.
A Foundation For Crochet Skills
Learning to crochet a granny square is like learning the alphabet before writing a book. It teaches you about working in rounds, managing stitches, creating corners, and joining pieces. These are all skills that will help you tackle more complex patterns later on. It’s a solid base for your crochet journey.
Exploring Different Yarn Choices
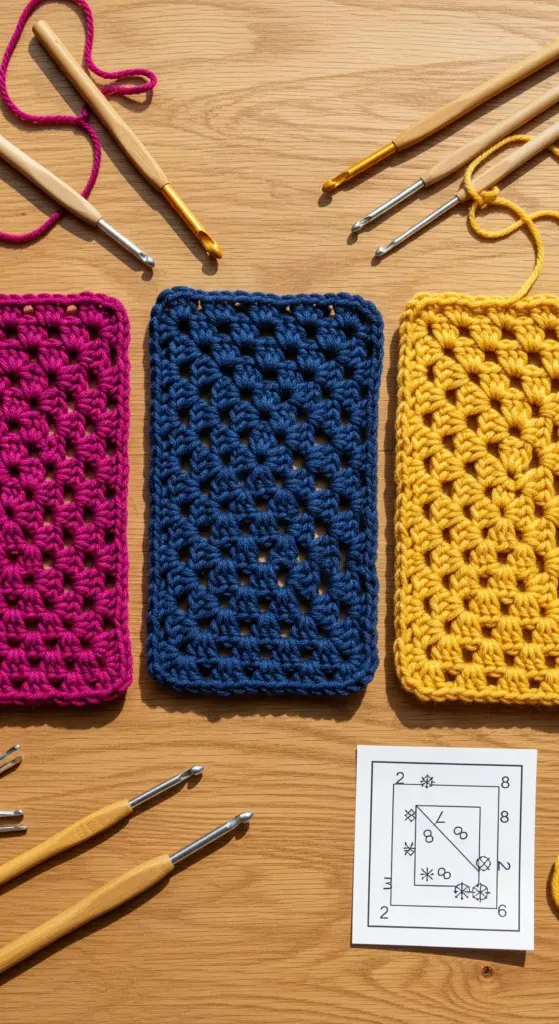
The type of yarn you choose can really change the look and feel of your granny square. Worsted weight yarn is common and works up quickly, but you can also use thinner yarns for a more delicate square or thicker yarns for a chunkier feel. Playing with different yarn weights and textures is part of the fun, and you can find great yarn options at many craft stores.
The Classic Granny Square Pattern
Here’s a basic breakdown of how a classic granny square is constructed:
- Start: Usually begins with a magic ring or a chain loop.
- Round 1: Create the center by working clusters of double crochets (typically 3 dc) with chain stitches in between, forming the first four corners.
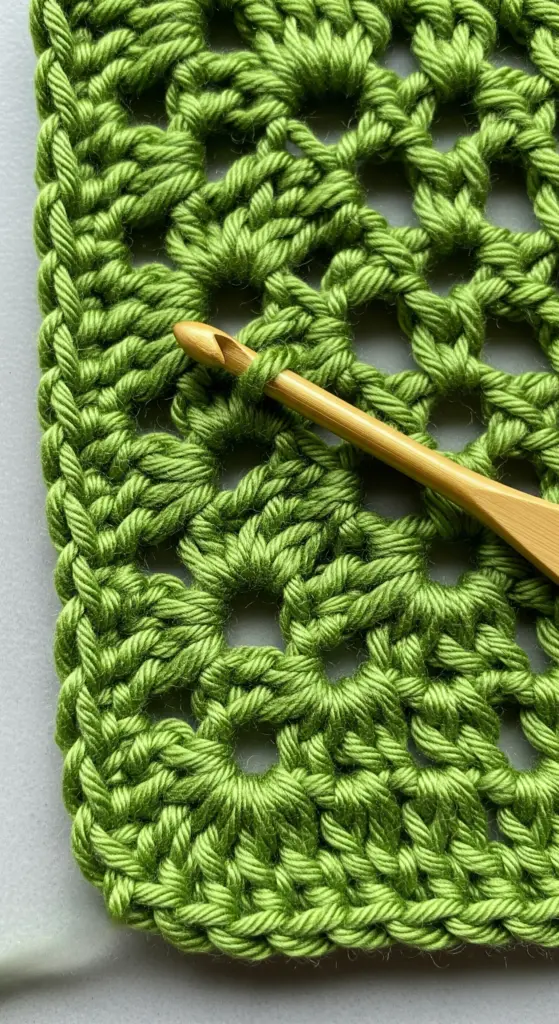
- Subsequent Rounds: Work into the chain spaces created in the previous round. Corners typically get a set of clusters with chain stitches (like 3 dc, ch-2, 3 dc), while the spaces along the sides get a cluster of 3 dc.
The beauty of the granny square is its repetitive nature. Once you understand the stitch placement for the corners and the sides, you can keep adding rounds to make your square as big as you like. It’s a very forgiving pattern, which is why it’s so good for beginners.
This pattern is a fantastic starting point for many projects, including making a beautiful easy crochet blanket pattern.
Essential Materials For Your Granny Square
To get started on your granny square journey, you’ll need a few key items. Don’t worry, it’s not a huge list, and most of these are things you’ll use for tons of other crochet projects too.
Choosing The Right Yarn Weight
The weight of your yarn really affects how your granny square turns out. Thicker yarns, like worsted weight, will make a bigger, chunkier square faster. Finer yarns, like sport or DK weight, will create a more delicate, smaller square. For your very first granny square, a worsted weight yarn is usually a good bet because it’s easy to handle and you can see your stitches clearly. It’s also what most beginner patterns are written for.
Selecting Your Crochet Hook Size
Your hook needs to work with your yarn. Most yarn labels will suggest a hook size, and that’s a great place to start. If you’re using worsted weight yarn, a 5.00 mm (US H/8) hook is a common choice. If your stitches are too tight and the fabric feels stiff, try a slightly larger hook. If your stitches are too loose and you’re getting big gaps, try a smaller hook. The goal is to have your stitches look neat and even, not too tight and not too loose.
Necessary Tools For Finishing
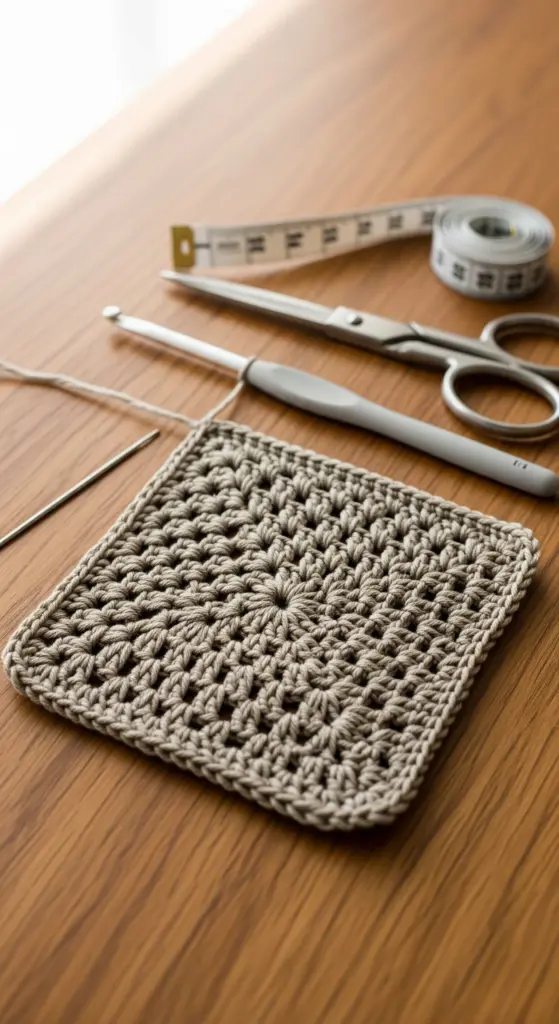
Once your granny square is all crocheted, you’ll need a couple of things to make it look neat. A tapestry needle is a must-have for weaving in all those yarn ends so they don’t unravel. Scissors are, of course, for cutting your yarn. That’s really it for the basics!
Understanding Yarn Labels
Don’t toss those yarn labels right away! They’re packed with helpful info. You’ll find the yarn weight category (like worsted, DK, etc.), the fiber content (like acrylic, cotton, wool), washing instructions, and often a suggested hook size. It’s like a little cheat sheet for your yarn.
Recommended Yarn Brands
While you can use almost any yarn, some brands are known for being reliable and easy to work with for beginners. Brands like Red Heart, Caron, Bernat, and Lion Brand are widely available and offer a good range of colors and weights. For a softer feel, you might look into brands like Lily Sugar ‘n Cream (for cotton) or explore some of the acrylic options from the brands mentioned.
Exploring Gradient Yarns
Gradient yarns, sometimes called
Mastering Basic Crochet Stitches
Let’s get down to the nitty-gritty of making a granny square. It’s not as complicated as it might seem, especially if you know a few basic stitches. Think of this section as your vintage crochet stitch guide, helping you get comfortable with the building blocks.
Understanding Crochet Abbreviations
Before you even pick up your hook, it’s good to know what all those letters and symbols mean. Most patterns use abbreviations to keep things short. Here are some common ones you’ll see:
ch: Chain. This is usually the very first stitch you make to start a project or a round.sl st: Slip Stitch. This stitch is often used to join rounds or move your yarn without adding height.dc: Double Crochet. This is the main stitch that forms the ‘clusters’ in a classic granny square.st(s): Stitch(es). This just refers to any stitch you make.
The Chain Stitch Explained
The chain stitch, or ch, is the foundation of most crochet projects. You make it by looping the yarn over your hook and pulling it through the existing loop on the hook. It creates a flexible cord that you can work into later. Getting a consistent tension with your chains is key for a neat start.
Creating Double Crochet Clusters
For a granny square, you’ll be making groups of three double crochet stitches, often called clusters. You work these stitches into the same space. So, you’ll yarn over, insert your hook into the space, yarn over, pull up a loop (you’ll have three loops on your hook), yarn over, pull through two loops (two loops left), yarn over, pull through the remaining two loops. Repeat this two more times in the same space. This forms your 3 dc cluster.
The Slip Stitch For Joining
When you need to connect one part of your work to another, or finish off a round, the slip stitch (sl st) is your friend. You insert your hook into the designated stitch or space, yarn over, and pull that yarn all the way through the stitch and the loop already on your hook in one go. It creates a flat join.
Single Crochet For Texture
While the granny square is mostly double crochet, sometimes you might see single crochet (sc) used, especially in variations or for joining. It’s a shorter stitch than the double crochet, creating a denser fabric. To make one, you insert your hook into the stitch or space, yarn over, pull up a loop (two loops on hook), yarn over, and pull through both loops.
Back Post Double Crochet Technique
This is a bit more advanced but great for adding texture. Instead of inserting your hook into the top of a stitch, you work around the post of the stitch from front to back. This makes the stitch stand out. It’s not in the basic granny square, but good to know for later!
Defining A Double Crochet Cluster
As mentioned, a double crochet cluster is typically three double crochet stitches worked into the same stitch or space. In a standard granny square, these clusters are separated by chain stitches, especially at the corners, which creates the open, lacy look.
US Versus UK Crochet Terms
This is important! Crochet terms can differ between the US and the UK. What’s called a ‘double crochet’ (dc) in the US is called a ‘treble crochet’ (tr) in the UK. And a US ‘treble crochet’ is a UK ‘double treble’. Always check which terms your pattern uses. For this guide, we’re sticking to US terms. If you need a quick reference, you can find a helpful US to UK Crochet Conversion Chart.
Understanding these basic stitches is like learning your ABCs for crochet. Once you’ve got them down, you can read almost any pattern and create amazing things. Don’t be afraid to practice each stitch a few times until it feels natural.
Step-By-Step Granny Square Construction
Let’s get down to business and actually make a granny square! It’s not as tricky as it might seem, and once you get the hang of it, you’ll be making them in your sleep. We’ll start from the very beginning, building that little center circle and working our way out.
Starting With A Magic Ring
This is how we create a nice, tight center for our square. You can also start with a chain and slip stitch, but the magic ring gives a cleaner look, in my opinion. It’s a bit fiddly at first, but stick with it. You’ll get it!
Round One: Building The Center
This is where the magic happens, literally. We’ll be making our first little clusters of stitches that form the base of the square. It’s usually just a few double crochets worked into that center ring.
Creating The First Corner
Corners are key to making it a square. We’ll create these by chaining a few stitches and then working more stitches into that chain space. This gives us that nice angled turn.
Round Two: Expanding The Square
Now we start to see it take shape! We’ll work into the spaces created in the previous round, building up the sides and making those corners more defined. The pattern for each round generally involves working into the chain spaces along the sides and into the corner spaces.
Adding Chains Between Clusters
These little chain stitches between the groups of double crochets are what give the classic granny square its lacy look. They create spaces for you to work into in the next round.
Round Three: Developing The Sides
We continue to build outwards, adding more clusters and chain spaces. You’ll notice the square getting bigger, and the pattern becoming more familiar.
Working Into Chain Spaces
This is the main technique for expanding your square. You’ll be skipping over the double crochets and working directly into the chain spaces, both along the sides and in the corners.
Completing The First Few Rounds
Once you’ve finished the first few rounds, you’ll have a good feel for the rhythm of the pattern. It’s all about repeating those corner and side sequences. You can find a great free pattern with instructions and a chart to help you get started on [af44].
Techniques For A Perfect Granny Square
Making a perfect granny square is all about a few key techniques that keep things neat and tidy. It’s not as complicated as it might seem, and once you get the hang of it, you’ll be making squares that look really good. We’re talking about how to crochet granny squares here, and getting them just right makes a big difference in your finished projects.
The Art Of Turning Your Work
Turning your work at the end of each round is super important. It keeps your stitches facing the right way and helps your square grow evenly. If you forget to turn, your edges can start to look a bit wonky, and the whole thing might twist up. It’s a simple step, but it really matters for a flat, square shape.
Avoiding A Twisted Square
Twisting happens when you don’t turn your work correctly or when your tension is all over the place. Make sure you’re always turning your piece in the same direction, like always turning it clockwise or counter-clockwise. This consistency helps prevent that annoying twist that can ruin a good square. Also, try to keep your yarn tension steady throughout the process.
Achieving Neat Edges
Neat edges come from consistent stitch work and proper turning. When you work into the chain spaces, try to get your hook into the middle of the space, not too far to one side. This makes your sides look straight. Some people like to add a single crochet or a slip stitch along the edge at the end to make it even cleaner, which is a nice touch.
Blocking Your Finished Square
Blocking is like giving your finished granny square a spa day. After you’re done crocheting, you wet the square and then pin it out to the exact size and shape you want. This helps all your stitches relax and even out, making your edges super straight and your corners sharp. It really makes a difference, especially if you’re joining squares together for a bigger project like a blanket.
Maintaining Consistent Tension
This is a big one for any crochet project, really. If your tension is too tight, your stitches will be stiff and hard to work into. Too loose, and you get floppy fabric with big gaps. Try to find a middle ground where your stitches are firm but have a little give. Holding your yarn and hook the same way each time helps a lot with keeping tension even.
Securing Your Yarn Ends
When you finish a round or change colors, you need to tie off your yarn securely. The best way is to weave the end back through several stitches using a tapestry needle. Go back and forth a few times in different directions. This stops your ends from coming undone later, which would be a shame after all your hard work.
The Impact Of Turning On Shape
Turning your work correctly affects the overall shape. If you’re making a square, you want it to stay square! Turning ensures that the stitches build upon each other in a way that maintains those straight sides and defined corners. Skipping a turn can make your work lean or curve, turning your intended square into something else entirely.
Tips For A Flatter Square
To get a flatter square, pay attention to your corners. Make sure you’re putting the correct number of stitches in each corner space. Also, try not to pull your stitches too tight in the corners, as this can make them bunch up. Blocking, as mentioned before, is also a fantastic way to get a really flat finish. Sometimes, adding a simple border of single crochet around the finished square can help to even out any minor imperfections and give it a crisp edge.
Expanding Your Granny Square Pattern
So, you’ve got the hang of the basic granny square, and now you’re wondering, ‘How do I make this thing bigger?’ It’s actually pretty straightforward. The beauty of the granny square is its repeat. You just keep adding rounds, and it grows and grows.
Repeating Rounds For Size
To make your square larger, you simply repeat the last round you worked. The pattern is built on adding clusters of double crochet stitches into the spaces created in the previous round, with chain stitches to form the corners and separate the clusters. So, if your last round involved working into chain-1 spaces along the sides and chain-2 spaces in the corners, your next round will do the same. You’ll continue this process until your square reaches the size you want.
Adding More Rounds To Grow
Each new round adds more stitches and more space. You’ll notice the square naturally expands outwards. The key is to maintain the corner structure – always working the corner sequence (like 3 double crochets, chain 2, 3 double crochets) into the corner chain-2 spaces. Along the sides, you’ll work your stitch clusters into the chain-1 spaces from the previous round. It’s like building layers, and each layer makes the whole thing bigger.
Increasing Corner Stitches
While the basic granny square keeps the corner structure consistent (usually 3 dc, ch 2, 3 dc), you can actually change this to make your square grow differently or add more flair. For instance, you could try working 5 double crochets and a chain-2 into the corner, or even a more complex stitch pattern. This change in the corner will affect how the sides develop in subsequent rounds, so it’s something to consider if you want a unique look.
Working Into Side Spaces
As your square gets bigger, you’ll have more chain-1 spaces along the sides between the corners. This is where you’ll continue to work your groups of double crochet stitches. The number of these side spaces will increase with each round. For example, if Round 3 had one group of 3 dc on each side, Round 4 might have two groups of 3 dc on each side, separated by chain-1 spaces. You just keep filling these spaces.
Maintaining The Pattern Repeat
The trick to a neat, growing granny square is consistency. Always identify the corner spaces and the side spaces from the previous round. Stick to the established stitch count for your clusters and the chain counts for your corners and sides. If you’re adding more rounds, just keep repeating the sequence that builds the square outwards. It’s all about following the established rhythm.
Creating Larger Motifs
Want a really big square? Just keep going! There’s no real limit to how many rounds you can add. You can make a small coaster or a giant blanket panel. The process remains the same: identify the corners, work the corner stitches, identify the side spaces, work the side stitches, and keep repeating. It’s a very forgiving pattern for scaling up.
Adjusting For Different Sizes
If you’re aiming for a specific size, you might need to adjust the number of rounds. For example, if you want a 6-inch square and your pattern typically yields 4-inch squares after 4 rounds, you’ll just need to add more rounds until you reach that 6-inch mark. It’s a good idea to measure your work periodically as you go to make sure you’re on track.
The Flexibility Of The Pattern
This is why the granny square is so loved. It’s incredibly adaptable. You can change yarn weights, hook sizes, and color combinations, and you can also change how many rounds you add. It’s a pattern that grows with your imagination and your project needs. You can even mix and match different granny square sizes if you’re making a patchwork item.
Creative Granny Square Projects
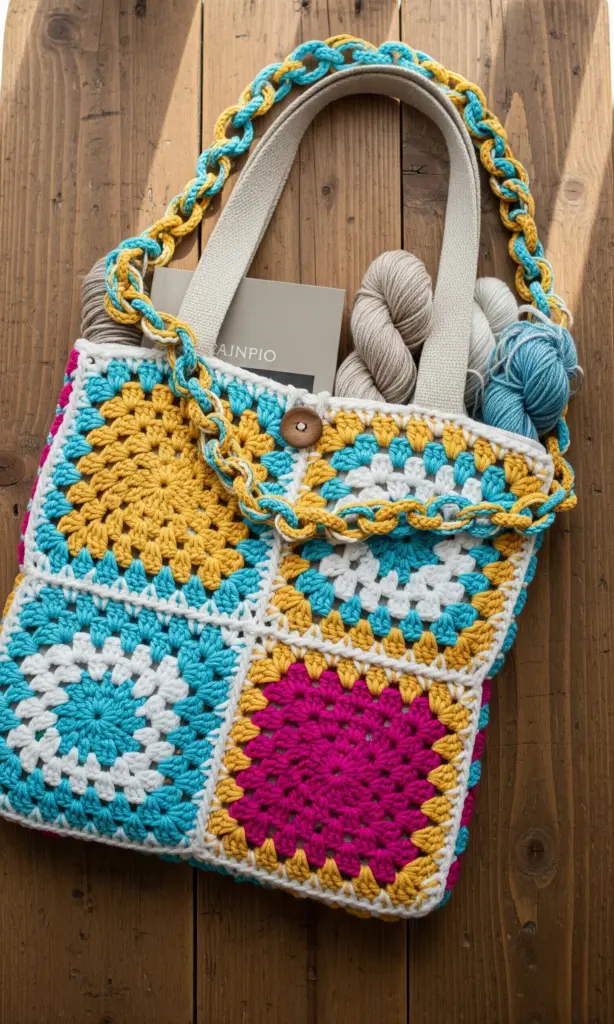
Granny squares are super versatile, aren’t they? Once you get the hang of the basic pattern, you can really do so much with them. It’s not just about blankets, though those are awesome. Think about making a bunch of these little squares and joining them up for a really cool patchwork-style pillow cover. Or maybe a tote bag? You could make a bunch of squares and then seam them together to form the body of the bag, adding straps made from more crochet. It’s a great way to use up leftover yarn too, especially if you have a lot of small bits in coordinating colors.
Designing Crochet Blankets
Blankets are probably the most popular thing to make with granny squares, and for good reason. You can make them as small as a baby blanket or as big as a king-size bedspread. Just keep adding rounds to your squares and then join them together. You can arrange them in a simple grid, or get fancy with different color arrangements for each square. It’s a project that grows with you, and you can work on it bit by bit.
Crafting Cozy Pillows
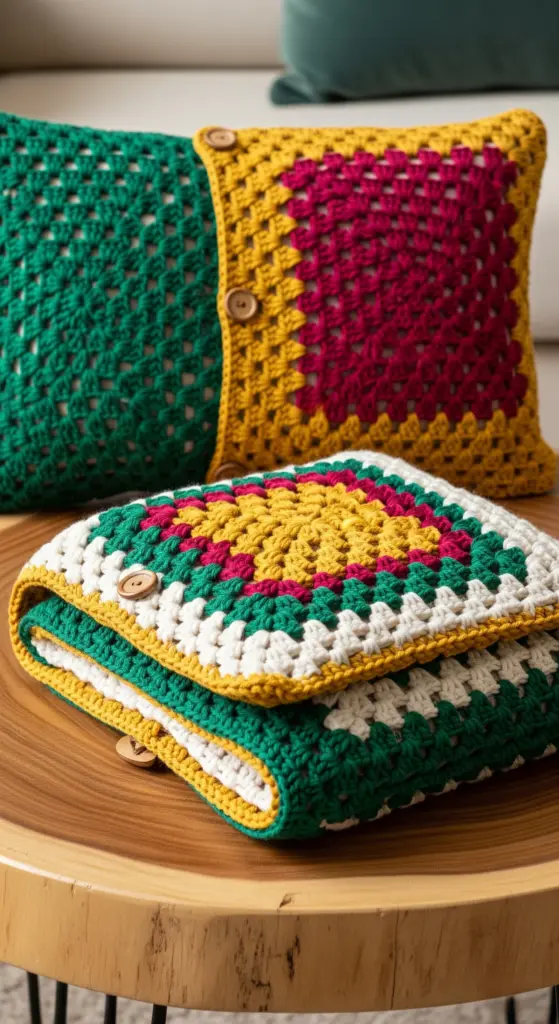
Want to add a handmade touch to your living room? Granny squares make fantastic pillow covers. You can make two squares of the same size and seam them together with a zipper or buttons for closure, or make one large square and fold it over. Mixing different colors within the squares can really make them pop against your sofa.
Fashioning Unique Bags
From tote bags to small purses, granny squares can be the foundation. For a tote, you might crochet four large squares for the front and back, and two smaller ones for the sides. Then, you just need to add straps, maybe made from crocheted chains or sturdy fabric. It’s a project that’s both practical and stylish.
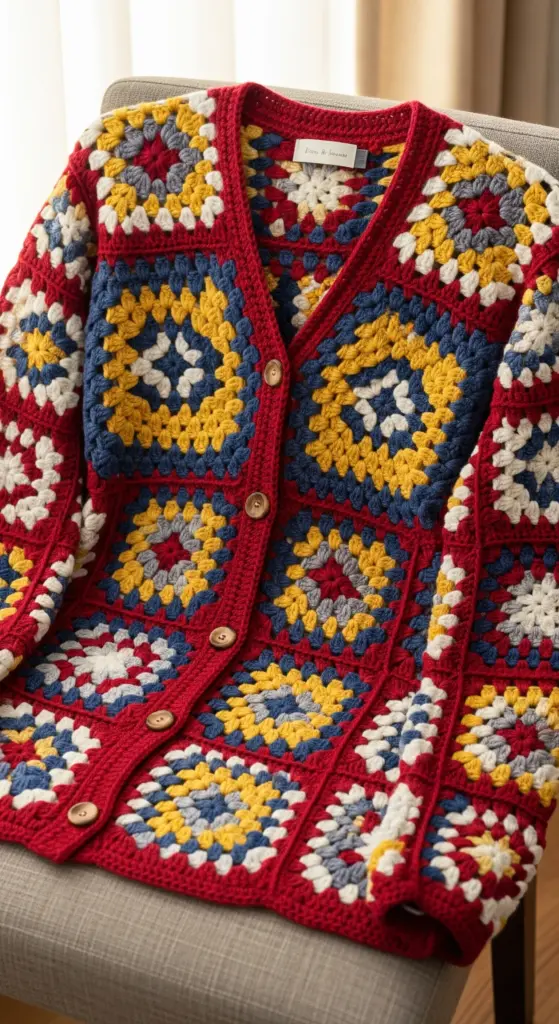
Creating Stylish Cardigans
Cardigans made from granny squares are really having a moment. You can use a few well-placed squares to form the yoke of a sweater, or make many smaller squares and join them to create the entire garment. It gives a wonderfully retro and bohemian vibe.
Ideas For Home Decor
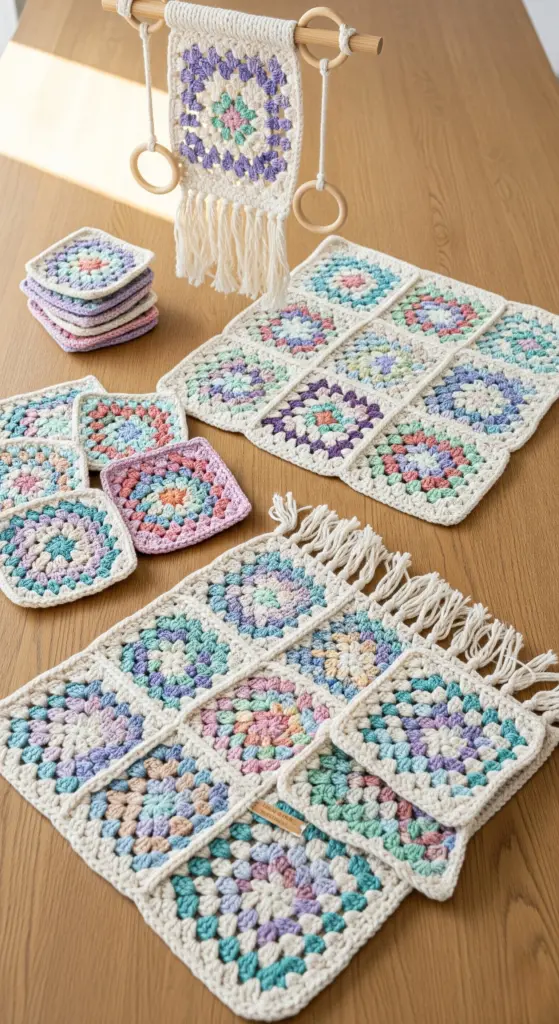
Beyond blankets and pillows, think about coasters, placemats, or even a table runner. You can make smaller squares and join them in rows or patterns to create these items. A set of granny square coasters would make a lovely handmade gift.
Patchwork Style Designs
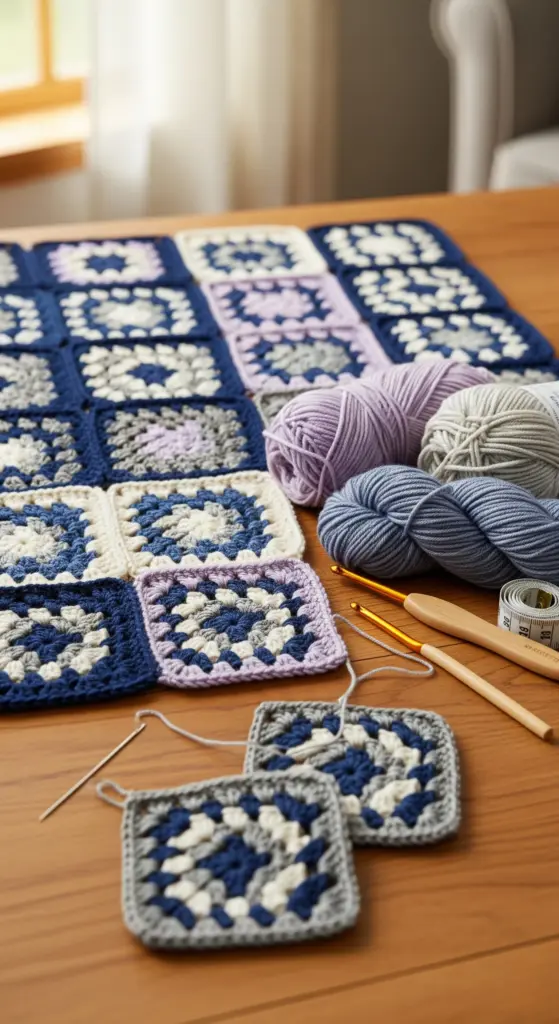
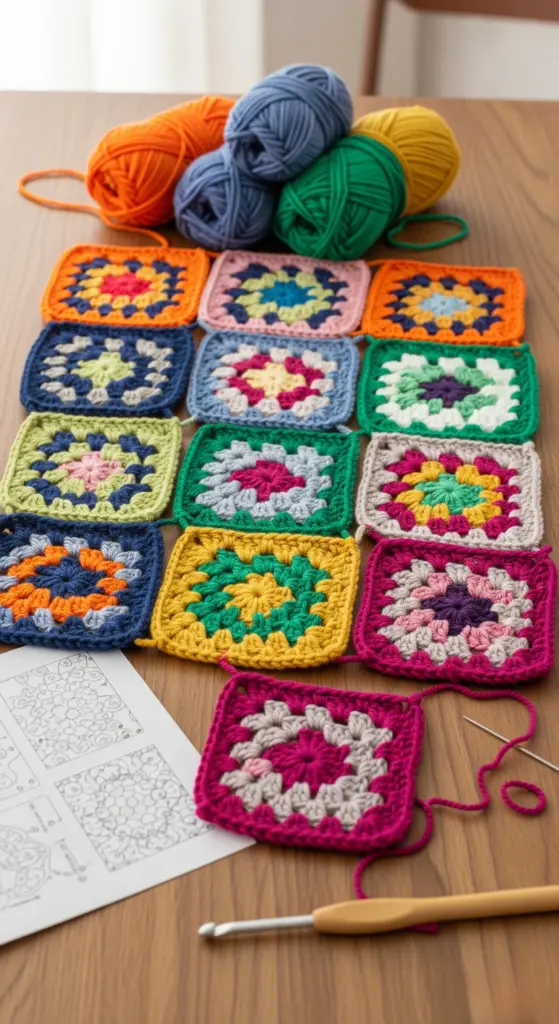
This is where the real fun begins with color. By making squares in a variety of colors and then joining them, you create a vibrant patchwork effect. This works wonderfully for blankets, bags, or even clothing items. It’s a great way to experiment with color combinations you might not normally try.
Incorporating Into Garments
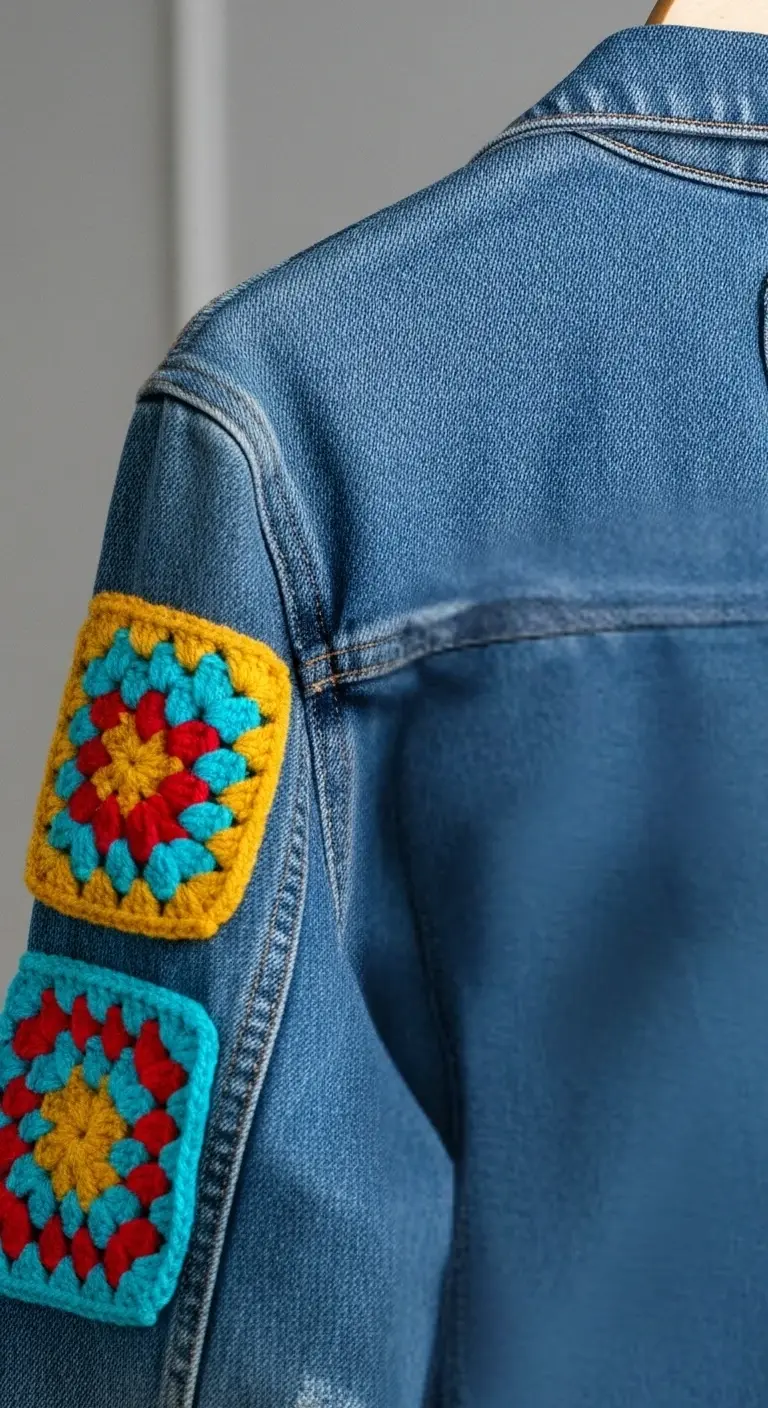
Besides cardigans, you can add granny square motifs to other clothing. Think about adding a granny square panel to the back of a denim jacket, or using them as appliques on t-shirts or skirts. They can add a unique, personalized touch to store-bought items.
Inspiration For Square Motifs
Don’t feel limited to just the traditional granny square. There are so many variations out there! You can change the number of double crochets in the clusters, alter the chain spaces, or even introduce new stitches. Looking at other people’s work online, like on Pinterest or Ravelry, can give you tons of ideas for new color palettes and pattern modifications. It’s amazing how a few simple changes can make a square look completely different.
Advanced Granny Square Variations
So, you’ve got the basic granny square down pat, huh? That’s awesome! But what if you’re looking to shake things up a bit, make your squares pop, or maybe just try something a little different? There are tons of ways to tweak the classic granny square pattern. It’s not just about making it bigger; you can really change the look and feel of it.
Eliminating Side Chain Stitches
Sometimes, those little chain stitches between the double crochet clusters on the sides can make the square look a bit lacy or gappy. If you want a more solid look, you can try skipping those chains. Just work your double crochet clusters directly into the next cluster. It makes the sides look more connected. It’s a small change, but it really does make a difference in the overall appearance.
Adding Texture With Post Stitches
Want to give your granny squares some serious texture? Post stitches are your best friend here. Instead of just working into the stitches as usual, you’ll work around the post of the stitch from the previous round. This can create raised ridges that add a lovely tactile quality. You can use front post double crochet (FPDC) or back post double crochet (BPDC) to create different effects. It’s a bit more involved than the standard stitch, but the results are totally worth it.
Exploring Different Corner Stitches
The classic granny square corner is usually (2 double crochet, chain 2, 2 double crochet) or (3 double crochet, chain 2, 3 double crochet). But you can play with this! Try using a different number of stitches in the corner, or change the number of chains in the corner space. You could even try a different stitch altogether, like a cluster of three treble crochets with a chain in between, or a simple single crochet. Experimenting with corners can really change the shape and the overall vibe of your square. It’s a fun way to make your squares unique.
Incorporating New Color Changes
Color changes are a big part of what makes granny squares so versatile, but how you change colors can also be a variation. Instead of changing colors at the end of a round, try changing colors mid-round. You can also try carrying yarn up the side of your work for certain colors, or using a join-as-you-go method with multiple colors. This can create interesting color blocks or stripes within the square itself, not just between rounds. It’s a great way to get creative with your palette.
Creating Solid Granny Squares
If you’re not a fan of the traditional holes in a granny square, you can make a solid version. This usually involves working double crochets (or other stitches) into every stitch and chain space, without leaving any gaps. It creates a much denser fabric. You might need to adjust your hook size or stitch count to get a nice, flat square. These solid squares are great for projects where you don’t want any holes, like sturdy bags or blankets that need to be extra warm.
Using Different Stitch Combinations
Who says it has to be all double crochet? You can mix and match stitches to create unique granny square designs. Try incorporating single crochet, half double crochet, or even treble crochet stitches into your clusters. You could also try working stitches into the back loop only or front loop only for added texture. Combining stitches can lead to really interesting patterns and textures that are far from the basic granny.
Modifying The Classic Pattern
There are so many little tweaks you can make to the classic pattern. For instance, some people prefer to skip the chain stitches between the clusters on the sides for a more solid look. Others might add an extra chain in the corners for a more pronounced point. You can even change the number of stitches in each cluster. These small adjustments can significantly alter the final appearance of your square, making it truly your own. It’s all about finding what works for you and your project.
Experimenting With Stitch Placement
Instead of always working into the chain spaces, try working your clusters into the stitches themselves, or even around the posts of stitches from previous rounds. This can create a completely different texture and appearance. For example, working into the back loop of the stitch can create a subtle ridge, while working into the front loop can create a different kind of texture. It’s a way to add depth and visual interest without changing the basic structure too much. You can find some really neat ideas for these variations on crochet pattern sites.
Joining Your Crocheted Squares
So, you’ve made a bunch of granny squares, maybe for a blanket or a pillow, and now it’s time to put them all together. This is where things can get a little tricky, but don’t worry, it’s totally doable. There are a few ways to join your crocheted squares, and each gives a slightly different look and feel to your finished item. Picking the right method really depends on the vibe you’re going for.
The Invisible Seam Method
This is a really popular way to join squares because, well, it’s nearly invisible! It creates a super clean finish, making it look like the squares just grew together. It’s a great choice if you want the focus to be on the colors and stitches of your squares, not the seams. You’ll need your yarn needle and a bit of patience for this one. It involves carefully picking up specific loops on each square and pulling the yarn through to create a tight, neat join. It’s a bit like magic, honestly. If you’re looking for a beginner crochet square tutorial that covers this, you can find one that explains the process step-by-step.
Joining With Single Crochet
If you want a more defined seam, or if you’re in a bit of a hurry, joining with single crochet is a good option. It’s faster than the invisible seam and adds a bit of texture to the join itself. You’ll typically work your single crochet stitches into the edge stitches or chain spaces of both squares at once. This method can also be used to add a decorative border as you join.
Creating Decorative Seams
Beyond the basic single crochet, there are other ways to make your seams a feature. You could use a contrasting yarn color to make the joins stand out, or even try a different stitch like a slip stitch worked in a decorative way. Some people like to create a sort of ‘X’ pattern over the join. It really depends on how much you want the joining lines to be part of the overall design.
Attaching Squares Together
When you’re actually connecting the pieces, it helps to lay them out first. See how you want them arranged before you start sewing or crocheting them together. Pinning them in place can be a lifesaver, especially if you have a lot of squares. It stops them from shifting around while you’re working.
Methods For Joining Edges
Here’s a quick look at some common joining methods:
- Single Crochet Join: Quick and adds a bit of texture.
- Whip Stitch/Mattress Stitch: Similar to the invisible seam, done with a yarn needle.
- Crocheted Seam: Using single crochet or slip stitch to join.
Securing Your Joined Pieces
Once you’ve joined all your squares, make sure to weave in all those loose yarn ends really well. Nobody wants their beautiful creation falling apart! A good knot and weaving the end back through the stitches a couple of times usually does the trick.
Visualizing Your Joined Project
Before you commit to a joining method, it’s a good idea to visualize the final piece. Think about how the seams will look with your chosen colors. Sometimes, a simple join is best, and other times, a more decorative seam can really make the project pop. You can even look at examples online to get ideas. For instance, seeing how others have joined their squares can be really helpful when you’re trying to decide on a joining technique.
Joining your granny squares is a big step in finishing your project. It’s where all your individual pieces come together to form something new. Take your time with this part, and don’t be afraid to try out different methods to see what works best for you and your project’s design. The result will be worth the effort!
Troubleshooting Common Issues
Sometimes, even with the best intentions, our crochet projects don’t turn out quite as planned. It happens to everyone, from total beginners to seasoned pros. Don’t get discouraged if your granny squares aren’t perfectly symmetrical or if your edges look a little wonky. Most of these common hiccups can be fixed with a little patience and a few simple adjustments.
Addressing Wonky Squares
If your granny square is leaning to one side or just doesn’t look quite square, it’s often a tension issue. Try to keep your stitches consistent throughout each round. Sometimes, a tight corner or a loose side can throw off the shape. You might also be accidentally adding an extra stitch or skipping one, especially when you’re working into chain spaces. Double-checking your stitch count at the end of each round can really help prevent this.
Fixing Uneven Edges
Uneven edges can make your finished project look messy. This usually happens when your turning chains aren’t consistent or when you’re not quite getting the right number of stitches along the sides. If the edges are wavy, your tension might be too loose. If they’re pulling in, it’s likely too tight. Sometimes, just blocking your finished squares can work wonders to even out those edges.
Correcting Tension Problems
Getting your tension just right is probably the most common challenge in crochet. If your fabric is too stiff, you’re probably crocheting too tightly. Try using a slightly larger hook or just consciously relaxing your grip on the yarn and hook. If your fabric is too loose and has big gaps, you might be crocheting too loosely. Try a smaller hook or focus on pulling your stitches a bit snugger. It takes practice, so don’t worry if it’s not perfect right away.
Managing Yarn Tangling
Oh, the dreaded yarn tangle! This can happen for a few reasons. If you’re using a center-pull ball, sometimes the yarn can get caught underneath. Letting the ball roll freely or using a yarn bowl can help. If you’re working with multiple strands or a particularly fuzzy yarn, tangles are more likely. Try to keep your working yarn separate from the rest of the skein as much as possible.
Resolving Stitch Count Errors
Miscounting stitches is super common, especially in complex patterns or when you’re just starting out. The best way to avoid this is to count your stitches at the end of each round. If you notice an error, it’s usually best to gently pull out your stitches (frogging!) back to where the mistake happened and correct it. It might seem tedious, but it saves you from having a bigger problem later on.
Dealing With Gaps Between Stitches
Sometimes, you’ll end up with little holes or gaps between your stitches, especially in the corners or where you join rounds. This is often due to the turning chains or how you’re working into the chain spaces. Making sure you’re working your stitches snugly into the chain spaces and using the correct turning chains can minimize these gaps. For corners, working the required stitches directly into the chain-2 space, rather than around the chain, can also help.
Ensuring Square Symmetry
For a truly square granny square, you need to make sure each side and corner is treated equally. This means consistently working the same number of stitches and chain spaces in each corner and along each side. If one side is longer than another, it’s usually because of an error in stitch count or tension on that particular side. Pay close attention to the pattern instructions for each round to keep things symmetrical.
When Your Square Isn’t Quite Square
If, after all your efforts, your square still isn’t perfectly square, don’t despair! Sometimes, a little bit of blocking can work wonders. Wet blocking or steam blocking can help to even out stitches, relax tight areas, and gently shape your crochet piece into a perfect square. It’s like magic for wonky projects!
Sharing Your Granny Square Creations
Once you’ve made a bunch of granny squares, the fun really begins! It’s time to show off your hard work and connect with other crafters. Sharing your creations is a fantastic way to get inspired and inspire others.
Tagging On Social Media
Social media is a great place to share your granny squares. Platforms like Instagram and Pinterest are full of crafters. When you post a picture of your finished item, use relevant hashtags like #grannysquare, #crochetlove, #handmade, or #crochetaddict. If you’re following a specific pattern designer, tag them! Many designers love to see what you’ve made and might even feature your work on their page. It’s a nice way to give credit and get your work seen by a wider audience.
Adding To Your Ravelry Queue
Ravelry is a huge online community for knitters and crocheters. It’s like a giant database for patterns and projects. When you finish a project, you can add it to your Ravelry queue. This is a great way to keep track of what you’ve made, what patterns you liked, and to see how others have interpreted the same pattern. You can also add notes about the yarn you used or any changes you made, which is super helpful for future reference.
Sharing Progress Photos
Don’t just share the finished product! Sharing your progress along the way can be really engaging. Post pictures of your squares as you make them, or show off how you’re joining them together. This gives people a behind-the-scenes look at your creative process. It also allows others to offer tips or encouragement if you get stuck on something. It makes the journey as exciting as the destination.
Joining Crochet Communities
There are many online groups, like Facebook groups or forums, dedicated to crochet. Joining these communities is a wonderful way to connect with people who share your passion. You can ask questions, get advice, share your successes, and even commiserate over tricky bits. These groups often have challenges or sew-alongs that can be a lot of fun and a great way to make new crochet friends.
Inspiring Other Crafters
Your unique color choices, your neat joins, or even a project you made from a simple granny square can spark ideas for someone else. Maybe someone sees your blanket and decides to try a similar color scheme, or perhaps your neatly joined squares inspire them to practice their joining techniques. You never know who you might influence with your creativity.
Receiving Project Features
Sometimes, if you tag a designer or use specific hashtags, your project might get featured! This could be on a designer’s blog, a crochet magazine’s social media, or even in a roundup of projects. It’s a really nice feeling to have your work recognized and shared. It’s like a little pat on the back for all your hard work.
Connecting With Fellow Crocheters
Crochet is often a solitary activity, but sharing your work helps you feel connected. You can chat with people about yarn choices, stitch patterns, and project ideas. It’s a way to build friendships and find people who understand the joy (and sometimes frustration!) of working with yarn. You might even find local crochet groups to meet up with in person.
Showcasing Your Finished Work
Ultimately, you want to show off what you’ve made! Whether it’s a cozy blanket, a set of pillow covers, or a stylish bag, your finished granny square items are something to be proud of. Display them in your home, gift them to loved ones, or sell them if you wish. Seeing your creations come to life is incredibly rewarding.
Understanding Granny Square History
Origins Of The Granny Square
The granny square, that familiar diamond of stitches, has a history that’s a bit fuzzy around the edges, much like an early, unblocked version. While pinpointing its exact birthdate is tricky, its roots are firmly planted in the 19th century. Early crochet patterns, often found in magazines and books, featured motifs that laid the groundwork for what we now recognize as the granny square. These early versions might not have had the distinct clusters of double crochet we see today, but the idea of building outward from a center point was definitely there. It was a way to use up yarn scraps and create something warm and decorative.
The Square’s Cultural Impact
This simple square really made its mark in the mid-20th century, especially in the 1970s. Think vibrant colors, afghans draped over sofas, and a general feeling of cozy, handmade comfort. It became a symbol of a certain era, appearing in popular culture and becoming a go-to project for crafters of all levels. Its accessibility meant that many people learned to crochet specifically with the granny square, making it a shared experience across generations. It wasn’t just a craft item; it was part of the cultural fabric.
Evolution Of The Pattern
Over time, the granny square pattern has seen a lot of tweaks and variations. While the classic version uses clusters of three double crochets with chain stitches in between and at the corners, people started experimenting. Some removed the chains between clusters for a denser look, others changed the corner chains, and new stitch combinations were introduced. This adaptability is a big part of why it’s stuck around. It’s easy to modify, making it a canvas for creativity.
Nostalgia And The Granny Square
For many, the granny square brings back memories of childhood, of grandmothers and mothers crocheting. It’s tied to feelings of warmth, home, and comfort. That nostalgic pull is powerful. Even today, when you see those familiar colors and patterns, there’s an instant connection to a simpler time. It’s like a warm hug in yarn form, and that feeling is something people actively seek out in their crafting.
Granny Squares In Popular Culture
It’s funny how a simple crochet pattern can become so recognizable. The granny square has popped up in movies, TV shows, and fashion. Think of those iconic afghans you see in films that just scream ‘home.’ It’s become a visual shorthand for handmade coziness. Its presence in these places has kept it in the public eye, reminding new generations of its charm and encouraging them to pick up a hook.
The Timeless Design Element
What makes the granny square so enduring? It’s partly its simplicity, partly its versatility, and partly that touch of nostalgia. But it’s also a really effective design. The way it grows outward is satisfying, and the corners create a natural structure. You can make it tiny or huge, use two colors or twenty, and it always looks like a granny square. It’s a design that just works, no matter how you play with it.
Historical Crochet Techniques
Looking back at historical crochet, you see techniques that are still used today. The basic stitches like chain stitch and double crochet are the building blocks. Early patterns might have used different terminology or hook sizes, but the core methods of creating fabric with a hook and yarn are consistent. Understanding these older techniques can give you a new appreciation for how the granny square, and crochet in general, has developed.
The Enduring Legacy Of The Square
The granny square isn’t just a passing trend; it’s a crochet staple. Its journey from 19th-century beginnings to a 1970s icon and its current status as a beloved modern motif shows its staying power. It’s a project that welcomes beginners, challenges experienced crafters with variations, and connects people through a shared love of making things. Its legacy is one of adaptability, comfort, and the simple joy of creating something beautiful with your own hands.
Customizing Your Granny Square Colorways
Picking colors for your granny squares can be a lot of fun, and it really changes how the whole thing looks. You can go super traditional with just a few colors, or you can get wild and use a different color for every single round. It’s all about what you like best.
Choosing Contrasting Colors
Using colors that are opposite each other on the color wheel can make your granny square really pop. Think about blues and oranges, or reds and greens. This makes each stitch and cluster stand out, giving your project a really vibrant feel. It’s a great way to make a bold statement.
Creating Gradient Effects
If you want a softer look, try using colors that are close to each other on the color wheel, like different shades of blue or green. You can also achieve a gradient by using a light color in the center and gradually moving to darker shades as you work your way out. This gives a really smooth, blended appearance.
Selecting Harmonious Palettes
Sometimes, you just want colors that look nice together without being too loud. Think about pastels, or earthy tones like browns and creams. These palettes create a cozy, calm feeling for your finished item. It’s like a warm hug in crochet form.
Using Color To Define Motifs
You can use color changes to create patterns within your granny square. For example, you could make each corner a different color, or use a contrasting color for the chain spaces between the double crochet clusters. This adds visual interest and can make your square look more complex, even if the stitches are simple.
Planning Your Color Changes
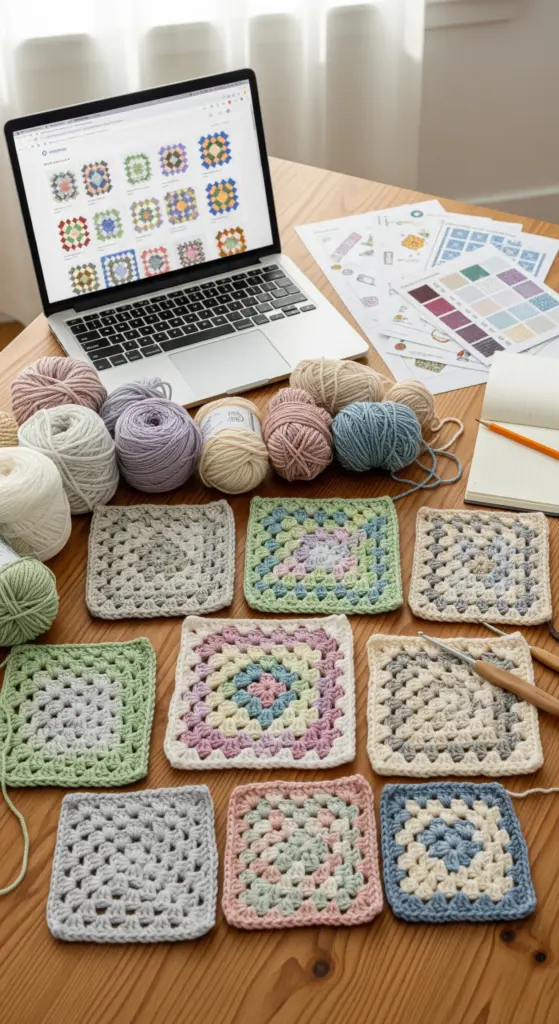
It’s a good idea to have a plan before you start crocheting. You don’t want to run out of a color halfway through a round or realize you don’t have a good transition color. Lay out your yarns and decide the order you want to use them. This saves a lot of hassle later on.
The Impact Of Color On Design
Color isn’t just about making things pretty; it actually affects how we see the shape and texture of the crochet. Bright colors can make stitches look more pronounced, while darker colors can make them blend together. Think about how a dark background makes a light-colored pattern stand out.
Experimenting With Color Blocks
Instead of changing colors every round, you could try using a color for two or three rounds, then switching to another color for a few rounds. This creates distinct color blocks within your granny square. It’s a modern take on the classic design and can be really striking.
Achieving Unique Color Combinations
Don’t be afraid to try something unexpected! Maybe a neon green with a soft grey, or a bright pink with a deep purple. Sometimes the most unusual combinations turn out to be the most beautiful. The best part about making your own crochet items is that you get to decide exactly how it looks. So go ahead, play with colors and see what amazing creations you can come up with!
Granny Square Crochet Pattern Resources
Finding the right resources can make all the difference when you’re learning a new crochet pattern, or even just looking for a fresh take on an old favorite like the granny square. Luckily, the internet is packed with helpful places to get you started and keep you inspired.
- Finding Ad-Free PDFs: Many designers offer printable, ad-free versions of their patterns on platforms like Etsy and Ravelry. These are great for keeping your pattern handy without distracting ads, and it’s a nice way to support the designer too.
- Utilizing Video Tutorials: Sometimes, seeing a stitch or a technique in action is the best way to learn. YouTube is a treasure trove of video tutorials for almost every crochet stitch and pattern imaginable, including detailed walk-throughs of granny squares.
- Accessing Printable Patterns: Beyond paid PDFs, many blogs and websites offer free printable patterns. Just search for “free granny square pattern printable” and you’ll find plenty of options.
- Supporting Pattern Designers: If you find a pattern you love, consider purchasing the PDF version or favoriting it on Ravelry. This helps designers continue creating the patterns we all enjoy.
- Finding Inspiration on Pinterest: Pinterest is a visual search engine perfect for crochet. You can find endless color combination ideas, project inspiration, and links to free patterns.
- Exploring Etsy for Patterns: Etsy is a marketplace where independent creators sell their handmade goods and patterns. You can find unique granny square variations and bundles here.
- Discovering Patterns on Ravelry: Ravelry is a massive online community for knitters and crocheters. It has a huge database of patterns, many of which are free, and you can connect with other crafters.
- Locating Helpful Crochet Blogs: Many crochet bloggers share free patterns, tutorials, and tips. They often have sections dedicated to beginner stitches or specific techniques, which can be incredibly useful.
When you’re looking for patterns, pay attention to whether they use US or UK crochet terms, as this can change how stitches are described. Most free patterns will specify which terminology they use, and many sites offer conversion charts if you need them. It’s also a good idea to check the recommended yarn weight and hook size, though you can often substitute based on your preference and the project you have in mind.
Advanced Granny Square Stitch Techniques
Ready to move beyond the basic granny square? This section is all about jazzing things up with different stitch techniques. We’ll explore how changing up the stitches can totally transform your squares, making them more interesting and textured. It’s not just about making them bigger; it’s about making them better.
Incorporating Post Stitches
Post stitches are a game-changer for adding texture. Instead of working into the top of a stitch, you work around the post of the stitch from a previous row. This creates a raised effect. For example, you can work front post double crochet (FPDC) or back post double crochet (BPDC) around the double crochets in your granny square. This can make the clusters pop or create ribbed sections.
Creating Textured Stitches
Beyond post stitches, there are other ways to add texture. Think about stitches like the puff stitch or the bobble stitch. These stitches create little bumps or knots of yarn that add a lovely tactile quality to your work. They can be worked into the chain spaces or even around the double crochets for a unique look.
Using Different Cluster Sizes
Traditionally, granny squares use clusters of three double crochets. But who says you have to stick to that? Try using clusters of four or five double crochets for a denser, more solid look. Or, mix it up! You could have clusters of three in some rounds and clusters of two or four in others. This variation can create subtle visual interest.
Adding Lace Elements
Want to make your granny squares lighter and more airy? Introduce some lace! This often involves using more chain stitches and skipping stitches to create openwork. You might work a double crochet, chain 2, skip a stitch, double crochet again, and continue this pattern. This creates delicate patterns within the square.
Working With Bobbles and Puffs
As mentioned before, bobbles and puffs are fantastic for texture. A bobble stitch is typically made with 5 double crochets worked into the same stitch, but only completing the last yarn over for all of them, then pulling through all loops at once. A puff stitch is similar, often using 3 or 4 half-double crochets worked into the same stitch, pulling through all but the last loop, then pulling through all loops. You can strategically place these within your granny square rounds to create focal points.
Exploring Tunisian Crochet Squares
While not strictly a
The Benefits Of Crochet For Well-being
Crocheting, especially something as straightforward as a granny square, can be a real balm for the soul. It’s not just about making pretty things, though that’s a big part of it. Sitting down with your yarn and hook can actually help quiet a busy mind. Think of it like a gentle hum that drowns out the everyday noise. It’s a way to slow down and focus on something tangible, something you’re actively creating with your own two hands. This kind of focused activity can be surprisingly calming.
Mindfulness Through Crafting
When you’re working on a granny square, you’re really present in the moment. You’re thinking about the next stitch, the feel of the yarn, the rhythm of your hook. This focus naturally pulls you away from worries or to-do lists. It’s a form of active meditation, really. You’re not just passively relaxing; you’re engaging your mind in a gentle, repetitive task that can lead to a sense of peace.
Stress Relief With Yarn
Life throws a lot at us, and sometimes we just need an outlet. Crochet provides that. The repetitive motion of making stitches, like the double crochet clusters in a granny square, can have a soothing effect on your nervous system. It’s like a physical release for mental tension. Many people find that after a session of crocheting, they feel less keyed up and more relaxed. It’s a simple way to manage daily stress without needing anything complicated.
Developing Patience And Focus
Let’s be honest, sometimes crochet projects don’t go perfectly the first time. You might drop a stitch, or your tension might be a bit off. Working through these little hiccups with a granny square teaches you patience. You learn to slow down, figure out what went wrong, and fix it. This process builds focus and problem-solving skills, not just for crochet, but for other areas of life too. It’s a low-stakes way to practice persistence.
The Therapeutic Nature Of Crochet
There’s a reason why crochet is often mentioned alongside other therapeutic crafts. The act of creating something from scratch, stitch by stitch, can be incredibly rewarding. It gives you a sense of accomplishment and control, which can be very grounding. For many, the tactile experience of yarn and the rhythmic motion of crocheting are deeply comforting. It’s a way to nurture yourself and engage in a calming, creative practice.
Boosting Creativity And Confidence
Even with a simple pattern like the granny square, there’s room for creativity. You can play with colors, experiment with different yarn textures, or even try slight variations on the pattern. Each finished square, and especially a completed project like a blanket or pillow, is a tangible result of your effort. This builds confidence in your abilities and encourages you to try new things. It’s a positive feedback loop: you create, you feel good, you want to create more.
Combating Anxiety With Stitches
When anxiety starts to creep in, having a go-to activity like crochet can be a real lifesaver. The structured nature of a pattern, like the rounds of a granny square, provides a predictable framework. This predictability can be very reassuring when things feel uncertain. The physical act of crocheting can also help to ground you, bringing your attention back to the present moment and away from anxious thoughts. It’s a gentle way to self-soothe.
Finding Calm In Repetitive Motion
There’s a certain magic in repetition. The consistent movement of your hands, the loop of yarn, the click of the hook – it all creates a steady rhythm. This rhythm can be very meditative, almost like a mantra. It helps to quiet the mental chatter and allows for a state of flow. In this state, you’re fully absorbed in the activity, and the outside world seems to fade away for a while. It’s a simple, accessible way to find a pocket of calm in your day.
The Joy Of Creating Handmade Items
There’s a special kind of satisfaction that comes from making something with your own hands. Whether it’s a small coaster or a big blanket, a handmade item carries a personal touch. It’s a piece of you that you’ve put into the world. This feeling of creation and the ability to make something beautiful and useful can bring a lot of joy. It’s a reminder of our own capacity to create and bring things into being, which is a pretty wonderful feeling, don’t you think?
Granny Square Projects Beyond Blankets
While blankets are a classic for a reason, the humble granny square is incredibly versatile. You can use these cheerful motifs for so many other crochet projects for home decor and more. It’s amazing how a few simple stitches can transform into something totally new.
Crocheted Coasters and Trivets
Protect your furniture with stylish, handmade coasters. They work up quickly and are a great way to use up small yarn scraps. You can make a set in coordinating colors or go wild with a different shade for each one. Trivets are just larger versions, perfect for hot dishes straight from the oven.
Designing Small Accessories
Think beyond the big projects! Granny squares can be turned into cute coin purses, small pouches for earbuds, or even decorative patches to sew onto existing clothing or bags. They’re also perfect for making keychains or small ornaments.
Creating Garment Yokes
Ever thought about using granny squares in clothing? They make fantastic yokes for sweaters or cardigans. You can create a traditional yoke that goes over the shoulders or a more modern, cropped style. It adds a lovely, handmade touch to any garment.
Making Unique Wall Hangings
Granny squares can be strung together or arranged in a larger pattern to create eye-catching wall art. Mix different sizes and colors for a bohemian vibe, or keep it simple with a monochromatic scheme. It’s a fun way to add some texture and color to your walls.
Crafting Small Accessories
Don’t underestimate the power of small details! Granny squares can be incorporated into headbands, bookmarks, or even used as appliques on other crochet items. They’re also great for making little stuffed toys or elements for amigurumi.
Adding to Clothing Details
Beyond yokes, you can add granny square motifs to the cuffs of sleeves, the hem of a skirt, or even as decorative pockets. They can really give a plain garment a unique, personalized flair. It’s a simple way to make your wardrobe more interesting.
Designing Playful Toys
Kids (and adults!) love handmade toys. Granny squares can be the building blocks for stuffed animals, dolls, or even simple play mats. Just imagine a colorful granny square snake or a patchwork-style teddy bear!
Building Modular Crochet Items
Granny squares are the definition of modular crochet. This means you can connect them in almost any way imaginable. Think outside the box and create things like draft stoppers, placemats, or even a unique lampshade cover. The possibilities are really quite endless when you start connecting them in different configurations. You can find lots of inspiration for these kinds of projects on Pinterest.
The beauty of the granny square lies in its adaptability. Whether you’re aiming for a cozy home accessory or a unique fashion statement, this classic motif offers a delightful starting point for countless creative endeavors. It’s a pattern that truly grows with your imagination.
Understanding Gauge In Crochet
So, you’ve got your yarn, your hook, and you’re ready to make a granny square. But have you thought about gauge? It might sound a bit technical, but it’s actually pretty important if you want your finished project to turn out the way you expect. Think of it like this: gauge is basically how many stitches and rows you get in a certain measurement, usually per inch or per 4 inches (10 cm).
Why Gauge Matters For Squares
When you’re making something like a blanket or a garment where pieces need to fit together, getting your gauge right is a big deal. If your squares are too big or too small compared to the pattern’s instructions, your whole project could end up wonky. For a simple granny square, it might not seem as critical, but if you’re planning to join a bunch of them, consistency is key. Even a small difference in size between squares can make a big difference in the final look and fit of your project. It affects how the colors line up and how the edges meet when you join them.
Calculating Your Stitch Count
Before you even start your actual project, it’s a good idea to make a small sample piece, often called a gauge swatch. For a granny square, this would be a small square made with the yarn and hook you plan to use. Once you’ve crocheted a few rounds, lay it flat and measure it. How many stitches are across and how many rows are up in a specific area? This is your gauge.
Here’s a simple way to check:
- Crochet a small square, maybe 4×4 inches, using your chosen yarn and hook.
- Lay it flat without stretching it.
- Use a ruler to count how many double crochets (or whatever the main stitch is) fit across 4 inches.
- Count how many rows it takes to reach 4 inches in height.
Measuring Your Crochet Fabric
Measuring your swatch accurately is important. Don’t just eyeball it! Use a ruler or a measuring tape. Place it over your swatch and count the stitches and rows within a defined area, like a 4-inch square. If your pattern specifies a gauge, like “12 dc and 6 rows = 4 inches,” you’ll compare your swatch measurements to that.
Adjusting Hook Size For Gauge
What if your swatch doesn’t match the pattern’s gauge? Don’t panic! This is where you can make adjustments. If you have too many stitches per inch (meaning your fabric is too dense), you’ll need to use a larger crochet hook. This will make your stitches bigger and your fabric looser, giving you fewer stitches per inch. Conversely, if you have too few stitches per inch (meaning your fabric is too loose), you’ll need to use a smaller crochet hook. This will make your stitches smaller and your fabric tighter, giving you more stitches per inch.
The Impact Of Yarn On Gauge
It’s not just the hook size that affects gauge; the yarn itself plays a huge role. Different yarn weights (like fingering, worsted, or bulky) will naturally create different sizes of stitches. Even within the same weight category, different fiber contents (like wool, cotton, or acrylic) can behave differently and affect how your fabric drapes and measures. Always check the yarn label for recommended hook sizes, but remember that your personal tension can also influence the final outcome.
Getting your gauge right might seem like an extra step, but it really saves you time and frustration down the line. It helps make sure your beautiful granny squares will fit together perfectly, creating a finished piece you’ll be proud of. It’s all about making sure your stitches are consistent, so your project doesn’t end up looking like a lopsided mess.
Achieving Consistent Measurements
Consistency is the name of the game. Try to crochet your gauge swatch and your actual project with the same tension. This means holding your yarn and hook in a similar way each time. Some people find that their tension changes as they get tired or if they switch hooks. Just be mindful of it. If you’re making a large project, it might even be worth checking your gauge partway through to make sure your tension hasn’t shifted.
Checking Gauge Before Starting
Seriously, do this! It’s much easier to adjust your hook size or yarn choice before you’ve spent hours crocheting a large piece that’s the wrong size. A quick swatch can prevent a lot of headaches later on. It’s a small investment of time for a much better result.
Ensuring Your Square Size
Ultimately, checking your gauge is about controlling the size of your finished granny squares. If the pattern calls for squares that are 4 inches by 4 inches, and your gauge swatch tells you that your current hook and yarn combo produces squares that are 5 inches by 5 inches, you know you need to make a change. This attention to detail is what separates a good crochet project from a great one.
Tips For A Neater Granny Square Finish
Finishing your granny squares well can really make a difference in how your final project looks. It’s not just about the stitches themselves, but how you handle the edges and those pesky yarn ends. Let’s talk about making your squares look as neat as possible.
Weaving In Ends Securely
This is probably the most important finishing step. If you don’t weave in your ends properly, your work can unravel, and that’s just sad. When you change colors or finish a round, you’ll have a tail of yarn. You want to take your crochet hook and thread that tail back and forth through the stitches on the wrong side of your work. Try to go through different stitches than you did on the first pass. Doing this a couple of times in different directions will help keep it from coming undone. It might seem tedious, but it’s worth it.
Trimming Excess Yarn
Once you’ve woven in your ends securely, you can trim the excess yarn. Don’t cut it too close to the fabric, though! Leave a little bit, maybe about a quarter of an inch, just in case it starts to loosen up. You don’t want to cut right up against the last stitch, as that’s a recipe for disaster.
Blocking For Perfect Shape
Blocking is a game-changer for granny squares. It helps to even out your stitches, open up any lace patterns, and most importantly, make sure your squares are the exact same size and shape. There are a few ways to block:
- Wet Blocking: Soak your squares in water, gently squeeze out the excess (don’t wring them!), and then lay them flat on a blocking mat or towel. Pin them into the desired shape and size. Let them dry completely.
- Steam Blocking: Hold a steam iron a few inches above your square and let the steam relax the fibers. Gently shape it with your hands while it’s damp. Be careful not to press the iron directly onto the yarn, especially if it’s acrylic, as it can melt.
- Spray Blocking: You can also lightly mist your squares with water using a spray bottle and then pin them into shape.
Creating Clean Corners
Corners are where the magic happens in a granny square, but they can also be a weak point if not done right. Make sure you’re consistently working the correct number of stitches and chain spaces into your corners. If your corners look a bit wonky, it might be because your turning chain isn’t quite right, or you’re not getting enough tension in those corner stitches. Sometimes, adding an extra chain stitch in the corner can help define it better, especially if you’re using a thicker yarn.
Maintaining Straight Sides
For sides that look straight and not wavy, consistent tension is key. If you’re pulling your stitches too tight along the sides, they might start to curve inwards. If they’re too loose, you might get a bit of a ripple effect. Pay attention to how you’re working into the chain spaces along the sides. The goal is to have sides that look like they could be measured with a ruler.
Ensuring A Professional Look
Think about how your squares will look when joined together. If some are slightly bigger or smaller, or if the edges are uneven, it can really show. Blocking helps a lot with this. Also, consider how your color changes look. If you’re joining squares, making sure the edges are clean and even will make the joining process much smoother and the final piece much more polished. It’s all about those little details that add up to a big difference in the final outcome.
Exploring Different Granny Square Styles
The granny square is a classic for a reason, but did you know there are quite a few ways to put one together? It’s not just one single way! Depending on how you like your edges and corners, you can tweak the pattern a bit. It’s pretty neat how a few small changes can give you a different look.
The Traditional Cluster Style
This is probably what most people picture when they hear “granny square.” It’s built with groups of three double crochet stitches, often called clusters, separated by chain stitches. The corners usually have a chain-2 space, which is where you’ll build the next set of clusters.
- Start with a magic ring or a chain loop.
- Round 1: Work clusters of 3 double crochet (dc) with chain-2 spaces in between, forming a square.
- Subsequent Rounds: Work clusters into the chain spaces from the previous round, adding more clusters along the sides and working corner clusters into the chain-2 spaces.
Solid Granny Square Variations
Want a denser look? Solid granny squares skip the chain spaces between the clusters. This makes the fabric thicker and can give a really nice, smooth appearance. It’s a great way to use up scraps if you want a more solid block of color.
Lace Granny Square Designs
If you like a bit of airiness in your crochet, lace granny squares are the way to go. These use more chain stitches and fewer stitches within the spaces, creating openwork patterns. They’re lovely for lighter projects like shawls or delicate blankets.
Granny Stripe Motifs
Instead of a square, a granny stripe is worked back and forth in rows, creating a rectangular or striped effect. You still use the classic granny stitch clusters, but the turning and row structure change the overall shape. It’s a fun way to get that granny texture in a different form.
Corner to Corner Granny Squares
This style is a bit different. You start in one corner and work diagonally, increasing stitches on both sides to create a square. It’s a really satisfying way to build a piece, and the diagonal lines give it a unique look. It’s not the traditional cluster method, but it’s still very popular.
Granny Square Ripple Patterns
Combining the granny stitch with a ripple or chevron pattern creates a really dynamic look. You’ll still use the cluster idea, but the way you increase and decrease stitches along the rows makes those zig-zag lines appear. It’s a bit more complex but very eye-catching.
Textured Granny Square Options
Beyond the basic double crochet, you can add texture. Think about using front post or back post stitches to create raised ridges, or even incorporating different stitch types like puff stitches or bobbles within the granny clusters. This adds a whole new dimension to the simple square.
Modern Interpretations of the Square
Crocheters are always innovating! Modern takes might involve unusual color changes, asymmetrical designs, or combining the granny stitch with other stitch patterns in unexpected ways. It’s all about playing with the basic formula to make something fresh.
The beauty of crochet is its adaptability. Even with a well-known pattern like the granny square, there’s so much room for personal touches. Don’t be afraid to experiment with yarn colors, hook sizes, and stitch counts to see what you can create. Your granny square can be as unique as you are.
Frequently Asked Questions
What exactly is a granny square?
A granny square is a crochet pattern that makes a square shape. It’s made using basic stitches like chains and double crochets, often worked in groups. It’s a classic design that’s been around for a long time and is great for beginners.
What do I need to make a granny square?
You can make a granny square using just a few materials: yarn, a crochet hook that matches the yarn, and scissors. A tapestry needle is also helpful for weaving in the ends when you’re done.
What are the main stitches used in a granny square?
The most common stitches used are the chain stitch (ch) and the double crochet stitch (dc). You’ll usually work these stitches in groups, often called clusters, and make chain spaces in the corners to help the square grow.
Is the granny square pattern good for beginners?
Yes, granny squares are fantastic for beginners! They teach you fundamental crochet skills like making chains, working into spaces, and creating corners. Once you learn the basic pattern, you can make them bigger or change colors easily.
Why should I turn my work when making a granny square?
Turning your work after each round helps keep your granny square from twisting and makes the edges straighter. It’s a simple step that makes a big difference in how neat your finished square looks.
How do I make a granny square bigger?
You can make your granny square as big as you want by simply repeating the rounds. Each round adds more stitches and makes the square grow outwards. You just keep adding rounds until it’s the size you need.
What kind of projects can I make with granny squares?
Granny squares are super versatile! You can use them to make blankets, pillows, bags, scarves, clothing like cardigans, and even home decor items. Their simple shape makes them easy to join together for larger projects.
How do I change colors in my granny square?
When you change colors, it’s best to do it at the end of a round. You can cut the old yarn and start the new yarn in the same spot or a corner. Many people like to weave in the ends securely to prevent them from unraveling.
What makes the corners of a granny square?
The classic granny square has a specific way of forming corners, usually with a chain-2 space (ch2). This space is where you’ll work the stitches for the next round’s corner, helping to create that square shape.
My granny square isn’t perfectly square. What can I do?
If your square looks a bit wonky or the edges aren’t straight, turning your work after each round can help a lot. Also, try to keep your tension (how tightly you crochet) consistent throughout the project.
How do I join multiple granny squares together?
There are many ways to join granny squares! You can sew them together using a tapestry needle and yarn, or crochet them together using stitches like single crochet or slip stitch. Some people even use decorative joining methods.
What’s the history behind the granny square?
The granny square has been around for a very long time, possibly originating in the 19th century. It became very popular in the 1970s and remains a beloved and recognizable crochet motif today.

Some genuinely marvelous work on behalf of the owner of this web site, utterly great subject matter.