Easy DIY Fall Garland Ideas to Cozy Up Your Home
Fall is the perfect time to add a touch of warmth and charm to your home, and what better way to do it than with DIY fall garlands? These versatile decorations bring a cozy autumn vibe to any space, whether draped over a mantel, framing a doorway, or accenting a table. In this blog post, I am sharing a variety of creative and easy-to-make DIY fall garlands that you can craft yourself. From rustic natural elements to vibrant, colorful designs, there’s something for every style and skill level. Get ready to be inspired and find the perfect DIY fall garland to enhance your autumn decor!
Key Takeaways
- Making your own fall garland is a great way to customize your decor and add a personal touch.
- DIY fall garlands are often more budget-friendly than store-bought options.
- Natural elements like real or faux leaves, acorns, and twigs can create a rustic charm.
- Fabric and felt are versatile materials for creating colorful and whimsical fall garlands.
- Paper and cardstock offer elegant and festive possibilities for DIY fall garland designs.
- Dollar store finds can be transformed into charming and inexpensive fall garlands.
- Garlands can be adapted for different locations, from mantels to doorways.
- Adding embellishments like beads, ribbon, or pom poms can further personalize your fall garland.
Crafting Your Own Fall Garland
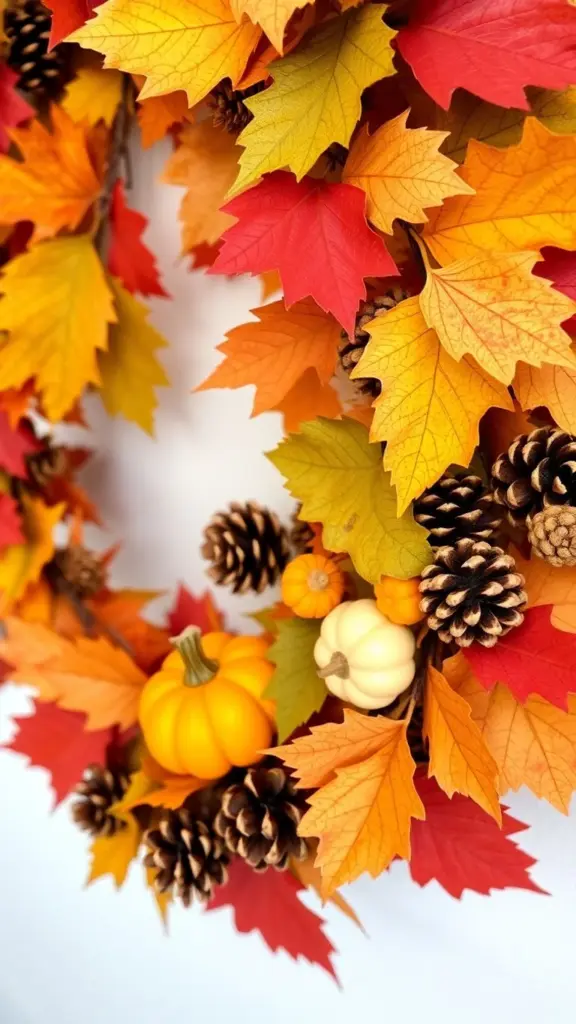
Fall is the perfect time to add some cozy vibes to your home, and making your own fall garlands is a fantastic way to do it. These handmade harvest decorations are super versatile – you can drape them over your mantel, frame a doorway, or even use them as a table runner. Plus, they’re a great way to get into the seasonal spirit.
Why Make DIY Fall Garlands?
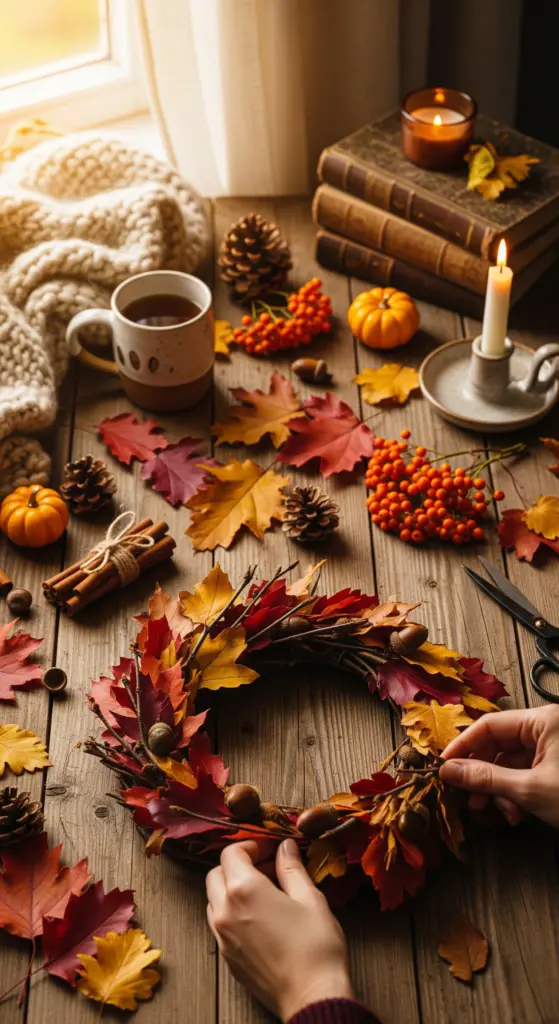
Making your own fall garlands is a smart move for a few reasons. First off, you can totally customize them to match your home’s style. Whether you like bright, bold colors or more muted, earthy tones, you’re in charge. They’re also really budget-friendly; you can often use things you already have or find inexpensive supplies. And honestly, there’s just something special about handmade decor. It adds a personal touch that store-bought items can’t quite capture. Plus, it’s just a fun, relaxing activity to do on a crisp autumn afternoon.
Customization Options for Your Garland
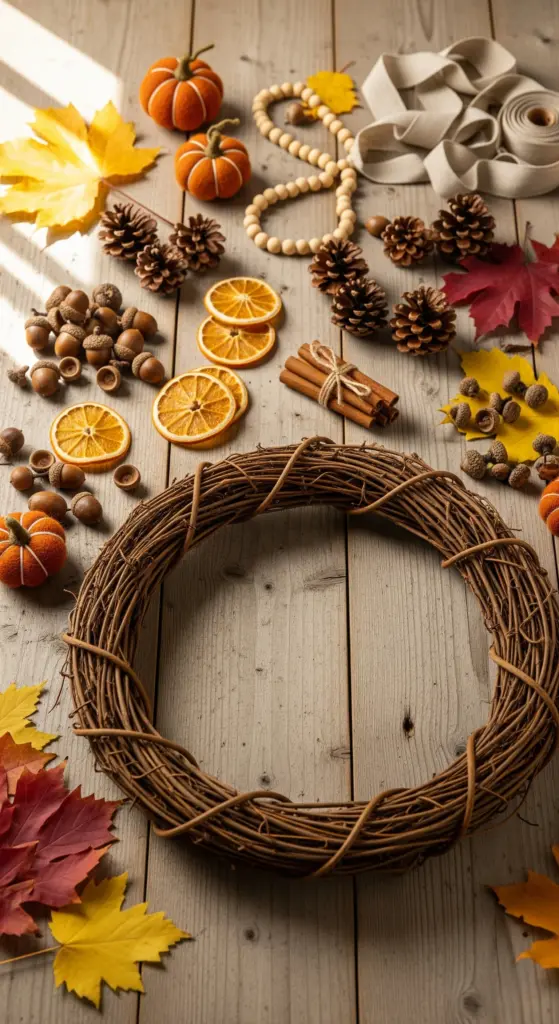
When you make your own, the possibilities are pretty much endless. You can mix and match materials, colors, and themes. Think about using real or faux leaves, wooden beads, felt shapes like pumpkins or acorns, or even fabric scraps. You can tailor the length and the spacing of the elements to fit exactly where you want to hang it.
Cost-Effective Decorating with DIY
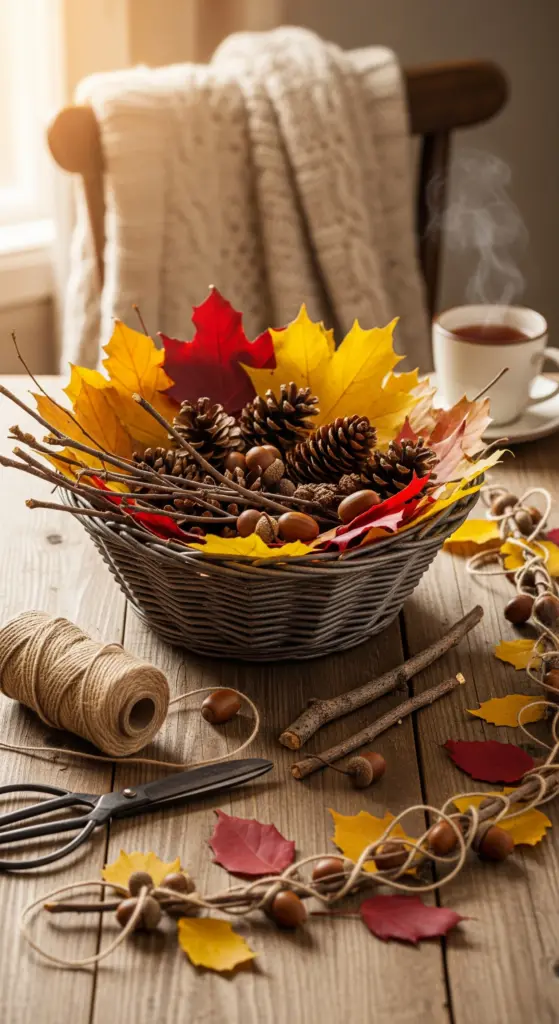
Decorating on a budget? DIY garlands are your best friend. You can often find great deals at craft stores or even use items from nature. This approach lets you create beautiful, festive decorations without spending a fortune.
Adding a Personal Touch to Your Home
Handmade items just have a certain warmth, don’t they? A DIY garland can be a reflection of your personality and your love for the season. It’s a way to make your home feel truly yours and filled with thoughtful details.
A Fun Activity for the Season
Gathering friends or family for a crafting session is a wonderful way to spend an autumn day. It’s a chance to connect, share some laughs, and create something beautiful together. It’s a memory-making activity that’s as enjoyable as the final product.
Gathering Essential Garland Materials
Before you start crafting, it’s good to have a few basic supplies on hand. You’ll definitely need some kind of string or twine to thread your items onto. Depending on your project, you might also want scissors, a hot glue gun, beads, felt, fabric, or even natural elements like acorns and leaves. Having these ready makes the process much smoother.
| Material | Purpose |
|---|---|
| String/Twine | To thread and hang the garland |
| Leaves (Real/Faux) | Classic fall element |
| Beads (Wooden/Glass) | Adds texture and visual interest |
| Felt/Fabric | For cutting out shapes (pumpkins, acorns) |
| Glue/Hot Glue Gun | For assembling components |
| Scissors | For cutting materials |
Natural Elements Fall Garland DIY
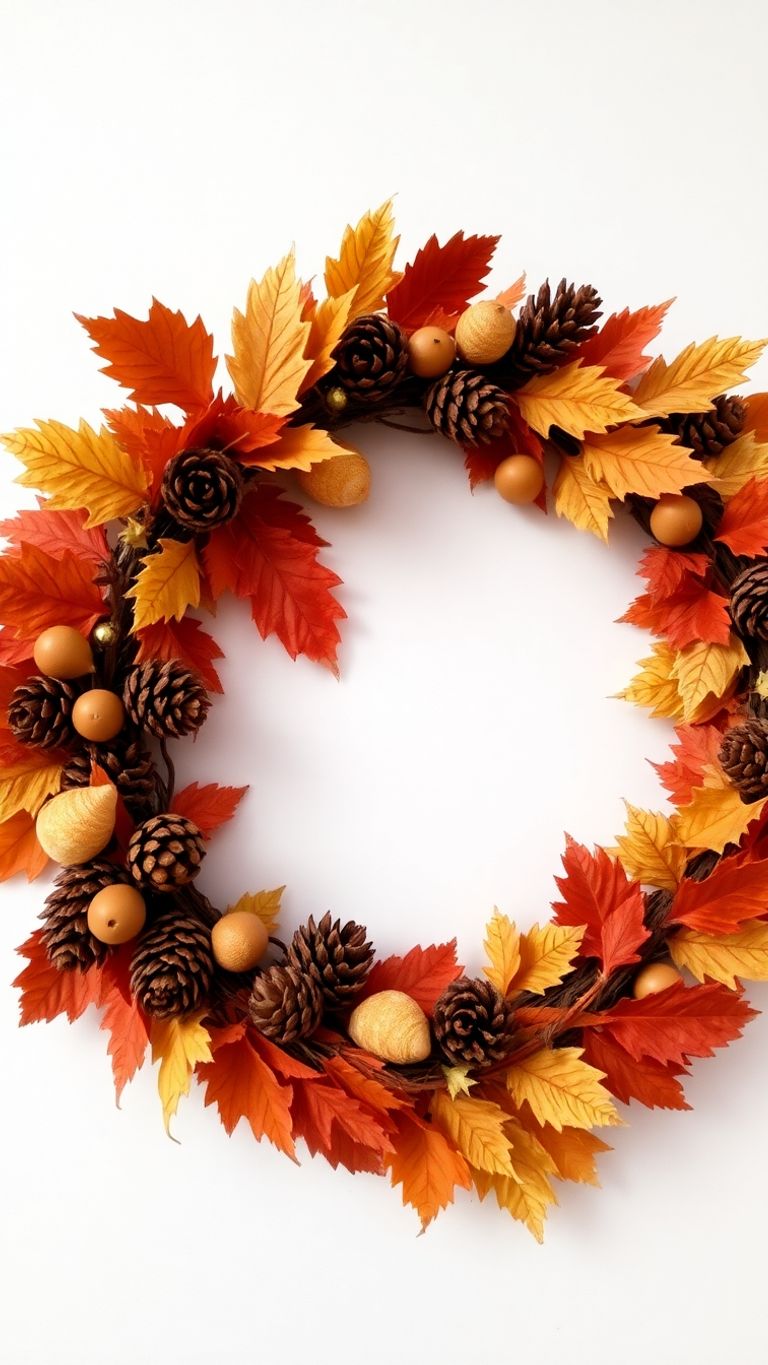
Bringing the outdoors in is a fantastic way to capture the essence of autumn, and natural elements make for some of the most charming DIY autumn decorations. Think about the textures and colors you see on a walk through the woods – those are your inspiration! You can gather real leaves, acorns, twigs, and pinecones to create truly unique garlands. If using real leaves, a little prep work can help them last longer. A simple way is to press them flat in a book for a few weeks, or you can try a glycerin solution to keep them supple. For a more durable option, faux leaves from a craft store work wonderfully and come in a variety of colors and sizes.
When assembling, consider how you’ll attach your natural finds. Twine or jute string gives a rustic feel, and you can thread it through acorns or tie it around small twigs. For leaves, you might punch a small hole near the stem or use a dab of hot glue to secure them to the string. Don’t be afraid to mix and match different natural elements for a more dynamic look. Combining dried berries, seed pods, or even small pinecones with your leaves can add extra depth and interest.
Here are some ideas for incorporating natural elements:
- Preserving Real Autumn Leaves: Press leaves between newspaper inside heavy books for 2-3 weeks. Alternatively, mix one part glycerin with two parts water and soak leaves for a few days until they become pliable, then let them dry.
- Creating Garlands with Faux Leaves: Craft stores offer a wide selection of artificial leaves in various materials like fabric, plastic, and paper. These are often more durable and vibrant than real leaves.
- Incorporating Acorns and Twigs: Drill small holes through acorns to thread them onto string. Small, interesting twigs can be tied onto the garland with twine or secured with hot glue.
- Foraging for Garland Components: Look for fallen acorns, pinecones, interesting seed pods, dried grasses, and sturdy twigs. Always be mindful of local regulations regarding foraging.
A simple leaf garland can be made by collecting colorful fallen leaves, pressing them gently, and then threading them onto twine using a large needle. Space them out for a delicate look or cluster them for a fuller effect. This is a great project to do with kids, teaching them about nature while creating beautiful decor.
Simple Leaf Garland Assembly:
- Gather your chosen natural elements (leaves, acorns, twigs).
- Prepare your string or twine, cutting it to your desired garland length.
- Thread your elements onto the string, securing them with knots or hot glue as needed. Leave some space between each item for a balanced look.
Fabric and Felt Fall Garland Ideas
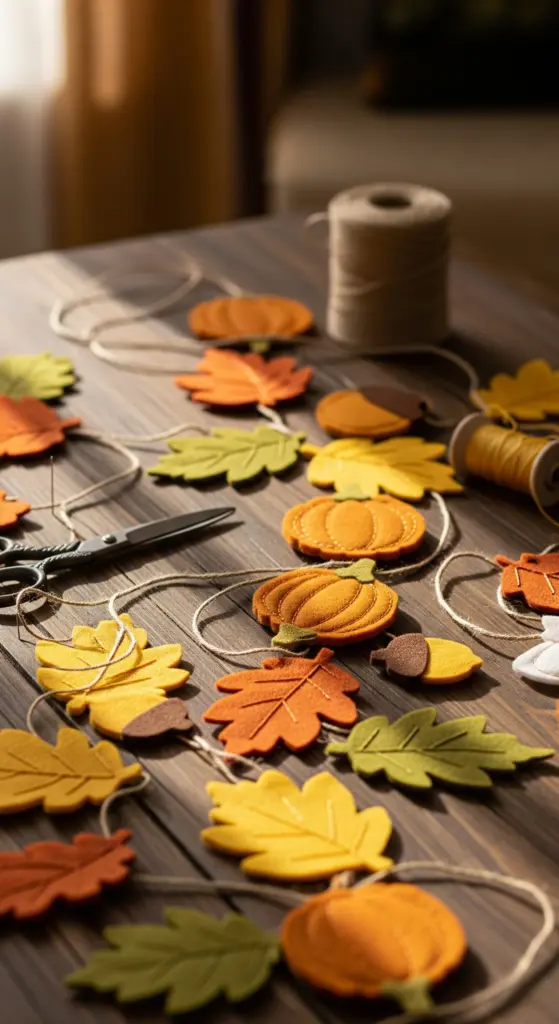
Fabric and felt are fantastic materials for creating charming fall garlands. They offer a soft texture and can be easily cut into various shapes, making them perfect for replicating autumn elements like leaves, pumpkins, and acorns. Plus, they’re quite forgiving for crafters of all skill levels, meaning you don’t need to be a sewing expert to make something beautiful.
Whimsical Felt Acorn Garlands
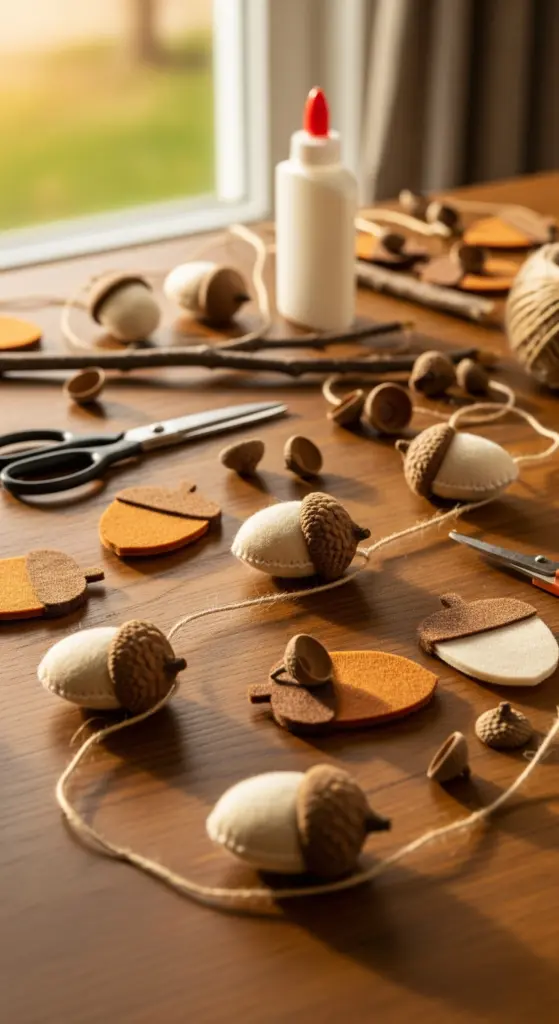
Felt acorns can add a playful touch to your fall decor. You can buy pre-made felt acorns or create your own by cutting out acorn shapes from felt and stuffing them lightly. Then, simply string them together with twine or ribbon. For an extra touch, you can even forage for real acorn caps to glue onto your felt acorns, giving them a more authentic look. This project is super simple and can be done in an afternoon.
Cozy Fabric Leaf Garlands
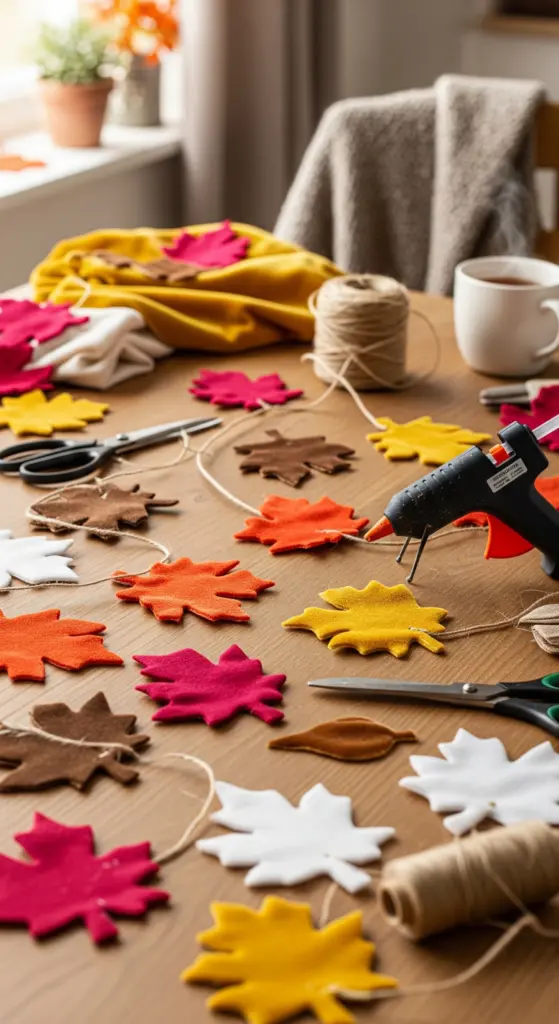
Using fabric scraps is a wonderful way to make a cozy leaf garland. Cut out leaf shapes from various fall-colored fabrics – think warm reds, oranges, yellows, and browns. You can either sew these leaves together along one edge or use a strong fabric glue. If you don’t have a sewing machine, a hot glue gun works well for attaching the leaves to a length of twine. This is a great way to use up leftover fabric from other projects.
Charming Felt Pumpkin Garlands
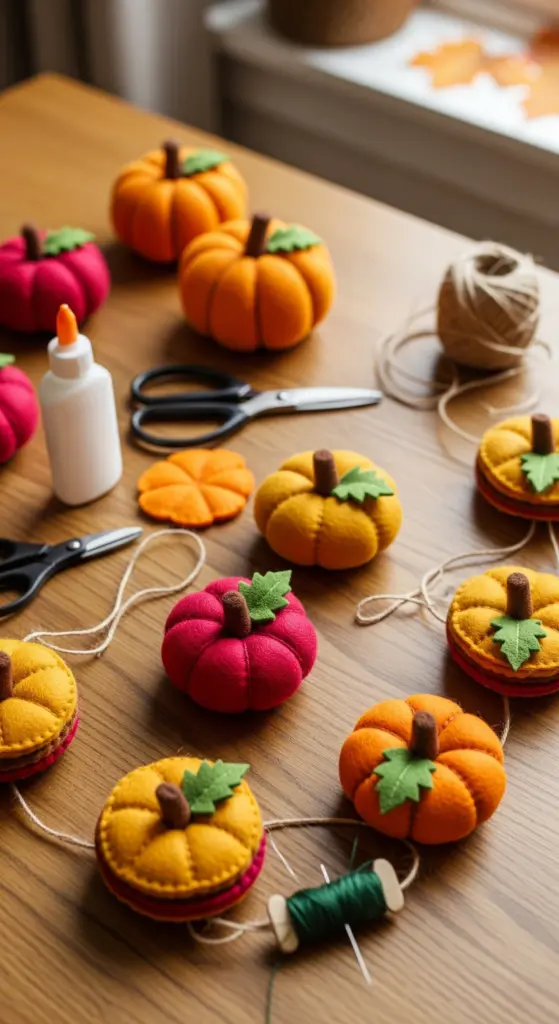
Felt pumpkins are a classic fall motif. You can create these by cutting out pumpkin shapes from orange felt and adding details like a brown felt stem and green felt leaves. Layering different shades of orange felt can give them a more dimensional appearance. String them together with a contrasting colored twine for a festive look. These are particularly cheerful when hung on a mantel or across a window.
Creating Garlands with Felt Balls
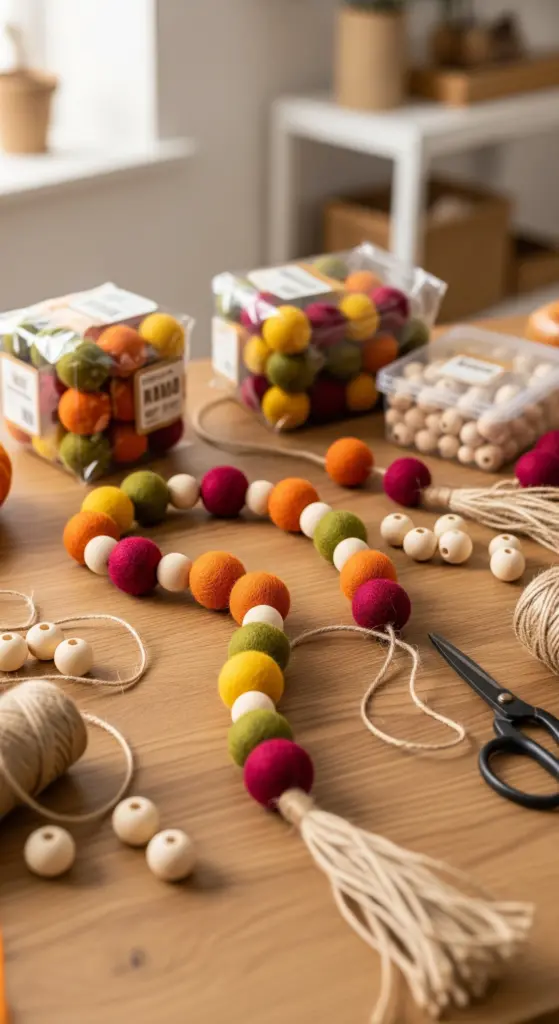
Felt balls are readily available at craft stores and can be used to create simple yet effective garlands. You can buy them in various fall colors or even dye your own wool roving to create custom shades. Stringing them onto twine or ribbon is straightforward, and you can mix them with other elements like wooden beads or faux acorns for added interest. A simple garland of alternating felt balls and wooden beads can look quite sophisticated.
No-Sew Felt Garland Projects
Many felt garland projects don’t require any sewing at all. For instance, you can cut out simple shapes like leaves, pumpkins, or even abstract fall-themed designs from felt sheets. Then, use a hot glue gun to attach them at even intervals along a piece of twine or ribbon. You can also create a garland by simply tying knots in the twine and sliding felt balls or shapes into the knots to secure them in place. This makes it incredibly easy for anyone to join in on the crafting fun.
Fabric Scrap Garland Creations
Don’t let those fabric scraps go to waste! Small pieces of fabric can be transformed into charming garland elements. You can cut them into strips and tie them onto a length of twine to create a fringed effect, or cut them into small squares and fold them into little bows. Even tiny scraps can be glued onto a base garland to add texture and color. This is a fantastic way to get creative and make a truly unique decoration that reflects your personal style.
Paper and Cardstock Fall Garland DIY
Paper and cardstock are fantastic, budget-friendly materials for crafting charming fall garlands. They offer a lot of versatility, allowing you to create everything from delicate leaves to festive patterns. Plus, working with paper is generally a clean and straightforward process, making it a great option for crafters of all ages.
Elegant Paper Leaf Garlands
Creating realistic or stylized paper leaves is a wonderful way to capture the essence of autumn foliage. You can use various shades of green, yellow, orange, and red cardstock. Cutting out leaf shapes is the first step. For a more natural look, try using different leaf templates – think maple, oak, or birch. Once cut, you can add dimension by gently curling the edges or scoring the veins with a craft knife. Stringing them together with twine or a thin ribbon creates a beautiful, flowing garland that mimics the real thing without the wilting.
Festive Candy Corn Paper Garlands
Candy corn is a quintessential fall and Halloween symbol, and paper makes it easy to replicate. Cut out elongated triangle shapes from yellow, orange, and white cardstock. You can layer these triangles to mimic the candy corn stripes. For a bit of sparkle, consider using glitter cardstock for some of the pieces. Stringing them together in a repeating pattern results in a fun, festive garland perfect for Halloween parties or just adding a pop of color to your decor.
Hand-Cut Paper Feather Garlands
Paper feathers offer a more delicate and whimsical touch. Start by cutting out feather shapes from various neutral or earthy-toned papers, like cream, beige, or light brown. You can add detail by cutting small slits along the edges to create a fringed effect, similar to real feathers. A touch of metallic gold or copper cardstock can add a sophisticated shimmer. These can be strung together or attached to a base garland for a unique look.
Creating Paper Pumpkins for Garlands
Paper pumpkins can be made in several ways. One popular method involves cutting out multiple identical pumpkin shapes from orange cardstock, scoring them down the middle, and then gluing the halves together. This creates a dimensional, 3D effect. Another approach is to use a paper-folding technique to create spherical pumpkins. You can add small green paper stems and leaves for extra detail. These little pumpkins can be strung together or interspersed with other fall elements.
Stenciled Paper Garland Designs
If cutting intricate shapes isn’t your strong suit, stenciling is a great alternative. Use pre-made fall-themed stencils (like leaves, pumpkins, or acorns) on plain cardstock or construction paper. Apply paint or ink through the stencil. Once dry, you can cut out the stenciled shapes or cut strips of the paper to create a banner-style garland. This method is quick and allows for consistent patterns.
Assembling Paper Chain Garlands
The classic paper chain gets a fall makeover. Instead of just red and green construction paper, use a palette of fall colors: oranges, yellows, browns, and deep reds. You can also incorporate patterned papers, like plaid or subtle floral prints. Simply cut strips of paper, loop them, and glue or staple them together to form a chain. This is a particularly fun project for kids and results in a vibrant, eye-catching garland.
Dollar Store Finds for Fall Garlands
Who says you need a big budget to get your home looking festive for fall? The dollar store is a goldmine for crafting supplies, and you can totally transform some of their basic items into charming fall garlands. It’s all about seeing the potential in everyday things. Think beyond the obvious and get ready to craft some seriously cute decor without breaking the bank.
Transforming Dollar Store Pumpkins
Those little faux pumpkins you see everywhere at the dollar store? They’re perfect for garlands. You can grab a bunch, maybe in different sizes, and string them together. A quick coat of spray paint in a muted tone like cream, sage green, or even a dusty rose can make them look way more high-end. Then, just drill a small hole through the top or bottom and thread them onto some twine or jute. You can even add a few faux leaves or some wooden beads in between for extra texture.
Creating Garlands with Wooden Ornaments
Keep an eye out for wooden ornaments, especially those with simple shapes like stars, leaves, or even plain circles. These are often sold in multi-packs. You can leave them as-is for a rustic look, or get creative with paint. Think about a simple color palette – maybe whites, creams, and a touch of gold or copper. String them up with some chunky yarn or twine, and you’ve got a minimalist, modern fall garland that looks like it came from a fancy boutique.
Budget-Friendly Bead Garlands
Dollar stores often have craft sections with various beads. Look for wooden beads in natural tones, or even some larger plastic beads that you can paint. You can create a simple, elegant garland by just stringing these onto fishing line or strong thread. Mixing bead sizes and adding a few faux acorns or small wooden shapes in between can give it a nice, varied look. It’s a super easy project, and the result is surprisingly chic.
Repurposing Craft Store Finds
Don’t forget to check the general craft aisles at the dollar store. You might find things like felt sheets, faux floral picks (you can snip off the flowers or leaves), or even small decorative items that can be repurposed. For example, those little faux berry sprigs? Snip off the berries and string them for a pop of color. Felt sheets can be cut into leaf shapes or small pumpkins and then strung together.
Easy Dollar Store Leaf Garlands
Sometimes, the simplest things are the best. You can often find pre-made faux leaf garlands at the dollar store. While they might look a little basic on their own, you can easily jazz them up. Add some small wooden beads, a few faux acorns, or even some mini pinecones by hot-gluing them onto the existing garland. You can also weave in some fairy lights for a magical glow.
DIY Ghost Garlands from the Dollar Store
Okay, this one is a bit more playful, but still totally doable with dollar store finds! Grab some white craft foam or felt sheets. Cut out simple ghost shapes. You can use a black marker to draw on little eyes and mouths. Then, string them together with black or orange twine. It’s a super quick and fun project, especially if you have kids who want to help out. It’s a great way to add a touch of Halloween whimsy without being too spooky.
The key to dollar store crafting is to look at items with fresh eyes. Don’t just see a plain wooden circle; see a potential bead for a garland. Don’t just see a plastic pumpkin; see a future painted accent. A little imagination goes a long way in turning cheap finds into stylish decor.
Unique Fall Garland Themes
Fall is a time for cozy vibes and homey touches, and unique garland themes can really set the mood. Forget just leaves and pumpkins; let’s explore some more specific ideas to make your autumn decor stand out.
Candy Corn Bunting for Halloween
This is a fun, festive option that screams Halloween without being too spooky. You can create this using felt, cardstock, or even painted wooden shapes. Cut out alternating yellow, orange, and white triangles, or use pre-made shapes. String them together with twine or ribbon, perhaps adding a black bead between each candy corn piece for extra pop. It’s a simple project that brings a playful spirit to your Halloween celebrations.
Apple Stamped Banners for Fall
Want something a bit more rustic and charming? Try an apple-stamped banner. Cut lengths of burlap or sturdy fabric into banner shapes. Then, cut an apple in half and use it as a stamp with fabric paint in autumnal colors like deep red, golden yellow, or burnt orange. You can stamp simple apple shapes or even try creating leaf patterns. This technique gives a wonderfully handmade feel.
Mushroom and Acorn Garland Designs
For a touch of woodland magic, consider a garland featuring mushrooms and acorns. You can find wooden mushroom shapes at craft stores, or even make your own from felt. Pair these with felted acorns or real ones (make sure they’re dry and sealed if you want them to last). Stringing them with natural twine and maybe some faux greenery creates a charming, earthy display perfect for a mantel or shelf.
Faux Mum Flower Garlands
Bring the vibrant colors of fall flowers indoors with a faux mum garland. Small faux mums, often found in craft stores, can be easily attached to twine or wire. You can mix in some faux fall leaves or berries for added texture and color. This is a great way to capture the beauty of autumn blooms without any of the wilting.
Magnolia Leaf Garlands
Magnolia leaves offer a unique, elegant look for fall. Their large, glossy leaves, often with a coppery underside, provide a sophisticated natural element. You can use real magnolia leaves (press them first to preserve them) or find good quality faux ones. String them together with a sturdy cord, perhaps adding some dried eucalyptus or small pinecones for a touch of natural contrast.
Wooden Apple Garlands for Teachers
A sweet idea for a teacher’s gift or just to add a touch of fall to a classroom or home office, a wooden apple garland is charming. You can buy small wooden apple cutouts and paint them in various shades of red, green, and yellow. String them with twine, maybe adding a few small wooden beads or a single green felt leaf between each apple. It’s a simple, cheerful decoration that’s both seasonal and thoughtful.
Garlands Featuring Autumnal Colors
When we think of fall, a specific color palette usually comes to mind, right? It’s all about those warm, earthy tones that just make your home feel so inviting. Crafting garlands that capture this essence is a fantastic way to bring that cozy autumn feeling indoors. You don’t need to be an artist to make these look good; simple materials and a bit of patience go a long way.
Vibrant Red and Orange Leaf Garlands
Nothing screams fall quite like the fiery reds and bright oranges of changing leaves. You can achieve this look in a few ways. Using real leaves, if you can find them in good condition, is a classic. Just be sure to press them flat to dry them out before you string them, otherwise, they can get a bit brittle or moldy. Faux leaves are a great alternative if you want something that lasts longer and is easier to work with. You can find these at most craft stores in bulk. For a really vibrant look, consider painting plain craft leaves in shades of crimson, scarlet, and pumpkin orange. A simple string or twine works perfectly for threading them, and you can even add a few wooden beads in between for a bit of texture.
Earthy Brown and Beige Garlands
For a more subdued, sophisticated vibe, leaning into browns and beiges is a smart move. Think about materials like burlap, jute twine, and natural wood elements. You could create a garland using small, dried pinecones, acorns, or even cinnamon sticks tied together with twine. Felt balls in various shades of tan, cream, and chocolate brown also look really chic strung together. This kind of garland has a very natural, almost rustic feel that complements a variety of decor styles.
Muted Tones for a Sophisticated Look
If bright colors aren’t your thing, or you’re aiming for a more elegant autumn display, muted tones are the way to go. Consider dusty rose, sage green, deep plum, and soft grey. These colors can be found in felt, craft paper, or even painted onto wooden shapes. You could make a garland of felted wool balls in these softer shades, or cut out paper leaves in these sophisticated hues. It’s a subtle way to acknowledge the season without being overly bold.
Incorporating Yellow and Gold Hues
Yellows and golds bring a cheerful, sunny aspect to fall decor. Think of sunflowers, golden leaves, or even little painted cornucopias. A garland made of felt sunflowers or paper leaves in shades of mustard yellow and antique gold can really brighten up a space. You can also mix in some metallic gold accents, like gold-painted acorns or small gold beads, for a touch of glamour. This palette feels warm and inviting, perfect for welcoming guests.
Creating a Rainbow Fall Garland
Who says fall colors have to be limited to red, orange, and yellow? You can create a fun, vibrant rainbow effect using all the colors of fall, plus a few unexpected ones. Start with a base of traditional fall colors and then add in pops of teal, deep blue, or even a soft lavender. This approach is great if you have a lot of colorful craft supplies already. It’s a playful way to interpret the season and can add a unique touch to your home.
Color Palette Inspiration for Garlands
When planning your garland, think about where it will hang and what other colors are in the room. A mantelpiece might call for something richer, while a doorway could benefit from something brighter. Consider these combinations:
- Classic Autumn: Deep reds, oranges, yellows, and browns.
- Rustic Harvest: Earthy browns, creams, muted greens, and touches of gold.
- Modern Fall: Burgundy, blush pink, grey, and metallic copper.
- Whimsical Harvest: Bright oranges, yellows, purples, and even some blues.
Choosing your color palette is one of the first steps in making your garland. It helps guide your material choices and ensures a cohesive look for your seasonal decor. Don’t be afraid to experiment with different shades and combinations to find what truly speaks to your personal style and the atmosphere you want to create in your home this fall.
Garland Ideas for Specific Locations
Garlands are fantastic for adding seasonal flair to specific spots in your home. They’re super adaptable and can really change the feel of a space without a lot of fuss. Think about where you want to draw the eye or add a bit of warmth.
Mantelpiece Garland Draping
Your fireplace mantel is practically begging for a garland. It’s a classic spot that instantly makes a room feel cozier. You can drape a leafy garland across the front, letting it cascade down the sides a bit. Or, try a more structured look by running it straight across the top. Mixing in some fairy lights with your garland can add a lovely glow, especially in the evening. It’s a great way to showcase your favorite fall elements, like faux pumpkins, acorns, or even some dried flowers.
Framing Doorways with Garlands
Welcoming guests with a festive doorway is a simple yet effective way to set a fall mood. A garland draped around your front door or even an interior doorway can make a big impact. Consider a more robust garland for the exterior that can handle the weather, like one made from preserved real autumn leaves or durable faux foliage. For interior doors, you have more flexibility with materials like felt, paper, or fabric.
Table Runner Garland Ideas
Forget a traditional table runner and opt for a garland instead! It adds texture and a pop of seasonal color right down the center of your dining table. A garland made of natural elements like twigs and berries works well, or you could use a felted wool garland for a softer feel. Just make sure it’s not too tall, so guests can still see each other across the table. It’s a charming touch for holiday meals or just everyday dining.
Wall Hanging Garland Displays
Blank walls can feel a bit bare, especially during the fall. A garland hung horizontally or even vertically can fill that space nicely. Use small nails or adhesive hooks to hang your creation. You can create a focal point by hanging a larger, more elaborate garland, or cluster a few smaller ones together for a layered effect. This is a great way to display a garland that might be too delicate for outdoor use.
Window Garland Decorations
Windows are another great place to showcase your fall garlands. Hanging a garland across the top of a window frame adds a festive touch that can be seen from both inside and out. You could also hang a longer garland vertically in the center of a large window. Consider using lighter materials like paper or felt for window displays, as they won’t weigh down the window treatments as much.
Porch and Outdoor Garland Ideas
Don’t forget your outdoor spaces! Your porch is the first impression guests have of your home. A sturdy garland made from weather-resistant materials can greet visitors with autumnal cheer. Think about draping a garland over your porch railing, around a porch light fixture, or even on a garden gate. A garland made with faux pumpkins and gourds can be particularly effective here.
Garland Embellishments and Additions
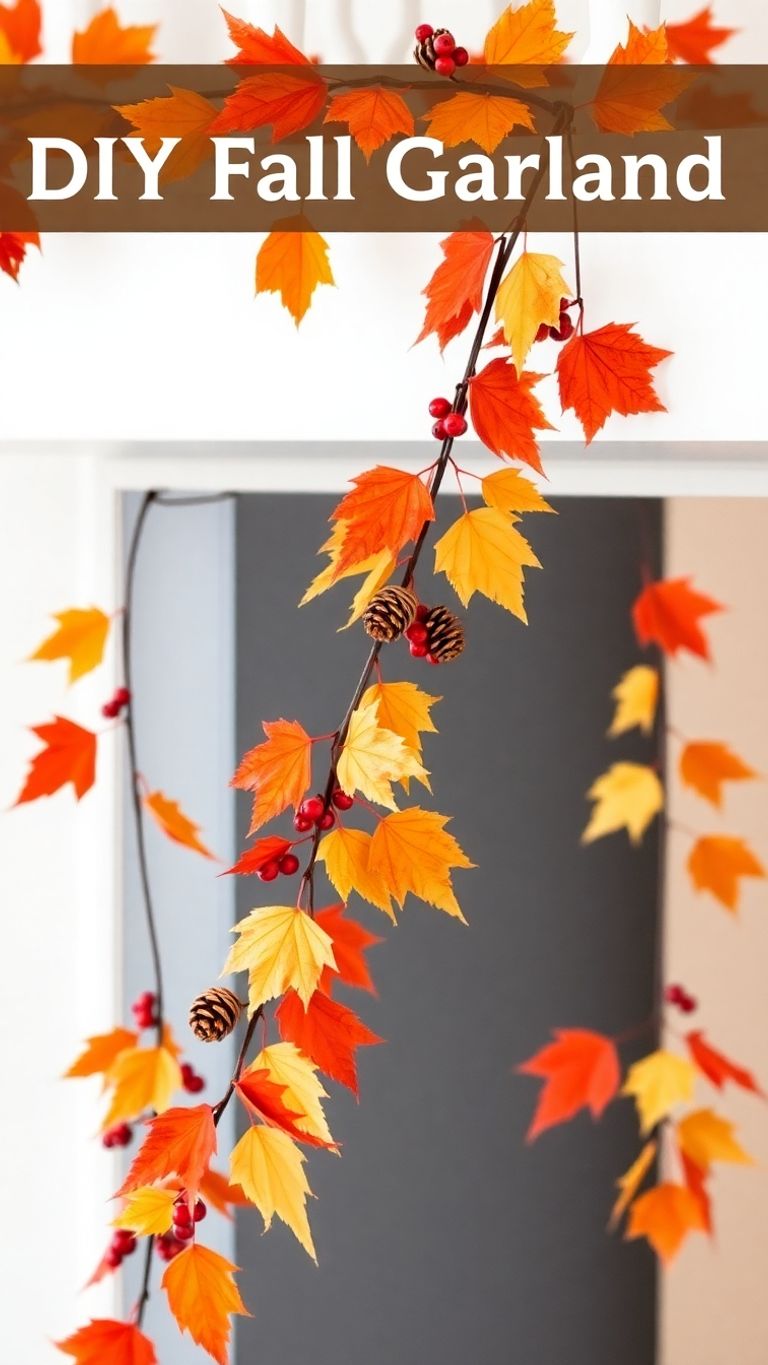
Sometimes, a plain garland just needs a little something extra, right? That’s where embellishments come in. They’re like the finishing touches that really make your DIY fall garland pop. Think of them as the accessories that tie your whole look together.
Adding Wooden Beads to Garlands
Wooden beads are fantastic for adding a natural, rustic feel. You can thread them onto twine or string between your main garland elements, like leaves or pumpkins. They come in all sorts of sizes, from tiny little ones to chunky statement beads.
- Tip: For a more cohesive look, try staining or painting the beads to match your fall color palette. A simple wash of brown or a deep burgundy can look really sophisticated.
- You can also group beads together for a more substantial look.
- Consider using beads with different textures, like smooth, ribbed, or even unfinished wood.
Incorporating Ribbon and Bows
Ribbon is a classic for a reason. You can tie small bows and attach them to individual elements of your garland, or create a larger bow to anchor one end.
- Velvet ribbons in deep jewel tones like emerald or sapphire add a touch of luxury.
- Burlap or gingham ribbons bring a more casual, farmhouse vibe.
- Don’t be afraid to mix ribbon textures and patterns for added interest.
Using Mini Clothespins for Photos
This is a super cute way to personalize your garland. Clip small photos of family, friends, or favorite fall memories onto the garland using mini clothespins. It turns your decoration into a sentimental display.
- You can find mini clothespins at most craft stores.
- Consider clipping on small notes or tags along with photos.
- This works especially well for garlands hung on a fireplace mantel or a wall.
Attaching Pom Poms to Garlands
Pom poms, whether store-bought or handmade, add a soft, playful touch. They’re great for a cozier, more whimsical feel.
- Yarn pom poms in fall colors like mustard yellow, burnt orange, and deep red are perfect.
- You can attach them by sewing or hot gluing.
Adding Glitter for Sparkle
If you want a bit of shimmer, a touch of glitter can do wonders.
- Apply glitter glue to the edges of paper leaves or the tips of faux pumpkins.
- A light dusting of fine glitter on certain elements can catch the light beautifully without being overwhelming.
Using Faux Berries and Pinecones
These natural-looking additions bring texture and a touch of the outdoors in.
- Clusters of faux berries can add pops of color.
- Small faux pinecones can be glued or tied onto the garland.
These little additions might seem small, but they really do make a difference in the overall look and feel of your garland. It’s all about those details that make it feel special and uniquely yours.
Garland Crafting Techniques
When you’re putting together your DIY fall garlands, the way you connect everything really matters. It’s not just about picking pretty materials; it’s about how you assemble them so they look good and hold up.
Threading Beads and Shapes
This is probably the most common technique, especially for simpler garlands. You’ll need a sturdy string or twine and a needle. For things like wooden beads, acorns, or even pre-made felt shapes, you just thread them onto the string.
- Needle Choice: An upholstery needle is often a good pick because they’re longer and have a larger eye, making it easier to thread thicker twine or yarn. Some needles even have a special side-opening eye, which is super handy.
- Spacing: Think about how you want your items spaced. Do you want them close together for a full look, or spread out with gaps of string showing? Measure and mark your string if needed.
- Securing: Make sure to tie a good knot at the end of your string before you start threading, so nothing slides off. You might also want to tie a knot or add a dab of glue after the last item to keep it in place.
Hot Gluing Components Together
Hot glue is a crafter’s best friend for a reason. It’s fast and strong, perfect for attaching things that can’t easily be threaded or for adding extra security.
- Surface Prep: Make sure the surfaces you’re gluing are clean and dry. Dust or oils can prevent a good bond.
- Application: Apply a small amount of glue to one surface, then press the pieces together quickly. Hold them for a few seconds until the glue sets.
- Caution: Be careful with hot glue guns; they can cause burns. It’s also a good idea to test the glue on a scrap piece of your material first to make sure it doesn’t melt or discolor it.
Sewing Fabric Garland Pieces
If you’re working with fabric, like felt leaves or fabric scraps, sewing can give your garland a really professional and durable finish. This is great for projects where you want a bit more structure.
- Machine vs. Hand: You can sew fabric pieces together using a sewing machine for speed, or by hand for a more rustic, visible stitch. Both have their charm.
- Joining: When sewing two pieces together, like two felt leaves, you can often sew around the edges, leaving a small opening to turn them right-side out, or simply sew them flat onto a backing fabric or directly onto your string.
Knotting Techniques for Securing
Knotting is key for making sure your garland stays together, whether you’re threading beads or attaching fabric elements.
- Simple Overhand Knot: Good for stopping beads from sliding off the end.
- Lark’s Head Knot: Useful for attaching fabric loops or tassels to your main garland string.
- Barrel Knot: Can be used to create a secure loop at the end of your garland for hanging.
The right technique depends on your materials and the look you’re going for. Sometimes a simple knot is all you need, while other times you might want a more decorative knot to be part of the design itself. Don’t be afraid to experiment a little to see what works best for your project.
Using Upholstery Needles
As mentioned before, upholstery needles are fantastic for garland making. Their length and large eye make them ideal for working with thicker cords, twine, or yarn, which are common in fall crafting. They can easily push through felt, fabric, and even some softer natural materials. If you’re planning on making several garlands, investing in a pack of these is a good idea.
Wiring Garland Elements
For more complex or structured garlands, especially those with heavier elements or where you need to shape the garland precisely, wiring is a great technique. You can wire individual components like faux flowers or leaves, or even wire a base structure onto which you attach other items.
- Floral Wire: Use craft or floral wire in a gauge appropriate for your materials. Green wire often blends in well with natural or faux foliage.
- Attachment: You can wrap wire around the base of an item and then twist the ends together, leaving a length of wire to thread through your main garland string or to attach to another part of the garland structure. This method gives you a lot of control over the final shape and placement of each element. For example, you could wire individual book page leaves to a base string for a unique look.
Seasonal Versatility of Garlands
Garlands aren’t just for one season, you know. They’re surprisingly adaptable, which is great because who wants to take down all those decorations and then put up new ones just a few weeks later? With a little thought, you can make a garland that works for a good chunk of the year, or at least transitions smoothly from one holiday to the next.
Transitioning Garlands from Fall to Winter
Think about a garland made with natural elements like pinecones, dried orange slices, and maybe some faux berries. This kind of thing looks super autumnal, right? But honestly, it works just as well when winter rolls around. You can easily swap out a few pieces or add some sparkly elements to make it feel more festive for the holidays. For instance, adding some glittery pinecones or a few small silver ornaments can give it a wintery feel without completely changing the base. It’s a simple way to keep your seasonal mantel decor looking fresh.
Adapting Garlands for Halloween
Halloween is a big one for garlands. You can start with a basic fall garland and then add some spooky touches. Think about adding some googly eyes to felt pumpkins, or maybe stringing some black and orange felt balls. Even a simple string of paper bats can transform a neutral garland into something perfectly spooky. It’s all about those small additions that really make a difference.
Creating Thanksgiving-Themed Garlands
Thanksgiving is all about gratitude and harvest. Garlands can really play into that theme. Consider using colors like deep reds, oranges, and browns. You could incorporate elements like faux mini pumpkins, acorns, or even little cornucopia shapes. A garland made from burlap and twine, perhaps with some dried wheat stalks, really captures that rustic, harvest feel. It’s a lovely way to add to your Thanksgiving table setting.
Garlands That Last All Season
Some garlands are just naturally versatile. Garlands made with neutral colors and simple shapes, like wooden beads or plain felt balls in earthy tones, can stay up for months. You can add seasonal elements to them as holidays approach. For example, a simple string of wooden beads can be adorned with small felt leaves in the fall, then with tiny jingle bells or red berries in the winter. It’s like having a base decoration that you can easily update.
Incorporating Holiday Elements
When you’re making a garland, think about how you might add specific holiday items later. If you’re making a leaf garland, maybe leave some space between the leaves to add small ornaments or candy canes for Christmas. Or, if you’re making a felt garland, create extra loops so you can easily tie on ribbons or small themed charms for different holidays. It’s about building in that flexibility from the start.
Year-Round Garland Adaptations
It might sound like a lot of work, but you can actually adapt some garland ideas for year-round use. A simple string of pom-poms, for instance, can be made in various colors. You could have a fall set, a Christmas set, and even a spring set. Or, consider a garland with interchangeable charms. You make the basic string, and then you have a collection of different themed charms – hearts for Valentine’s Day, shamrocks for St. Patrick’s Day, flowers for spring – that you can swap out. It’s a really economical way to decorate throughout the year.
Garland Display and Styling Tips
Once you’ve put in the work to create your beautiful fall garlands, you’ll want to show them off! How you hang and arrange them can really make a difference in how they look in your home. It’s not just about sticking them up anywhere; a little thought goes a long way.
Using Command Hooks for Hanging
Command hooks are seriously a lifesaver for decorating, especially if you rent or just don’t want to put holes in your walls. They come in all sorts of sizes, so you can find ones that are pretty much invisible once the garland is up. For a mantelpiece, you can place a couple of hooks on the underside or sides to drape the garland over. If you’re hanging one on a wall or framing a doorway, just make sure you use enough hooks to support the weight and keep it looking neat. It’s way easier than wrestling with nails and spackle later.
Achieving a Natural Drape
Nobody wants a garland that looks stiff and unnatural. To get that lovely, flowing look, try not to pull the garland too taut. Let it sag a little in between your hanging points. Think about how real vines or branches hang – they have curves and dips. You can use your hands to gently shape the garland, encouraging it to fall in a pleasing way. Sometimes, just adjusting the placement of a few leaves or ornaments can make a big difference.
Balancing Garland Size and Space
It’s easy to get carried away and make a super long, chunky garland, but you need to consider where it’s going. A massive garland might overwhelm a small entryway, while a tiny one could get lost on a large fireplace. Measure the space first! For a mantel, a garland that’s about two-thirds the length of the mantel often looks just right. For a doorway, you might want something that goes all the way around or just drapes across the top. It’s all about proportion.
Layering Garlands for Depth
Want to add even more visual interest? Try layering! You can hang a longer, more substantial garland first, and then add a second, perhaps thinner or differently textured garland over the top. For example, a rustic grapevine garland could have a delicate bead garland or a string of fairy lights woven through it. This creates a really rich, full look that’s super inviting.
Styling Garlands with Other Decor
Your garland shouldn’t be the only star of the show. Think about how it complements your other fall decorations. If you have pumpkins on your mantel, make sure the garland’s colors and textures work with them. You can tuck in extra faux leaves, pinecones, or even small decorative gourds around the garland. For a cozy vibe, add some candles or battery-operated fairy lights to the mix. It all ties together to create a cohesive look.
Creating a Focal Point with Garlands
Garlands are fantastic for drawing the eye. Use them to highlight a specific area. Draping a garland over your fireplace mantel instantly makes it the room’s centerpiece. Framing a doorway with a garland welcomes guests and sets a festive tone before they even step inside. Even a simple garland hung on a wall can add a pop of seasonal color and texture, turning a plain space into something special. The goal is to use the garland to guide the eye and add a touch of seasonal charm where it’s most appreciated.
Here’s a quick look at common garland placement ideas:
| Location | Styling Tip |
|---|---|
| Mantelpiece | Drape loosely, tuck in small accents. |
| Doorway | Frame the opening, ensure it doesn’t block entry. |
| Table Runner | Lay flat or gently curve down the center. |
| Wall Hanging | Use hooks for a clean, supported look. |
| Window | Hang with clear string for a floating effect. |
| Porch Railing | Secure well against weather, add lights. |
Kid-Friendly Fall Garland Projects
Getting the kids involved in decorating for fall is a fantastic idea. It’s a great way to spend time together and create some really cute decorations. These easy craft projects for fall are perfect for little hands and can be adapted for various ages. You don’t need a lot of fancy supplies either; often, things you already have around the house will work just fine.
Simple Paper Cut-Out Garlands
This is probably the most straightforward project. You can grab construction paper in fall colors – reds, oranges, yellows, browns, and even some deep purples. Let the kids draw simple shapes like leaves, pumpkins, or even apples. Then, help them cut them out. You can make holes at the top of each shape with a hole punch and thread them onto some twine or yarn. It’s a classic for a reason!
Bead Stringing for Little Hands
Wooden beads are wonderful for this. They come in various sizes, and the larger ones are easy for younger children to grasp and thread onto pipe cleaners or thicker yarn. You can even get them in fall colors or paint them yourself beforehand. Just make sure to supervise closely, especially with younger kids, to avoid any choking hazards. A simple string of colorful beads can look surprisingly festive.
Felt Shape Garlands
Felt is a forgiving material for crafting. You can buy pre-cut felt shapes, or you can cut out your own. Think acorns, leaves, or little ghost shapes for a Halloween touch. You can either glue these onto a string or, for a slightly more involved project, sew them onto a ribbon or twine. This is a great way to introduce basic sewing concepts if you want.
Pom Pom Making for Garlands
Making pom poms can be a fun activity in itself. Kids can wrap yarn around their fingers or use cardboard cutouts. Once you have a collection of fluffy pom poms in fall colors, you can easily string them together. They add a lovely, soft texture to any garland.
Painting and Stamping Garlands
Grab some plain cardstock or even brown paper bags. Let the kids paint them or use them as stamps. You can cut apples in half and use them as stamps with fall-colored paints, or let them go wild with brushes. Once the paint is dry, cut the paper into shapes or strips and string them up. It’s a good way to get a bit messy, which kids usually love.
Family Crafting Garland Sessions
These projects are perfect for a family afternoon. Set up a crafting station with all the supplies. Put on some fall-themed music, maybe bake some cookies, and just enjoy the process together. It’s not just about the finished product; it’s about the memories you make. You can even use some of these ideas to create decorations for local fall festivals.
Remember, the goal is to have fun and create something cheerful. Don’t worry too much about perfection; the handmade charm is what makes these garlands special. Keep the steps simple and the materials accessible, and you’ll have a wonderful time crafting with your little ones.
Garland Inspiration from Nature
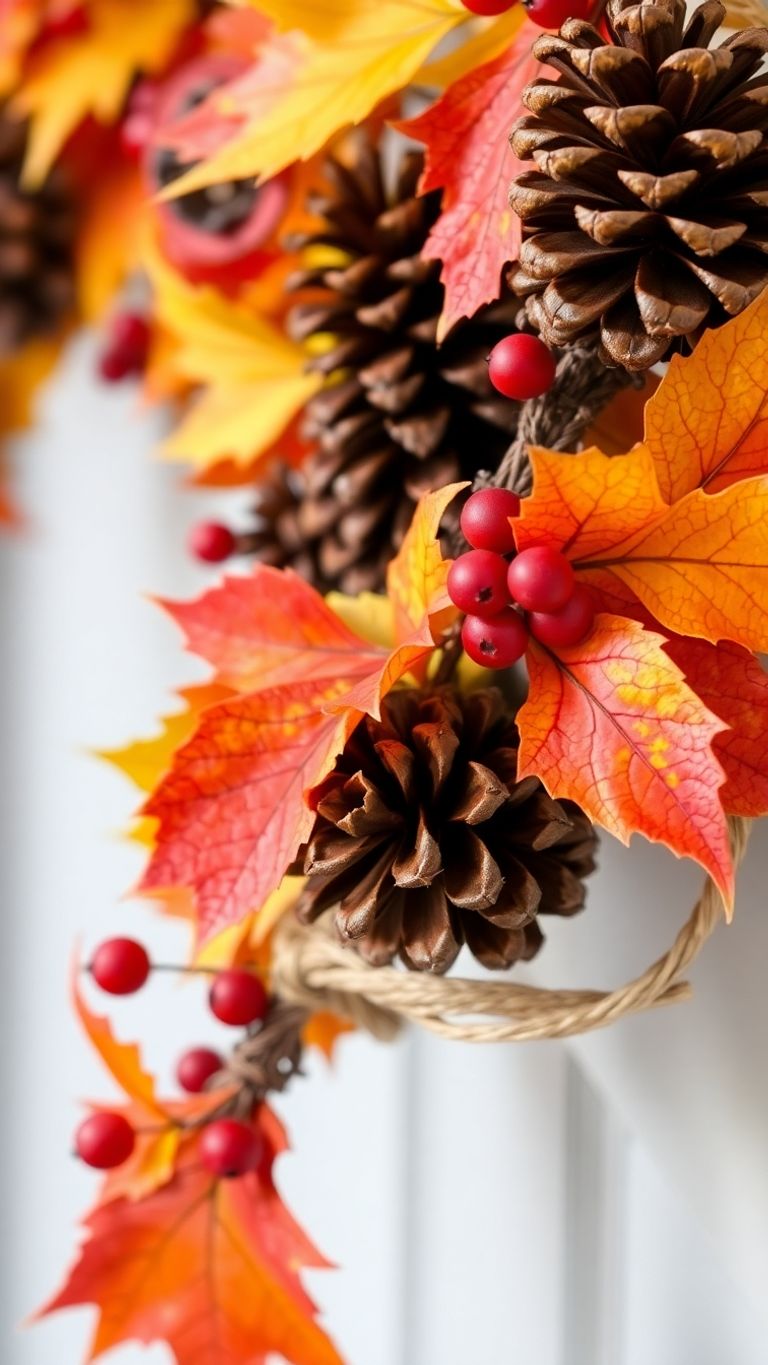
Nature really does offer up some amazing inspiration for fall decorating, and garlands are no exception. You can really capture that feeling of the season by using elements straight from the outdoors, or by mimicking what you see. Think about the colors, the textures, and even the shapes you find on a walk through the woods or a park in autumn.
Mimicking Autumn Foliage
Getting that look of fall leaves without using actual leaves is totally doable. You can cut leaf shapes out of paper or cardstock in all those classic fall colors – reds, oranges, yellows, and browns. Or, try using felt! Felt is great because it’s a bit thicker and holds its shape well. You can layer different shades of felt for a more realistic look, or even add a little stitching for detail. Some people even use fabric scraps, cutting them into leaf shapes and fraying the edges a bit to give them a natural, worn look. It’s all about getting those warm, earthy tones that just scream autumn.
Capturing the Essence of Harvest
Harvest time brings its own set of beautiful symbols. Think about things like pumpkins, gourds, apples, and corn. You can find small wooden pumpkins or gourds at craft stores, or even carve your own tiny ones from craft foam. For apples, you could use wooden apple shapes or even paint small craft apples. Even something as simple as dried corn kernels strung together can make a really unique garland. It’s a way to bring that feeling of abundance and the bounty of the season right into your home.
Using Seed Pods and Dried Flowers
Don’t overlook the smaller details in nature! Seed pods, like those from maple trees (the little helicopters!) or sycamore trees, can be really interesting when strung together. Dried flowers, like statice, baby’s breath, or even dried hydrangeas, add a delicate touch. You can often find these at craft stores, or if you’re feeling ambitious, you can dry your own flowers from your garden. Just be sure they are completely dry before you use them, otherwise, they might get moldy. A little bit of twine and a needle is usually all you need to string these natural bits and pieces into a charming garland.
Recreating Forest Floor Textures
Think about what you see on the ground in a forest during fall: fallen leaves, twigs, maybe some moss. You can replicate this by using different textures in your garland. Burlap or jute twine gives a rustic, earthy feel. You can add small twigs, maybe even some pinecones if you can find small ones. For a mossy look, you could use green felt cut into irregular shapes or even some fuzzy yarn. It’s about layering different textures to create a garland that feels grounded and natural, like a piece of the forest itself.
Inspired by Woodland Creatures
Fall is also a time when you might see more wildlife around. You can incorporate cute woodland creatures into your garlands. Think felt owls, little fabric foxes, or even wooden acorns and mushrooms. These add a playful and whimsical touch. You can find pre-made wooden or felt animal shapes, or you can cut your own out of felt or craft wood. Painting small details on them, like eyes or little stripes, can really bring them to life. It’s a fun way to add a bit of story to your decorations.
Seasonal Botanical Garland Ideas
Beyond just leaves, there are so many other botanical elements you can use. Consider dried grasses, wheat stalks, or even small branches with berries. These add a different kind of texture and color. You can find dried wheat bundles at craft stores, and they look lovely mixed with other natural elements. Small, dried berry sprigs can add a pop of color, but make sure they are truly dry and secure. Combining different botanical elements can create a really rich and layered look that feels authentically autumnal.
Garland Projects with a Rustic Feel
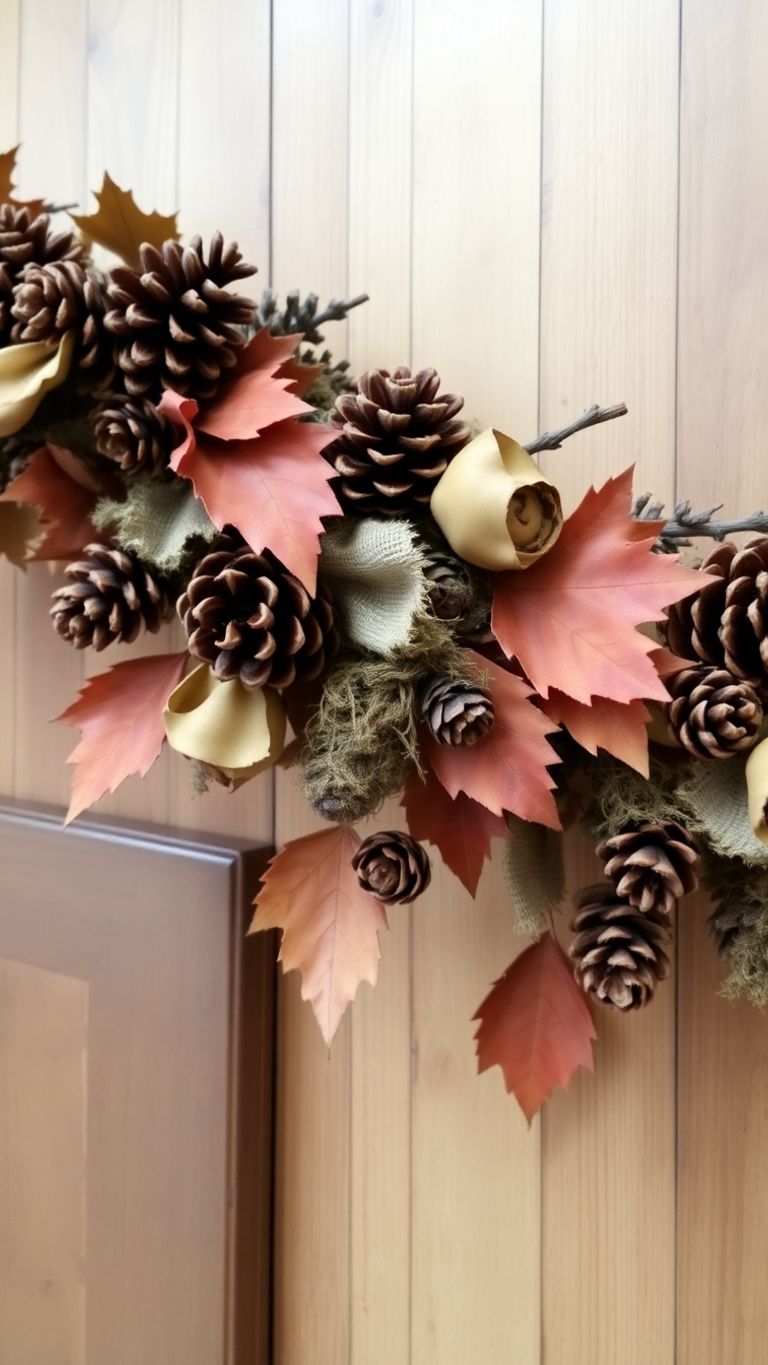
When you think of fall, what comes to mind? Probably lots of warm colors, natural textures, and that cozy feeling. Rustic fall garlands really capture that vibe. They’re all about using materials that feel a bit wild and untouched, like wood, twine, and dried bits. It’s like bringing a little piece of the autumn woods right into your home.
Grapevine Base Garlands
Starting with a grapevine wreath or a pre-made grapevine garland base is a fantastic way to get that natural, tangled look. You can then weave in other elements like faux leaves, small pinecones, or even dried flowers. It’s pretty forgiving, so don’t worry about making it perfect. Just tuck things in where they look good. You can secure them with a bit of hot glue if they feel loose.
Burlap and Twine Garlands
These are super simple and always look good. You can cut strips of burlap and tie them onto a length of twine, or make little bows. Another idea is to cut circles or leaf shapes from burlap and string them together. Twine itself can also be used as a garland, maybe braided or just hung as is for a very minimalist, rustic feel. It’s all about that natural fiber look.
Dried Grass and Flower Garlands
If you have access to dried grasses, wheat stalks, or even dried flowers like hydrangeas or statice, these make beautiful, delicate garlands. You’ll want to be gentle with them. Threading them with a large needle and sturdy twine works well. Sometimes, just tying small bundles together with twine is enough. They have a lovely, airy quality that’s really special.
Incorporating Jute and Natural Fibers
Beyond burlap and twine, think about other natural fibers. Jute webbing, raffia, or even strips of unbleached cotton can be incorporated. You can braid them, knot them, or simply tie them onto a base string. Mixing different textures of these natural materials can add a lot of visual interest without being too busy.
Weathered Wood Accent Garlands
Small wooden beads, unfinished wooden shapes (like acorns or leaves), or even small pieces of driftwood can add a nice touch. You can paint them with muted, earthy tones or leave them natural. Drilling small holes to thread them onto twine or wire is usually the way to go. It gives a very grounded, earthy feel to your decor.
Achieving a Farmhouse Fall Look
To really nail that farmhouse fall aesthetic with your garlands, focus on a limited color palette – think creams, browns, muted greens, and maybe a touch of rusty orange. Combine different natural textures: maybe some burlap, some dried wheat, and a few wooden beads. Keep the designs relatively simple and unfussy. The goal is a look that feels collected and comfortable, not overly decorated. It’s about creating a warm, inviting atmosphere that feels lived-in and authentic.
Garland Ideas for a Cozy Ambiance
When the air gets crisp and the leaves start to turn, there’s just something about wanting your home to feel extra snug and inviting. Garlands are a fantastic way to bring that cozy autumn feeling indoors. They’re not just for mantels, either; you can drape them over doorways, along shelves, or even across a dining table. Making your own means you can really get the look and feel just right for your space.
Soft Yarn and Pom Pom Garlands
For a truly soft and touchable garland, think about using yarn. You can make simple pom poms by wrapping yarn around your fingers or a piece of cardboard, then tying them off and trimming them into fluffy balls. These can be strung together with a large needle and sturdy yarn or twine. Another idea is to create simple yarn tassels, which add a bit of swing and texture.
- Pom Pom Creation: Wrap yarn around two fingers about 50-75 times. Slide the yarn off your fingers, keeping the loop intact. Tie another piece of yarn tightly around the middle of the loop. Trim the ends to create a fluffy pom pom.
- Tassel Making: Cut several strands of yarn to your desired length. Fold them in half and tie a knot near the fold. Wrap another piece of yarn around the top to secure the tassel.
- Assembly: Use a long upholstery needle to thread your pom poms or tassels onto a strong piece of twine or yarn, spacing them as you like. Tie a knot on each side of the pom pom or tassel to keep it in place.
Felted Wool Garland Designs
Felted wool balls offer a lovely, organic texture that’s perfect for fall. You can buy pre-made felt balls in a variety of autumn colors, or if you’re feeling ambitious, you can even make your own by wet-felting wool roving. These little balls look great strung together, perhaps with some wooden beads interspersed for added interest.
Felted wool garlands have a natural, handmade charm that really speaks to the season. They feel substantial without being heavy, and the muted colors often found in felted wool are just perfect for creating a warm atmosphere.
Garlands with Warm Lighting Elements
What’s cozier than a garland that also provides a soft glow? Battery-operated fairy lights are your best friend here. You can weave them through almost any type of garland – whether it’s made of leaves, felt shapes, or even dried natural elements.
- Light Integration: Gently weave the string of lights through your existing garland structure.
- Battery Pack Placement: Tuck the battery pack discreetly behind the garland or secure it with a small piece of tape or a dab of hot glue.
- Placement Ideas: Hang these near a seating area or along a mantelpiece for a truly inviting ambiance.
Textured Fabric Garlands
Don’t underestimate the power of different fabric textures. Think about using scraps of flannel, burlap, or even velvet. You can cut these into leaf shapes, simple strips, or even small squares and then attach them to a string. Layering different textures can create a really rich and inviting look.
Creating a Hygge-Inspired Garland
Hygge, the Danish concept of coziness and contentment, can be easily translated into a garland. Focus on natural materials, soft textures, and a calming color palette. Think simple wooden beads, unbleached cotton twine, and perhaps some dried eucalyptus or simple felt shapes in muted tones. The goal is a garland that feels peaceful and inviting, like a warm hug.
Garland Projects with a Touch of Whimsy
Sometimes, fall decor needs a little playful twist, right? That’s where whimsical garlands come in. They’re not just about leaves and pumpkins; they’re about adding a bit of unexpected fun and personality to your space. Think bright colors, quirky shapes, and maybe even a few surprises mixed in. These aren’t your grandma’s traditional garlands, though they can certainly be inspired by classic fall elements.
Playful Felt Critter Garlands
Felt is such a forgiving material, perfect for creating little woodland creatures or friendly fall characters. Imagine a garland strung with tiny felt owls, mischievous squirrels, or even plump little hedgehogs. You can easily make these by cutting out simple shapes and stuffing them lightly, or by using pre-made felt balls and adding embroidered details. They add a soft, tactile element that kids especially love.
Gingham and Polka Dot Accents
Who says fall has to be all earth tones? Mixing in some cheerful gingham or classic polka dots can really liven things up. You could create a garland using fabric scraps in these patterns, cutting them into leaf shapes or simple banner flags. Pairing these with more traditional fall elements, like acorns or small pinecones, creates a really unique look that feels both festive and a little bit retro.
Garlands with Unexpected Colors
Don’t be afraid to step outside the usual fall color box. While oranges, reds, and browns are lovely, consider adding pops of teal, mustard yellow, or even a soft lavender. These colors can be incorporated through painted wooden beads, dyed felt, or even colorful paper shapes. A garland with a slightly unexpected color palette can really make your decor stand out.
Adding Small Toys or Charms
This is a fun one, especially if you have little ones. You can incorporate small, lightweight toys or charms into your garland. Think tiny plastic farm animals, miniature toy pumpkins, or even little metal charms shaped like stars or moons. Just make sure they’re securely attached and not too heavy for your string. It turns your garland into a bit of a treasure hunt!
Creating a Storytelling Garland
Why not make your garland tell a story? You could create a garland that depicts a little fall adventure. Maybe it starts with a scarecrow, moves through a field of pumpkins, and ends with a cozy little house. Each element can represent a part of the narrative. This approach adds a layer of engagement and imagination to your decorations.
Whimsical Pattern Mixing
This is where you can really let loose. Mix patterns like stripes, plaids, and florals with your fall shapes. For example, you could have a garland with plaid leaves, striped acorns, and floral pumpkins. The key is to keep the color palette somewhat cohesive so it doesn’t look too chaotic. It’s all about playful experimentation to create something truly unique and eye-catching.
Garland Ideas for a Modern Aesthetic
Looking to give your fall decor a fresh, uncluttered look? Modern aesthetics often favor clean lines and a more minimalist approach, even when it comes to seasonal decorations. Forget the overly fussy or the super traditional; we’re talking about garlands that feel current and stylish. Think geometric shapes, subtle textures, and a color palette that’s sophisticated rather than overtly festive. These ideas are perfect for those who appreciate a more refined, contemporary vibe in their home.
Geometric Shape Garlands
Geometric patterns are a hallmark of modern design, and they translate beautifully to garlands. Instead of traditional fall shapes, consider cutting out simple geometric forms like circles, triangles, or hexagons from cardstock or felt. You can create a monochromatic look with varying shades of a single color, or use a limited palette of autumnal hues like muted gold, deep rust, and charcoal gray. Stringing these shapes together with a fine metallic thread or a simple black cord keeps the look sharp and intentional.
Minimalist Leaf Garlands
Even with a modern twist, leaves are a classic fall motif. The key here is simplicity. Instead of a dense, overflowing garland, opt for a sparser design. You could cut out simple leaf shapes from plain cardstock in a single color, or use metallic paper for a subtle shimmer. Another approach is to use a few well-chosen faux leaves, perhaps in an unexpected color like a soft cream or a dusty rose, and space them out evenly on a thin wire or string. The goal is to evoke the feeling of fall without being too literal.
Monochromatic Color Schemes
Modern design often plays with color in subtle ways, and a monochromatic garland is a perfect example. Choose a single color – perhaps a deep forest green, a warm terracotta, or a soft beige – and create a garland using various textures and shades within that color family. This could involve felt balls, wooden beads, and cut-out shapes all in different tones of your chosen hue. The result is a cohesive and visually pleasing decoration that adds warmth without overwhelming the space.
Metallic Accents in Garlands
Adding a touch of metallic can instantly update a traditional fall garland. Think about incorporating elements like gold or copper painted wooden beads, metallic thread for stringing, or even small metallic charms. You could also cut out shapes from metallic cardstock or use metallic spray paint on natural elements like acorns or small pinecones. These subtle glints of metal catch the light and add a touch of understated glamour.
Clean Lines and Simple Designs
When aiming for a modern aesthetic, focus on the overall silhouette and structure of your garland. Avoid overly intricate details or busy patterns. Simple, clean lines are your friend. This might mean using a single type of material, like all felt balls or all paper shapes, and keeping the arrangement symmetrical and balanced. The beauty lies in the clarity and intentionality of the design.
Contemporary Material Combinations
Don’t be afraid to mix materials in unexpected ways. Consider combining natural elements like dried grasses or thin twigs with modern materials like acrylic shapes or even small LED fairy lights. A garland made from a mix of felt, wood, and a bit of metallic thread can create an interesting textural contrast that feels very contemporary. The trick is to keep the color palette controlled and the overall design uncluttered.
Frequently Asked Questions
Why should I make my own fall garlands instead of buying them?
Making your own fall garlands is a great way to save money on decorations. You can use materials you already have or find cheap supplies at craft stores. Plus, handmade items just feel more special!
How can I customize a DIY fall garland to match my style?
You can totally make them your own! Pick your favorite colors, materials like leaves, felt, or paper, and even add personal touches like photos. It’s all about making something that looks great in your home.
Where are the best places to hang a fall garland?
Garlands are super versatile! You can hang them over a fireplace mantel, around a doorway, across a shelf, or even down the middle of a table. They add a festive touch wherever you put them.
What kind of materials work best for fall garlands?
You can use real leaves, but they might dry out and get brittle. Faux leaves are a good choice if you want them to last longer. You can also use paper, felt, fabric scraps, or even things like dried apples and pinecones.
Are there any fall garland ideas that kids can help with?
Yes! Many fall garland projects are perfect for kids. Simple ones like paper chains, stringing beads, or making pom poms are fun activities for the whole family to do together.
What basic supplies do I need to make a fall garland?
You’ll likely need things like string or twine to connect the pieces, scissors for cutting, and a glue gun for sticking things together. Depending on your project, you might also need craft paper, felt, or faux leaves.
Can I make a garland that works for both Halloween and Thanksgiving?
You can definitely make garlands that fit different holidays. For Halloween, you could add spooky elements, and for Thanksgiving, focus on harvest themes. Some garlands can even be adjusted to last through both holidays!
How can I give my garland a rustic or natural look?
Absolutely! Using natural items like real or faux leaves, acorns, twigs, and dried grasses gives your garland a rustic, earthy feel that’s perfect for autumn.
What colors are best for a fall garland?
Think about warm colors like reds, oranges, yellows, and browns. You can also use muted tones like beige or cream for a more sophisticated look. Mixing different shades can create a beautiful autumn palette.
Can I find materials for fall garlands at the dollar store?
Yes, dollar stores are fantastic for garland supplies! You can often find wooden ornaments, small pumpkins, beads, or craft supplies that are perfect for turning into a cute fall garland on a budget.
What are some good tips for hanging and displaying my finished garland?
To make your garland look its best, try draping it naturally. Use small hooks or tape to secure it in place without pulling it too tight. Layering different garlands can also add a nice touch of depth.
What’s the main appeal of making DIY fall garlands?
Crafting garlands is a fun way to get into the fall spirit. It’s a relaxing activity that lets you be creative and make your home feel extra cozy for the season.


Some truly select posts on this website , saved to bookmarks.